Quick-start guide
What we are going to do
Let's enable HitL in a simple RWC Flow and see the user-agent-bot conversation live in the [HitL] Agent UI View.
Our expected result looks like this: a new RWC conversation appears in the Sessions list.
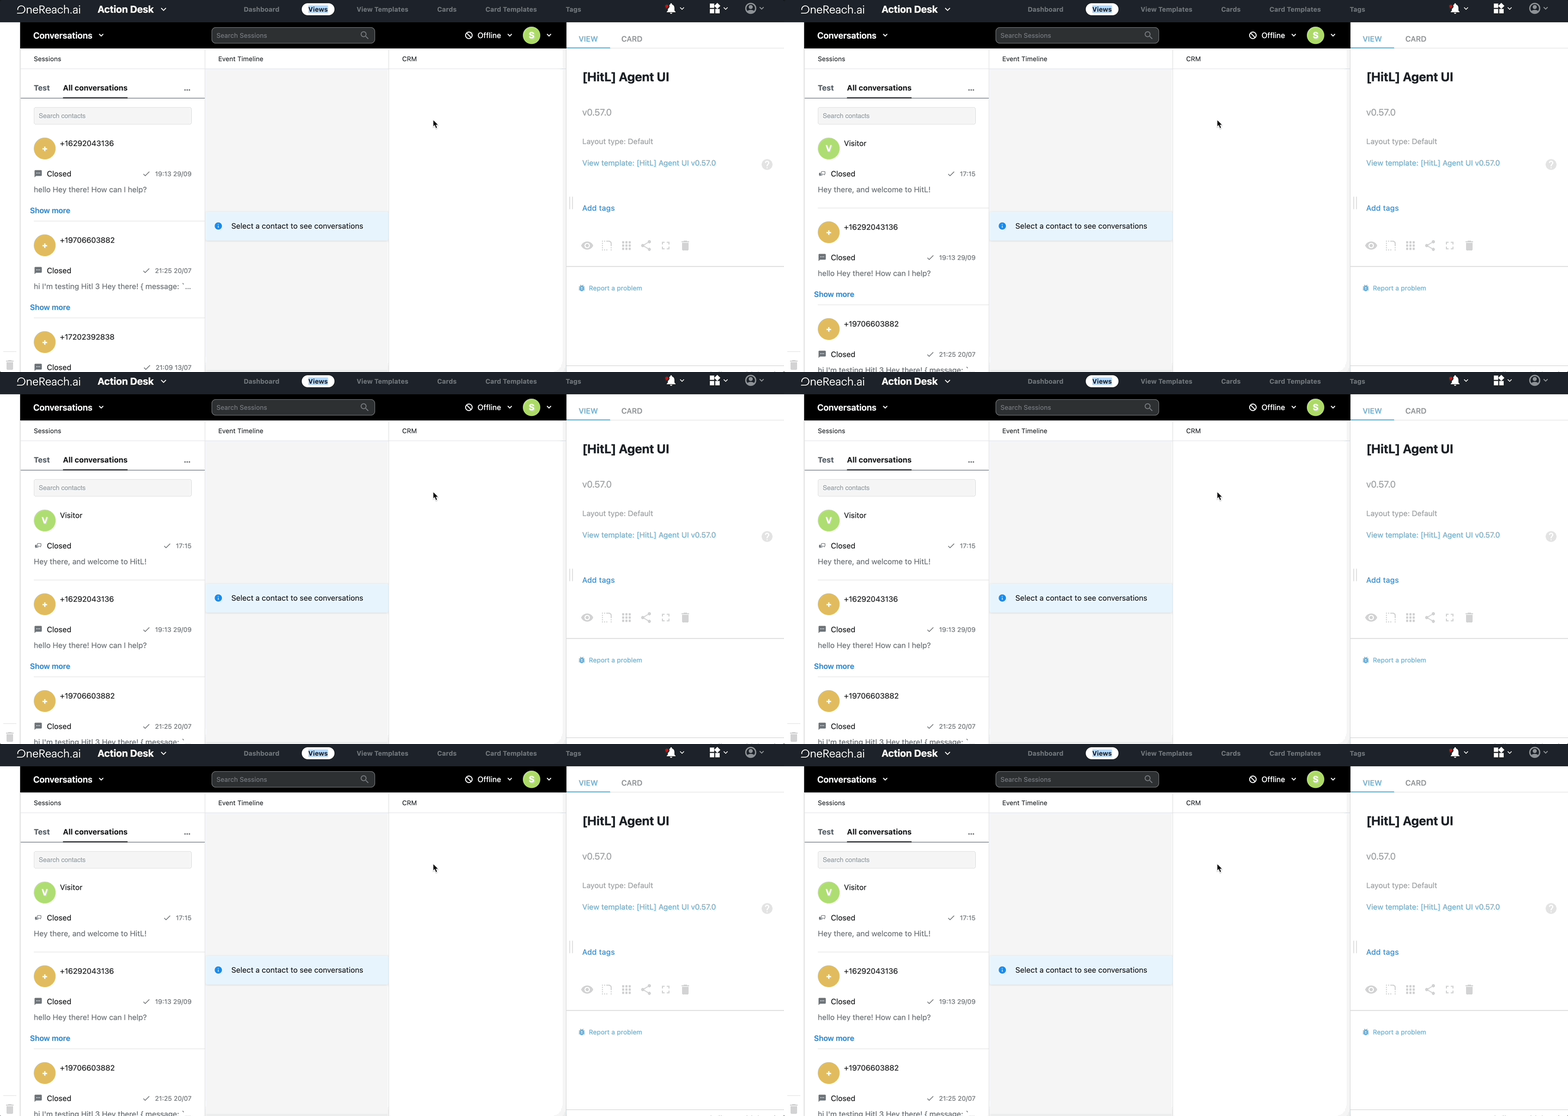
This guide gives step-by-step instructions for enabling HitL. We are going to:
- Set up the [HitL] Settings View
- Create a Bot in the Designer
- Create a Flow in this Bot
- Download HitL Step templates from the Library to this Flow
- Build a Flow tree with these Step templates
- Activate the Flow
- Open and use the [HitL] Agent UI View to see the result
Prerequisites
You need to have an account in OneReach.ai and an admin-level user access.
Log in.
Instruction
Set up the [HitL] Settings View
- Download the [HitL] Settings View from the Library.
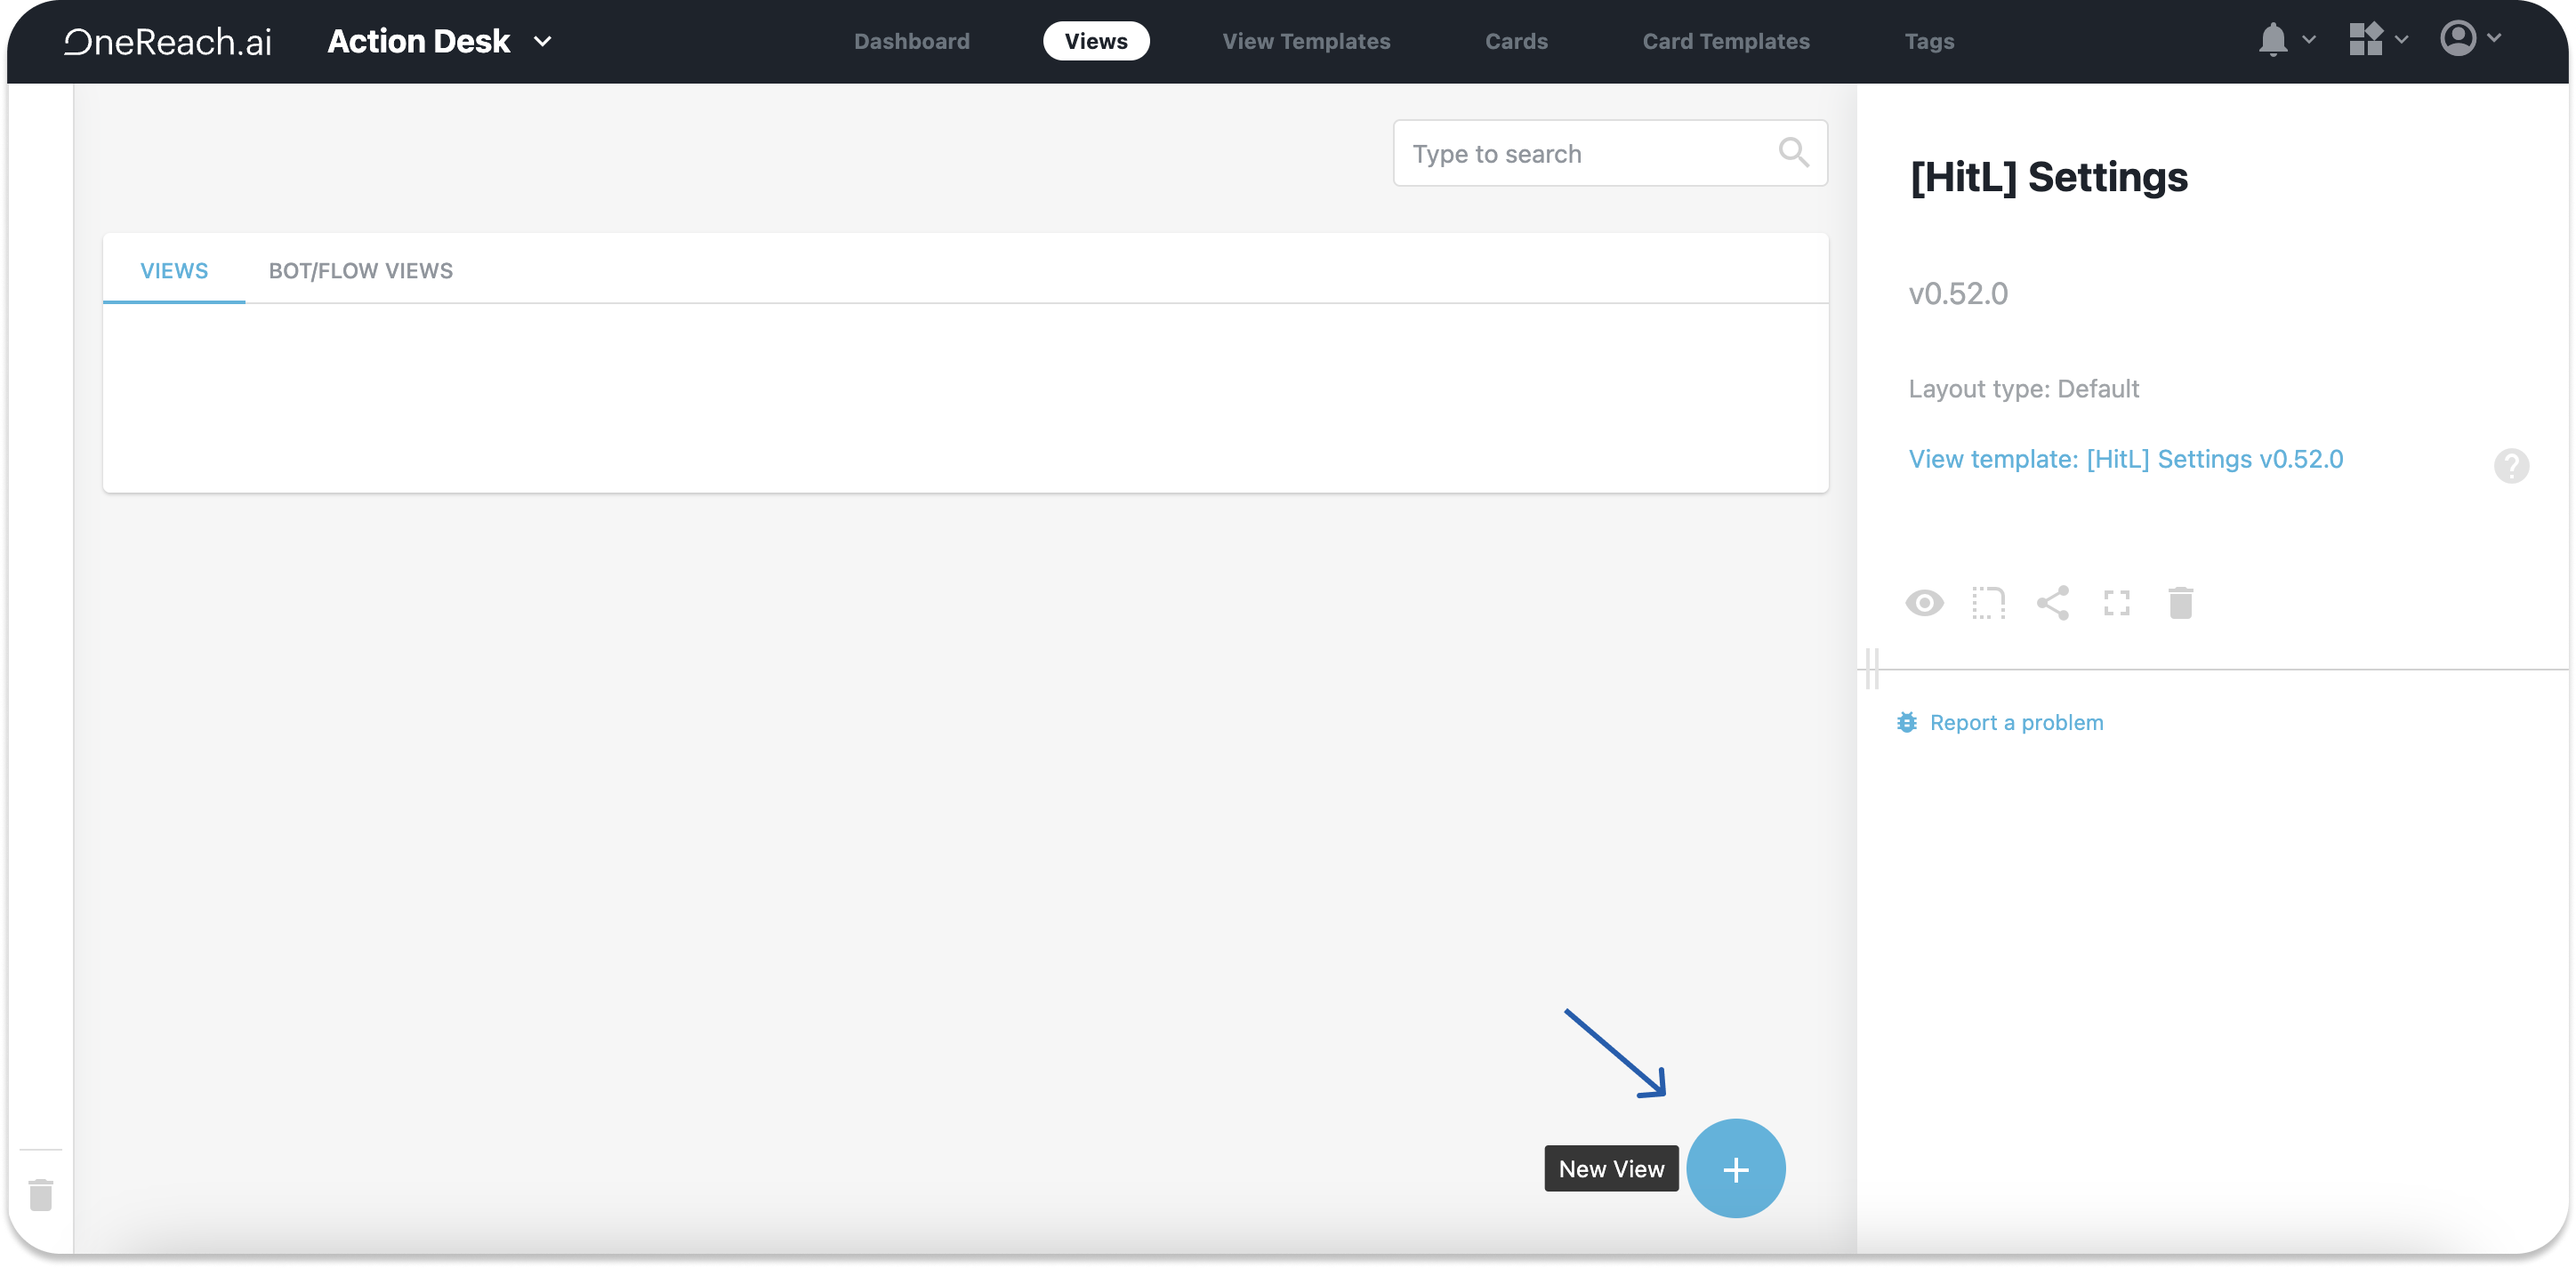
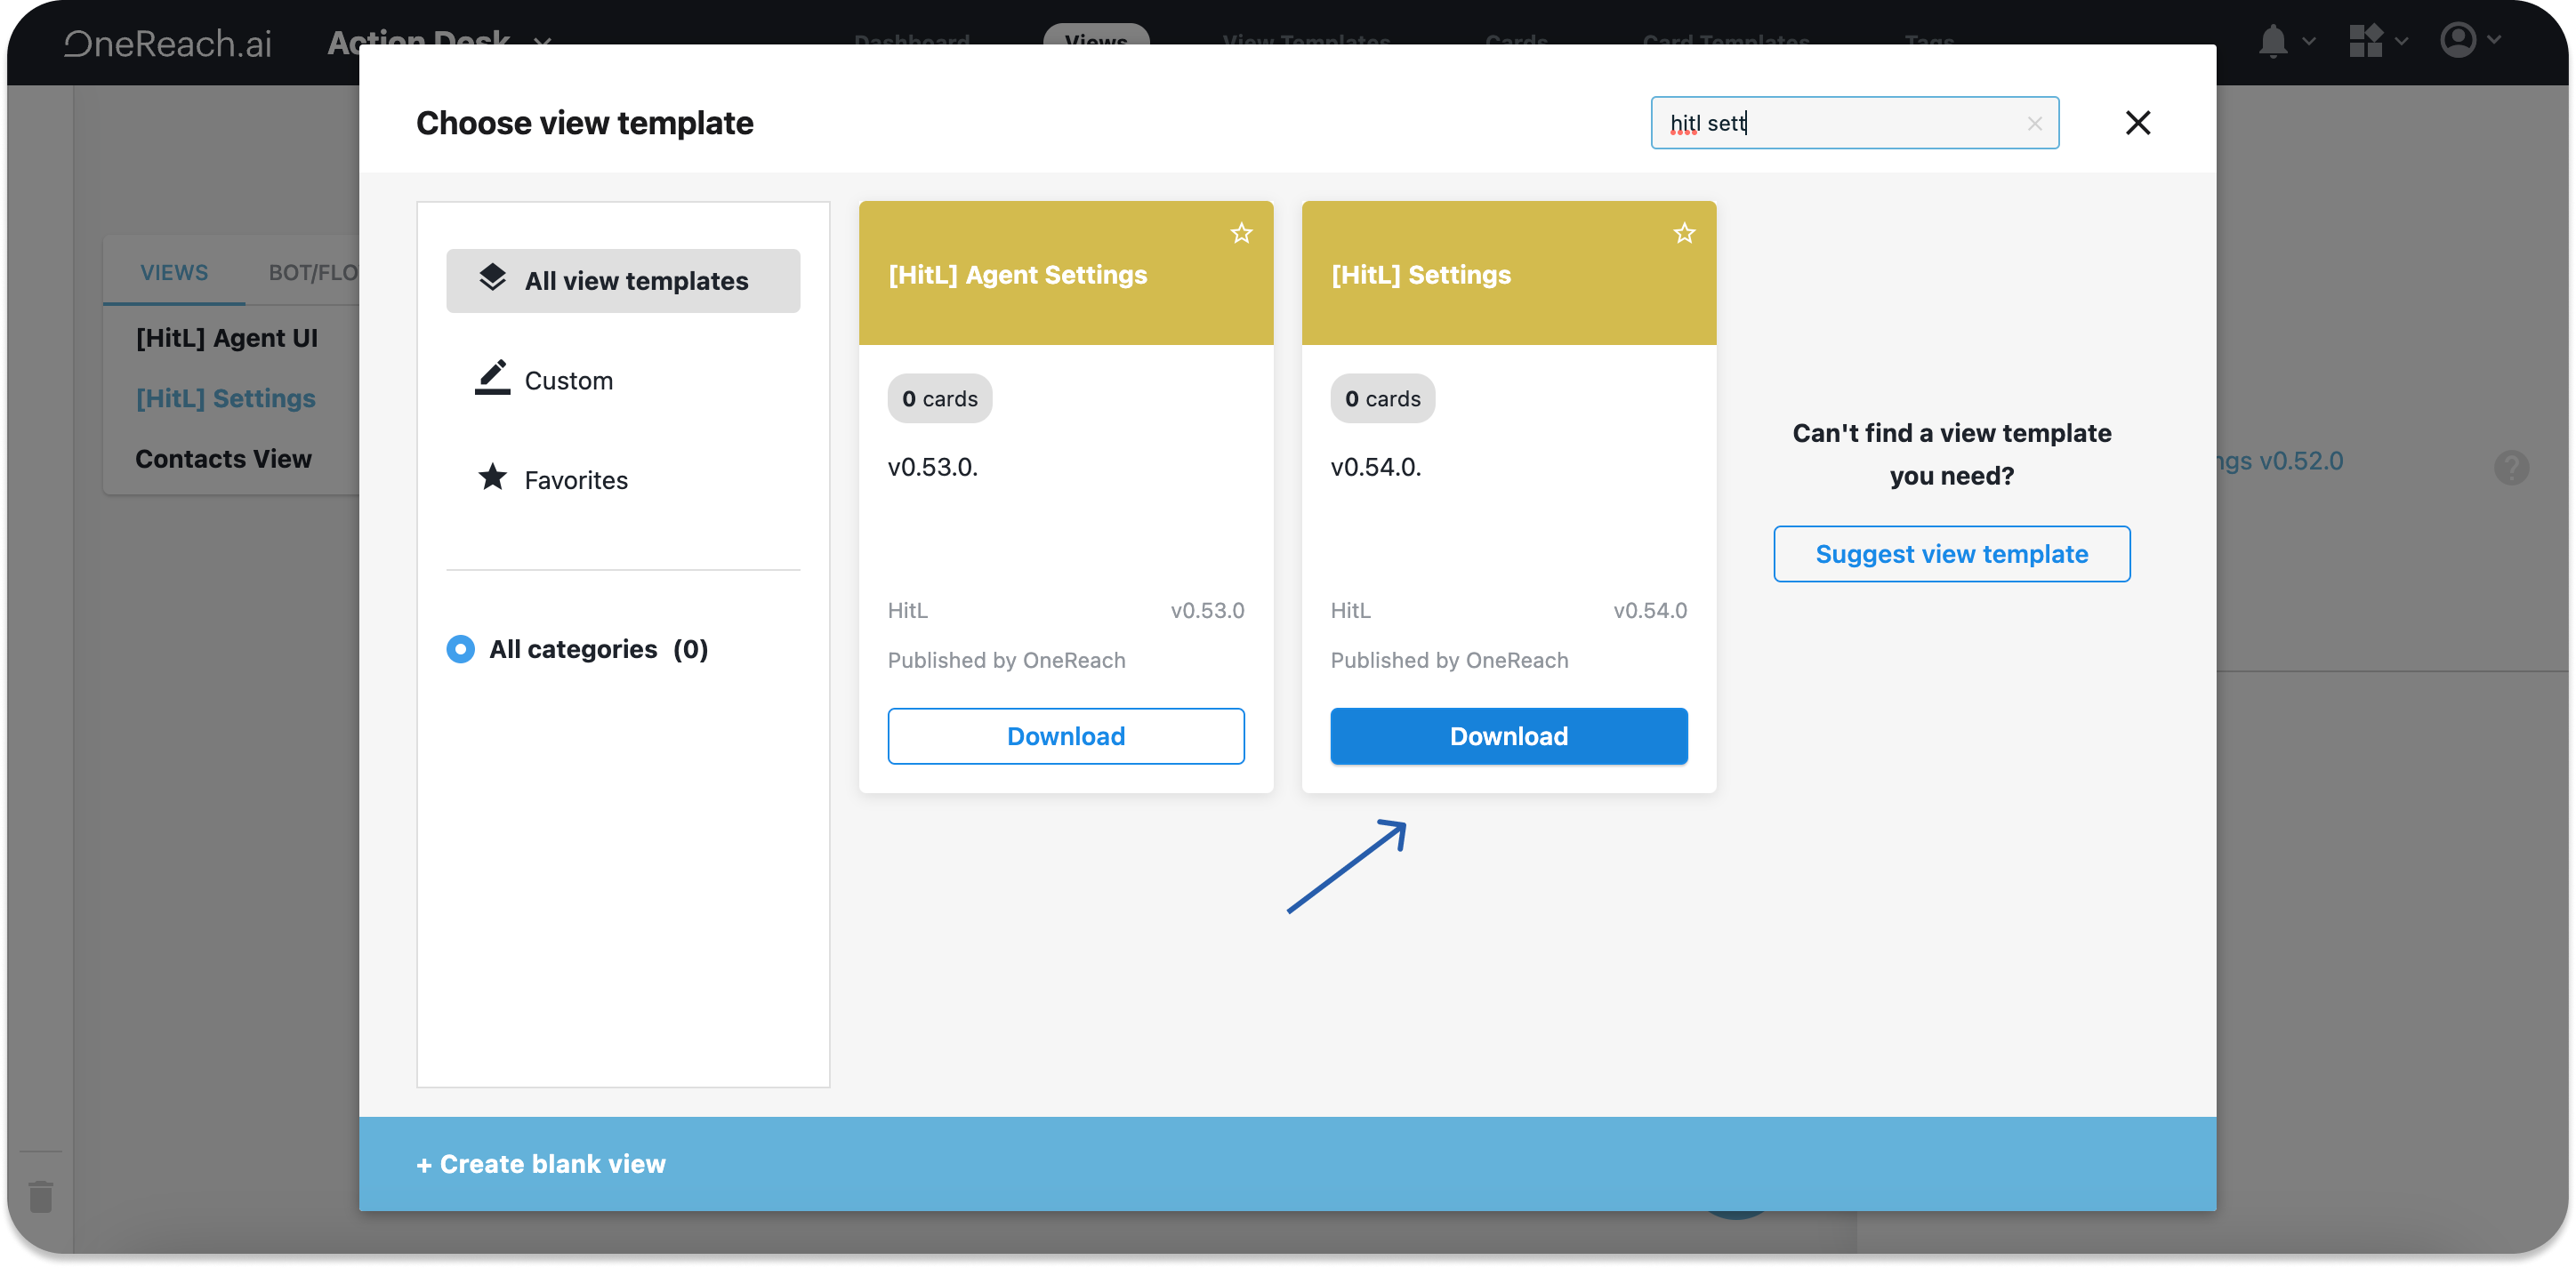
To do that, navigate to the Views tab in Action Desk and click + to add the View from the Library. In the Library iFrame, search for the needed View. Once found - click Download, and then Add view.
Open the [HitL] Settings View, wait for the View to check the HitL tables installation status, and click Install HitL tables.
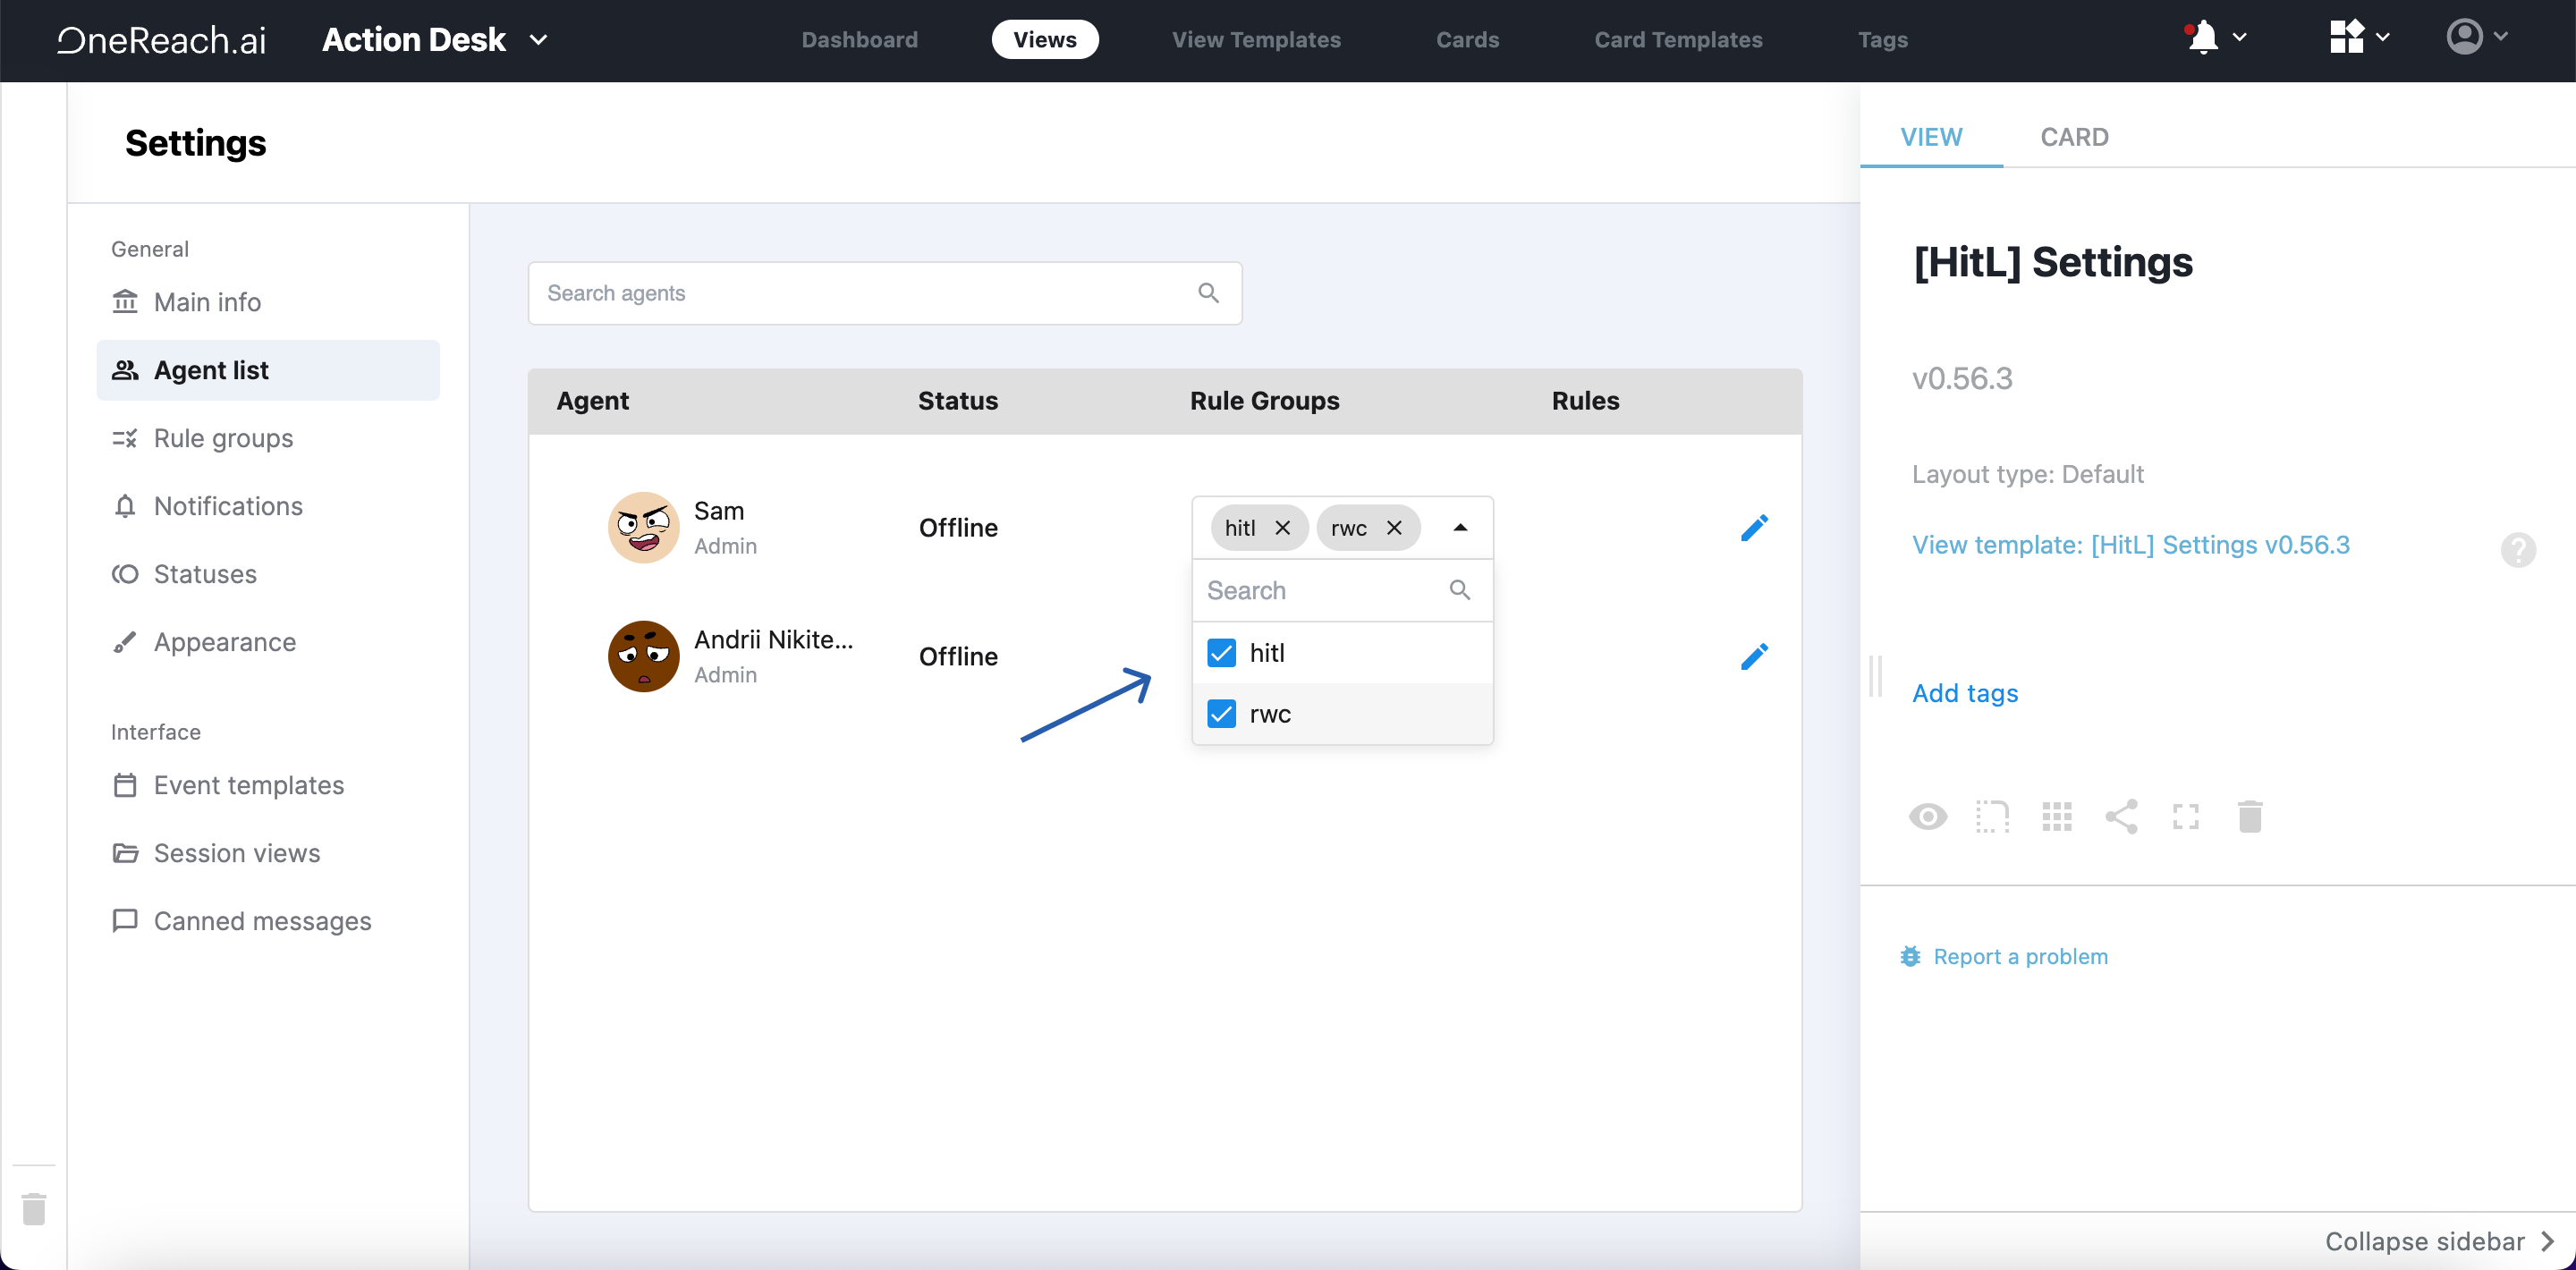
In the [HitL] Settings View, navigate to the Rule groups tab and create a group called rwc with a simple rule:
|rwc. The group hitl is created by default.
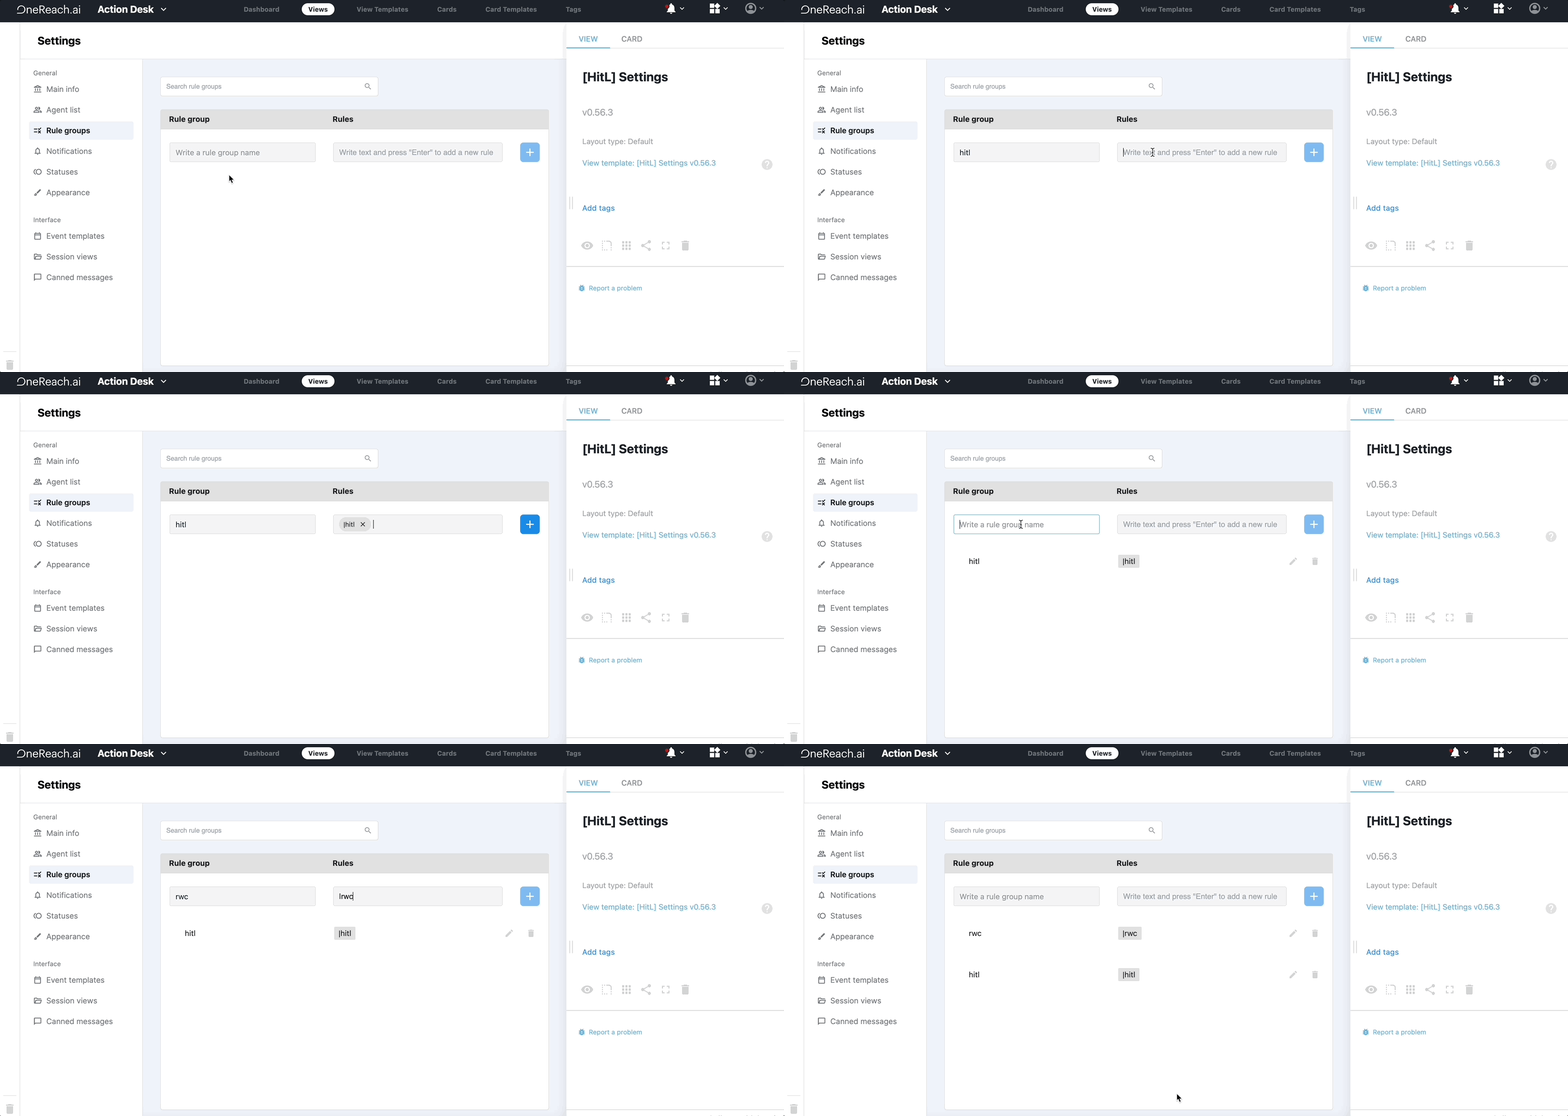
- Navigate to the Agents list and add your user (and any other members you wish to make an agent) to the newly created rwc and hitl groups.
Create a Bot in the Designer
First, add a blank Bot.
Create a Flow in the Bot
Next, add a blank Flow to this Bot.
Download HitL and RWC Step templates from the Library to this Flow
To build this chat, you need the following Step templates:
- Enable HitL
- Wait for Chat (RWC)
- Send Message (RWC)
To download them from the Library to your Flow:
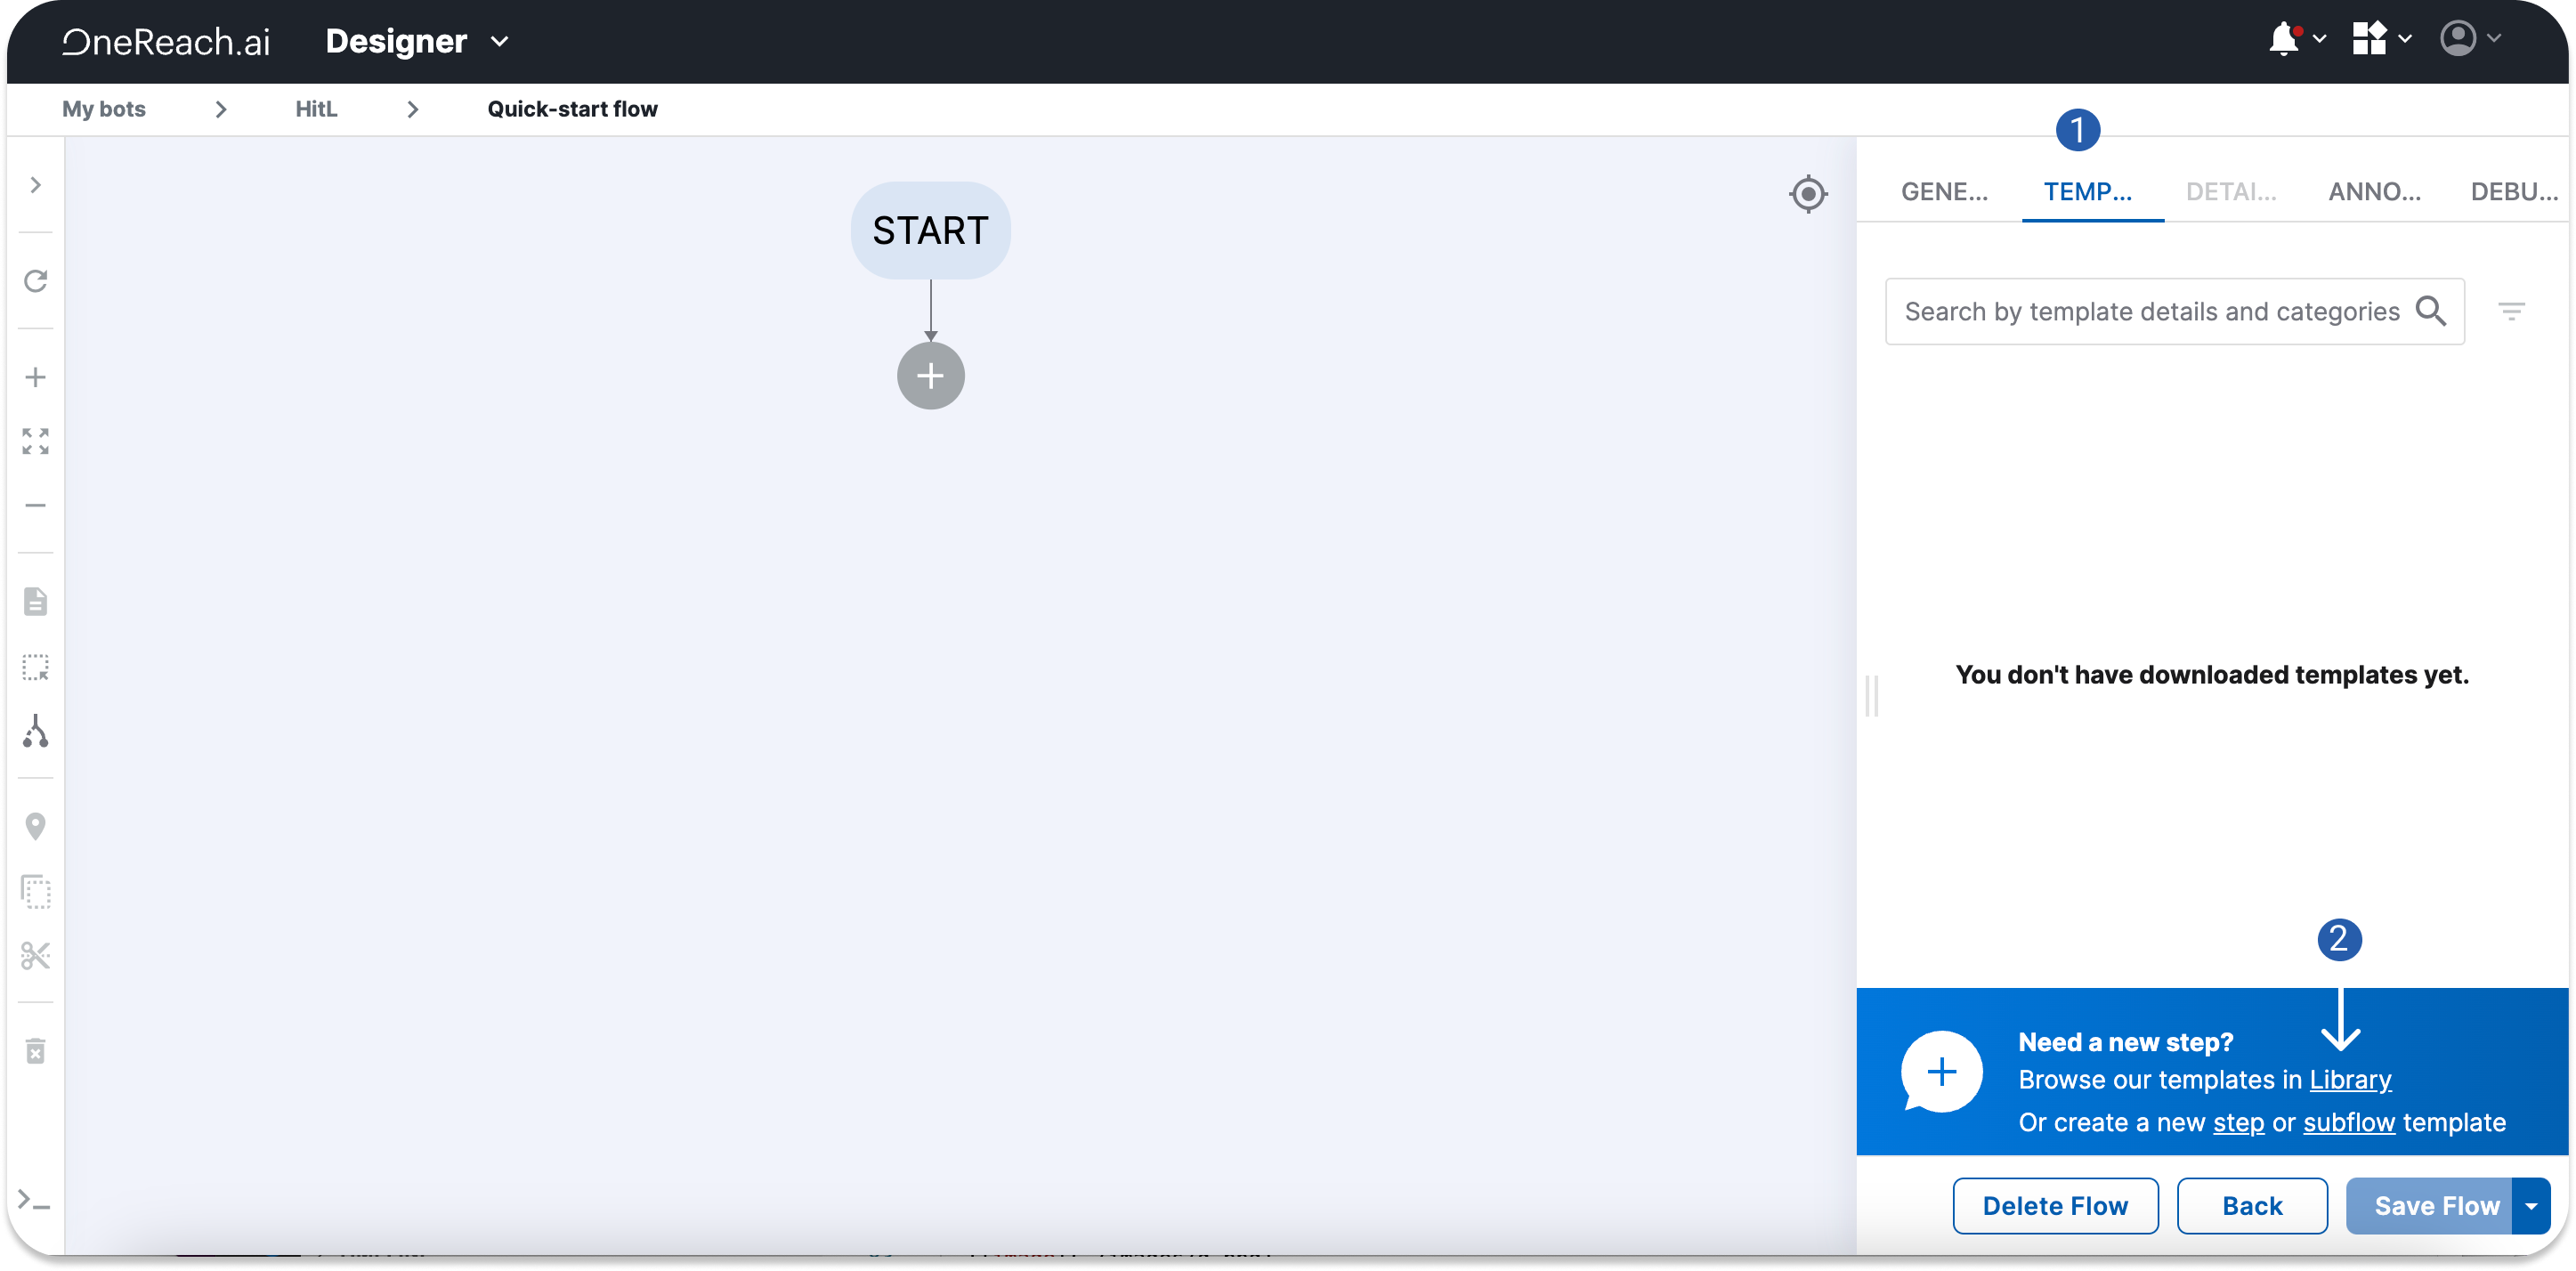
- Open the Templates tab.
- Click Library down the tab. The Library iFrame opens.
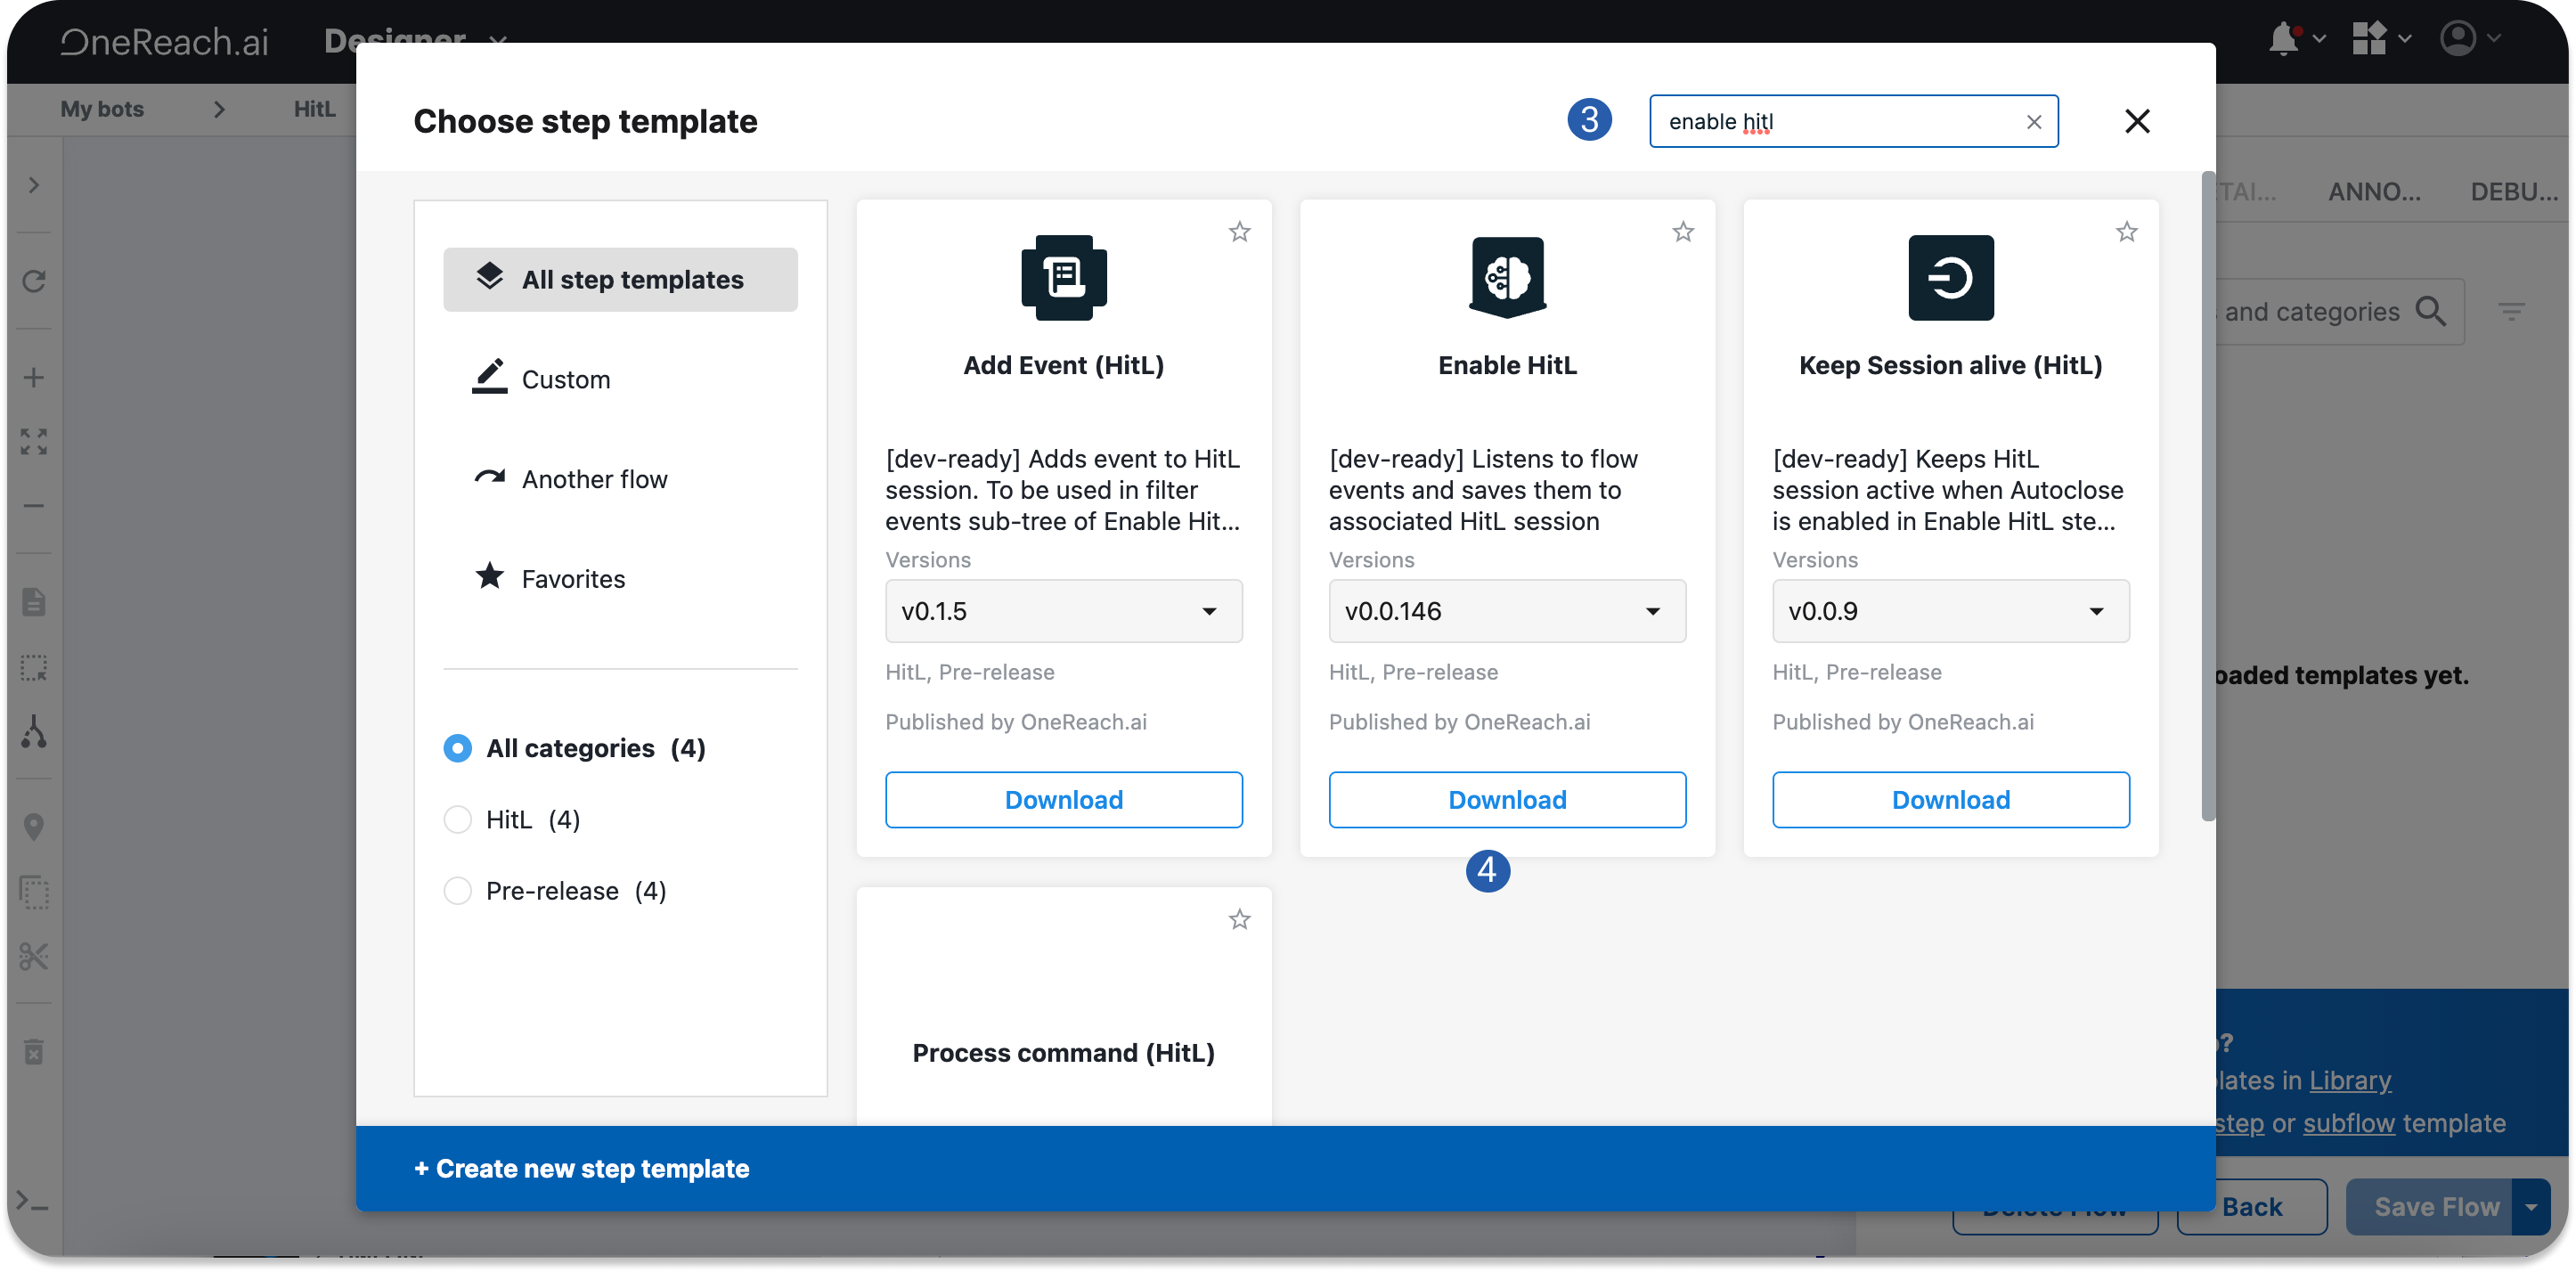
- In the search field, paste the Step template name. Scroll through search results if needed.
- Click Download for the Step template of interest.
Note
If several versions of the Step template are available to download, choose the latest.
- Close the Library iFrame.
After downloading the necessary Steps templates, you will see them in your Flow in the Templates tab.
Build a Flow tree with these Step templates
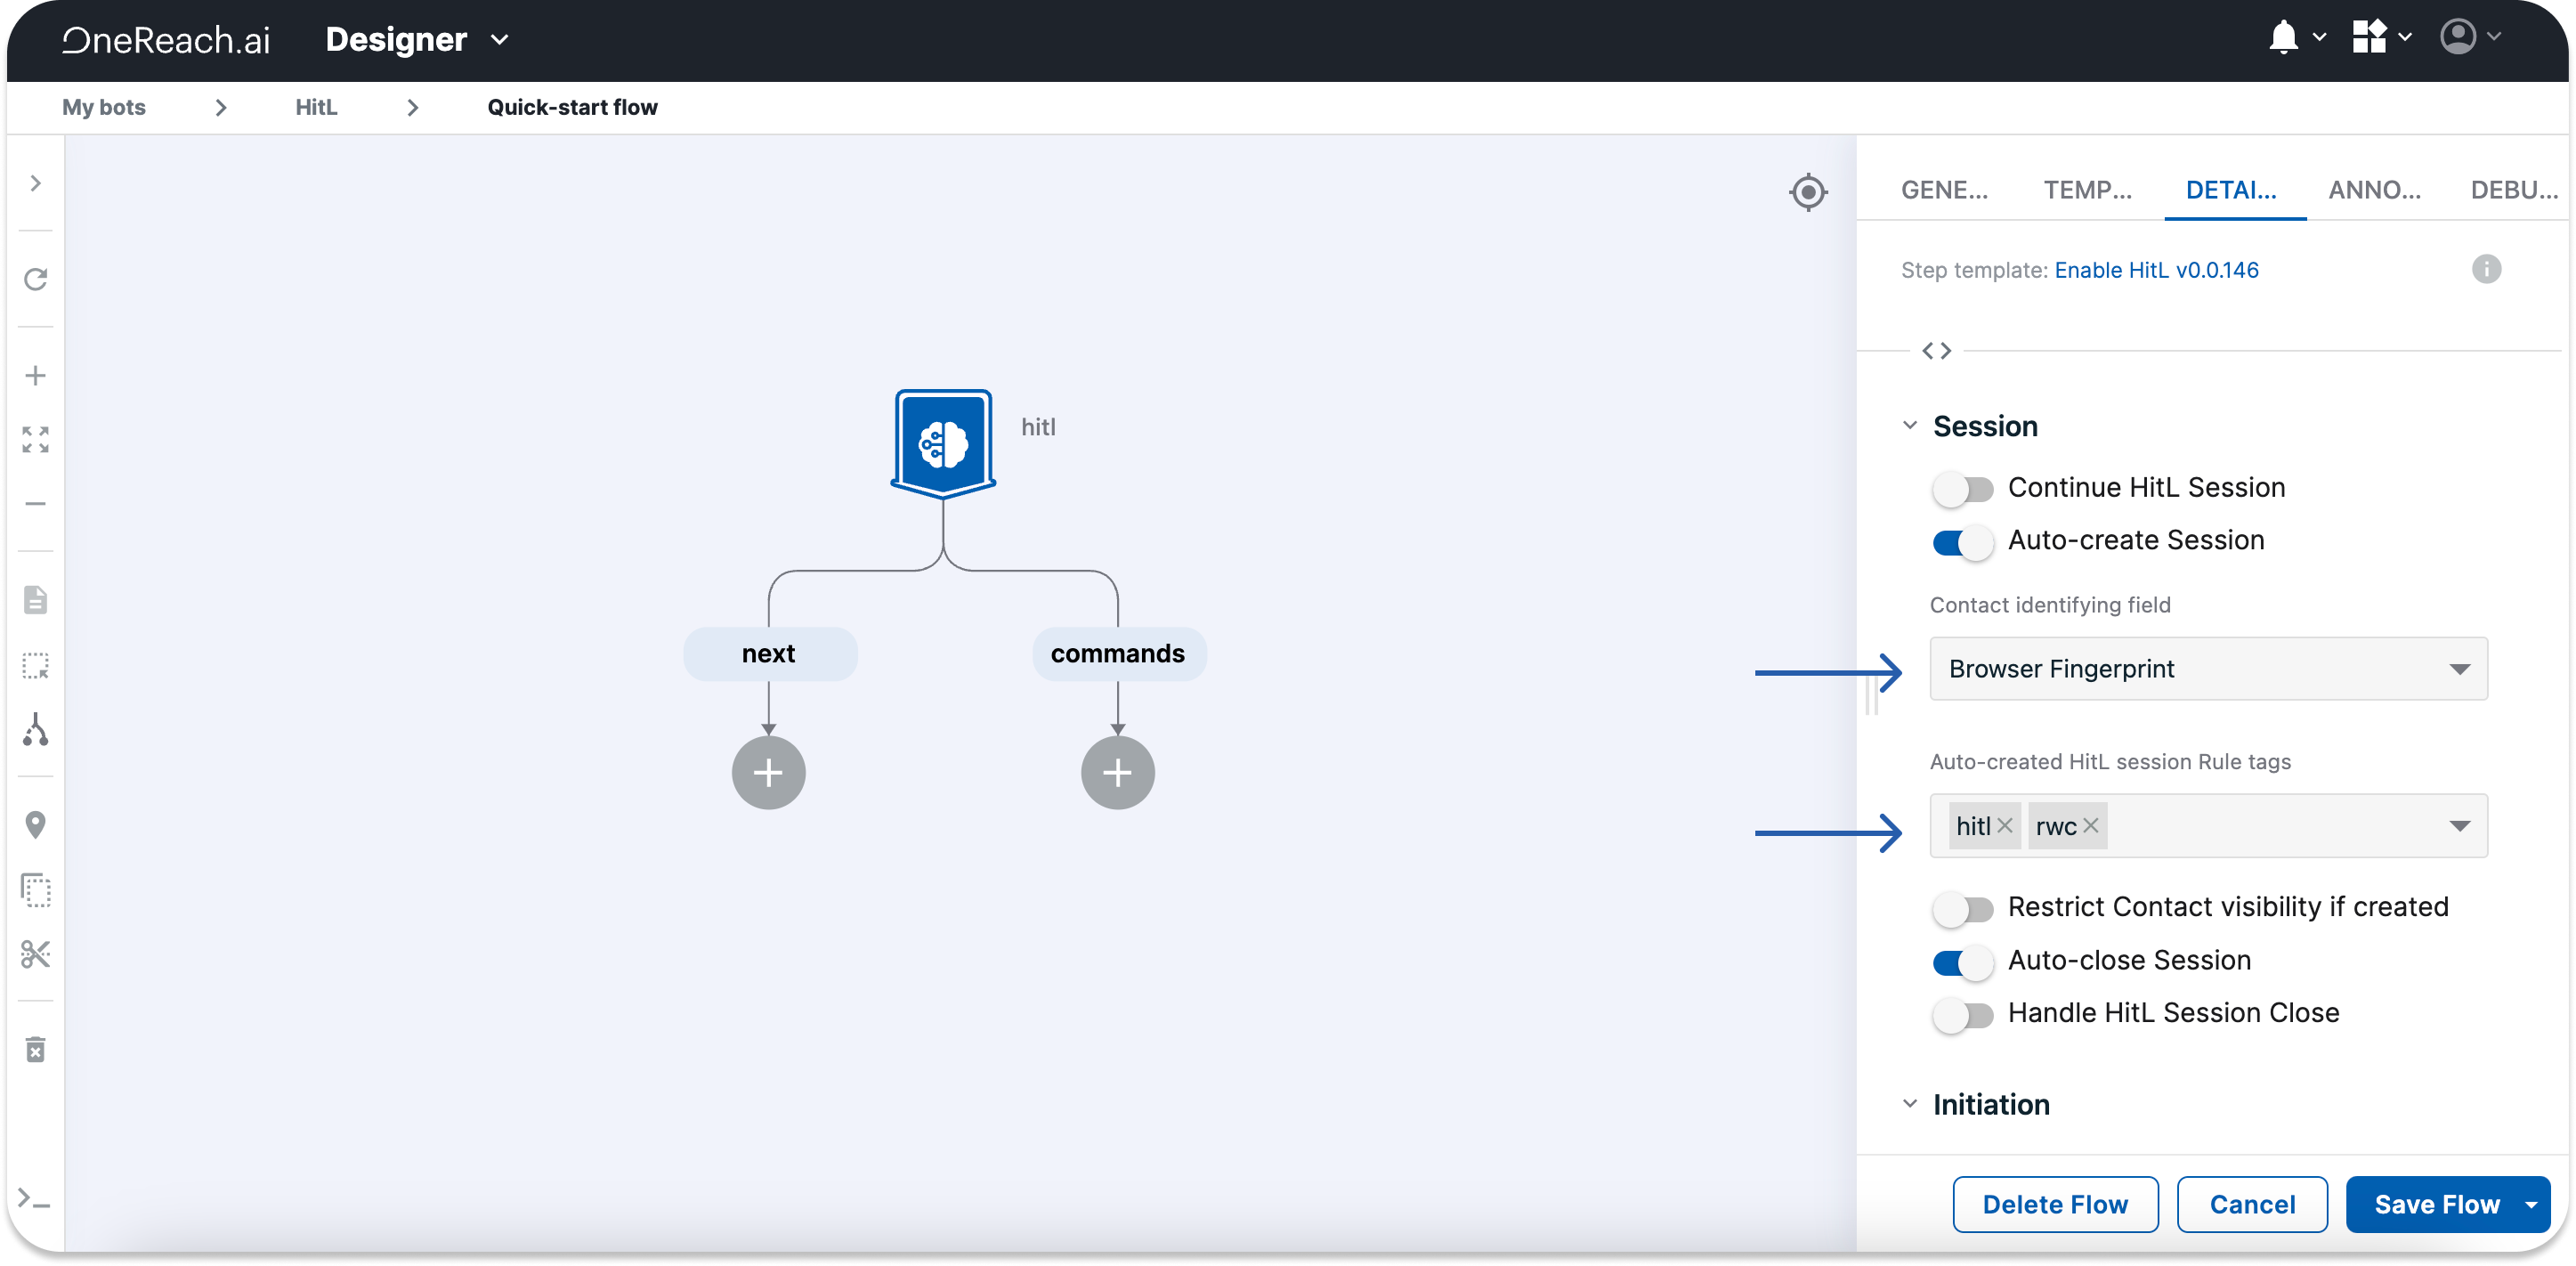
- Add the Enable HitL Step as the first Step of the Flow:
- From the Templates tab, drag the Enable HitL Step onto the Canvas.
- Name the Step "hitl".
- Add
hitlandrwcto the Auto-created HitL session Rule tags. - Select Browser fingerprint from the dropdown in the Contact identifying field.
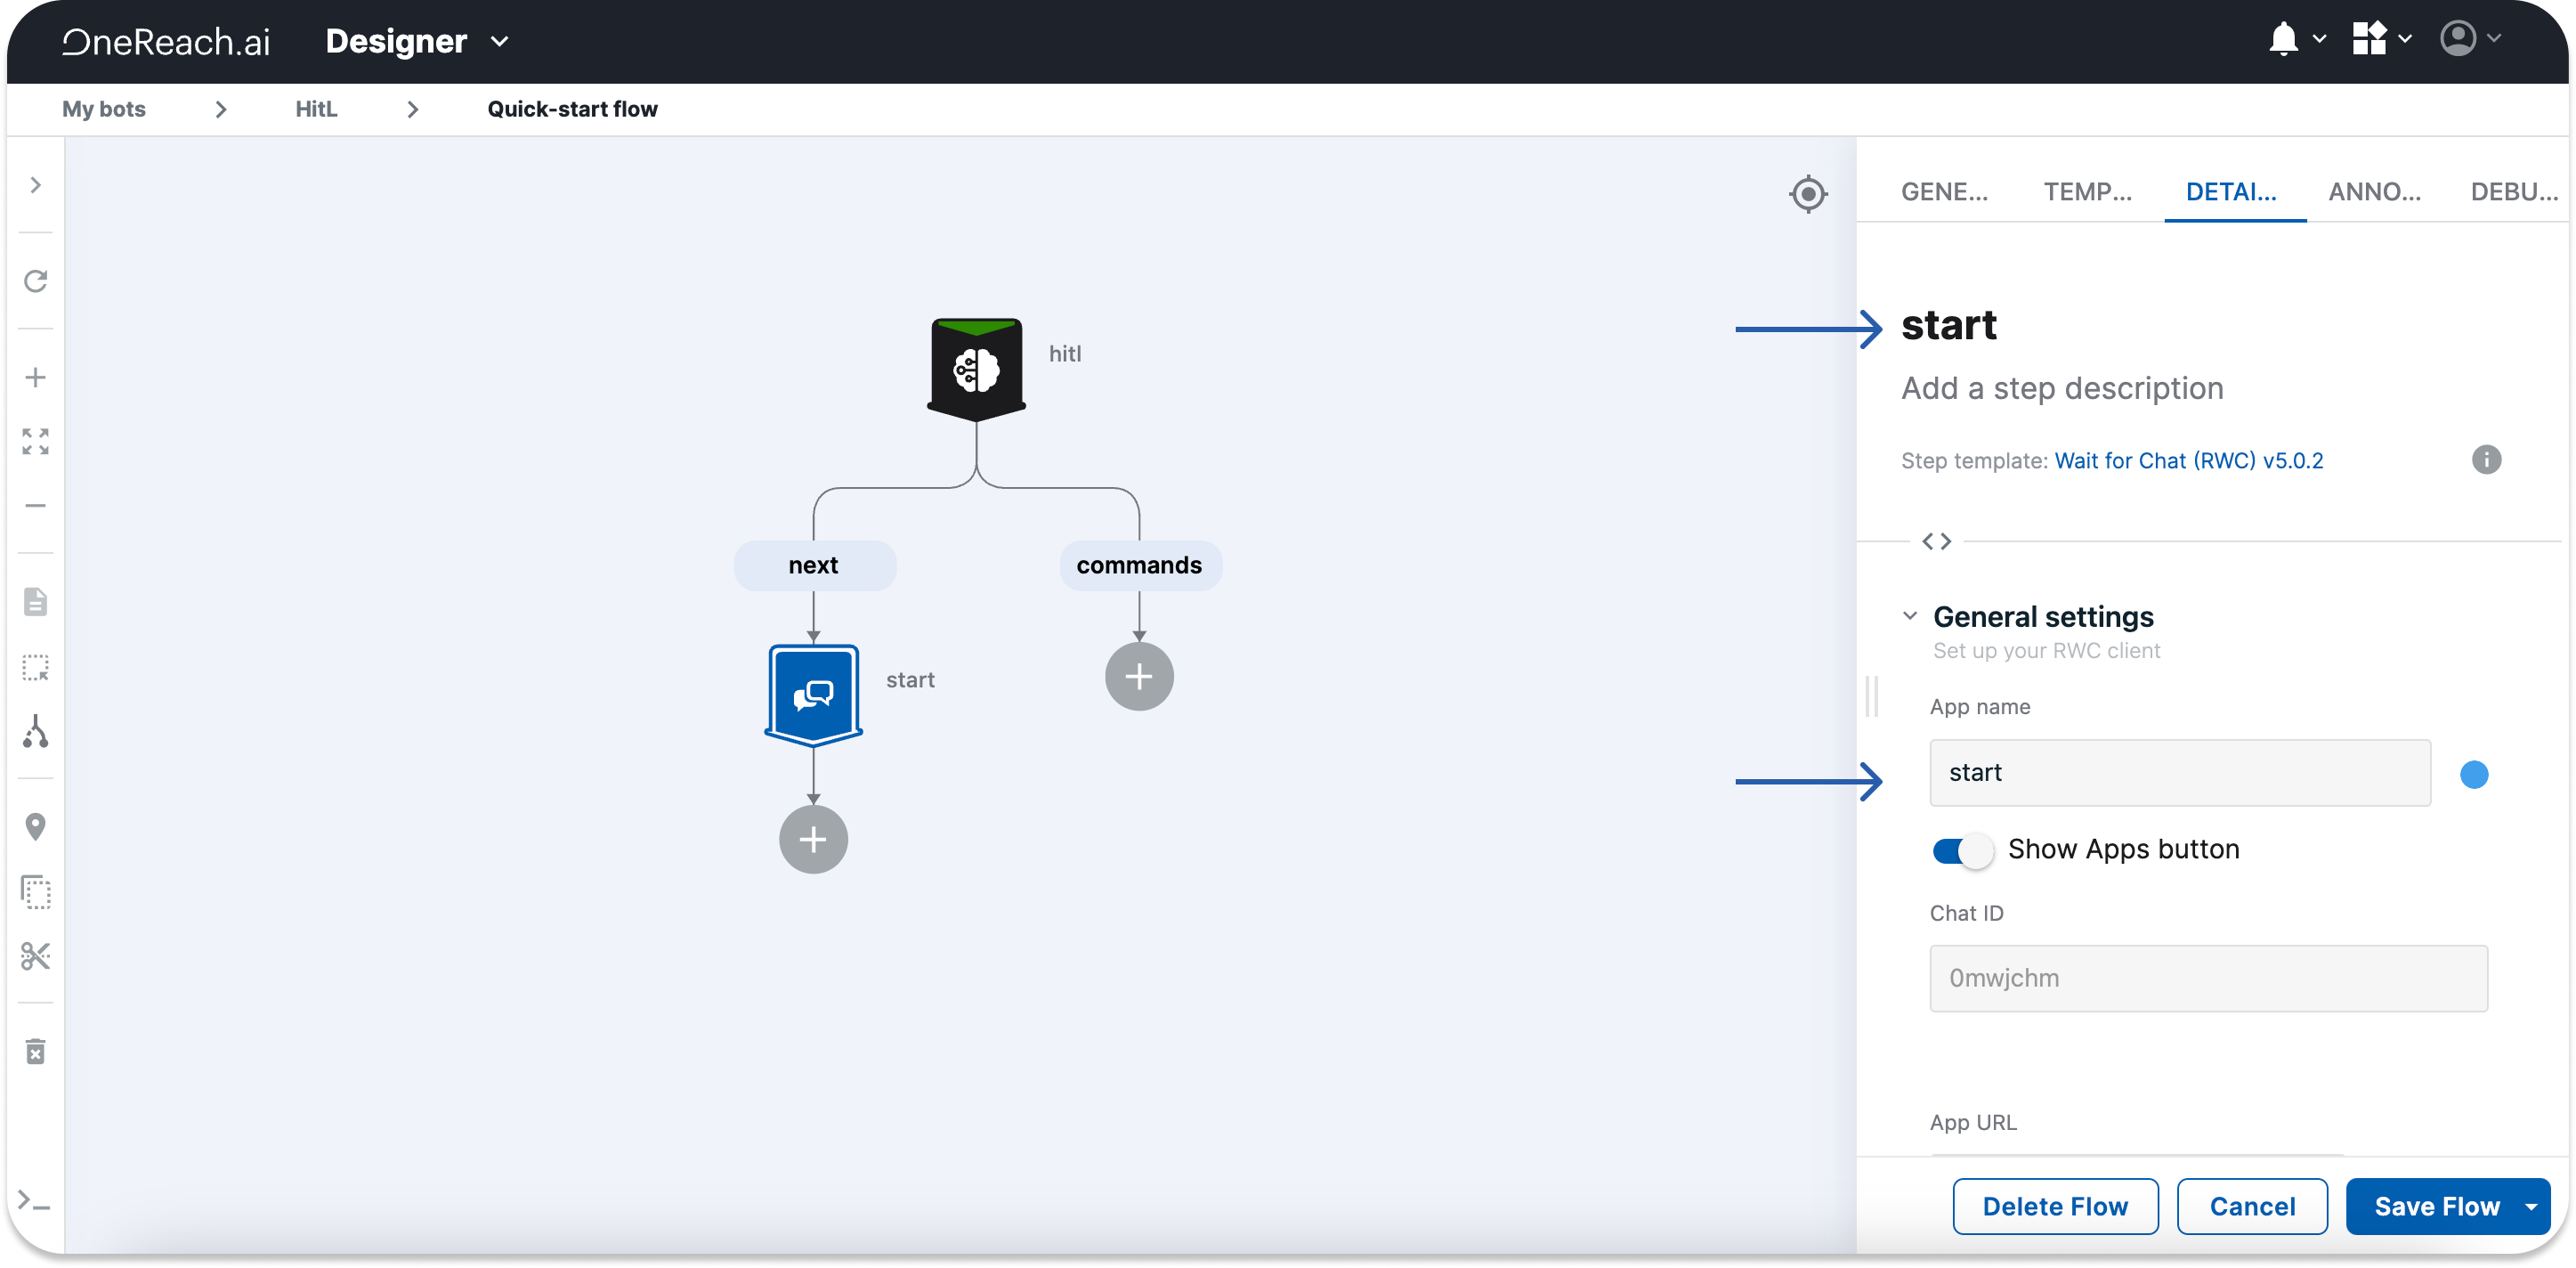
- To start the chat, configure the Wait for Chat (RWC) Step template:
- From the Templates tab, drag the Wait for Chat (RWC) Step onto the Canvas.
- Name the Step "start".
- Do the same for App name.
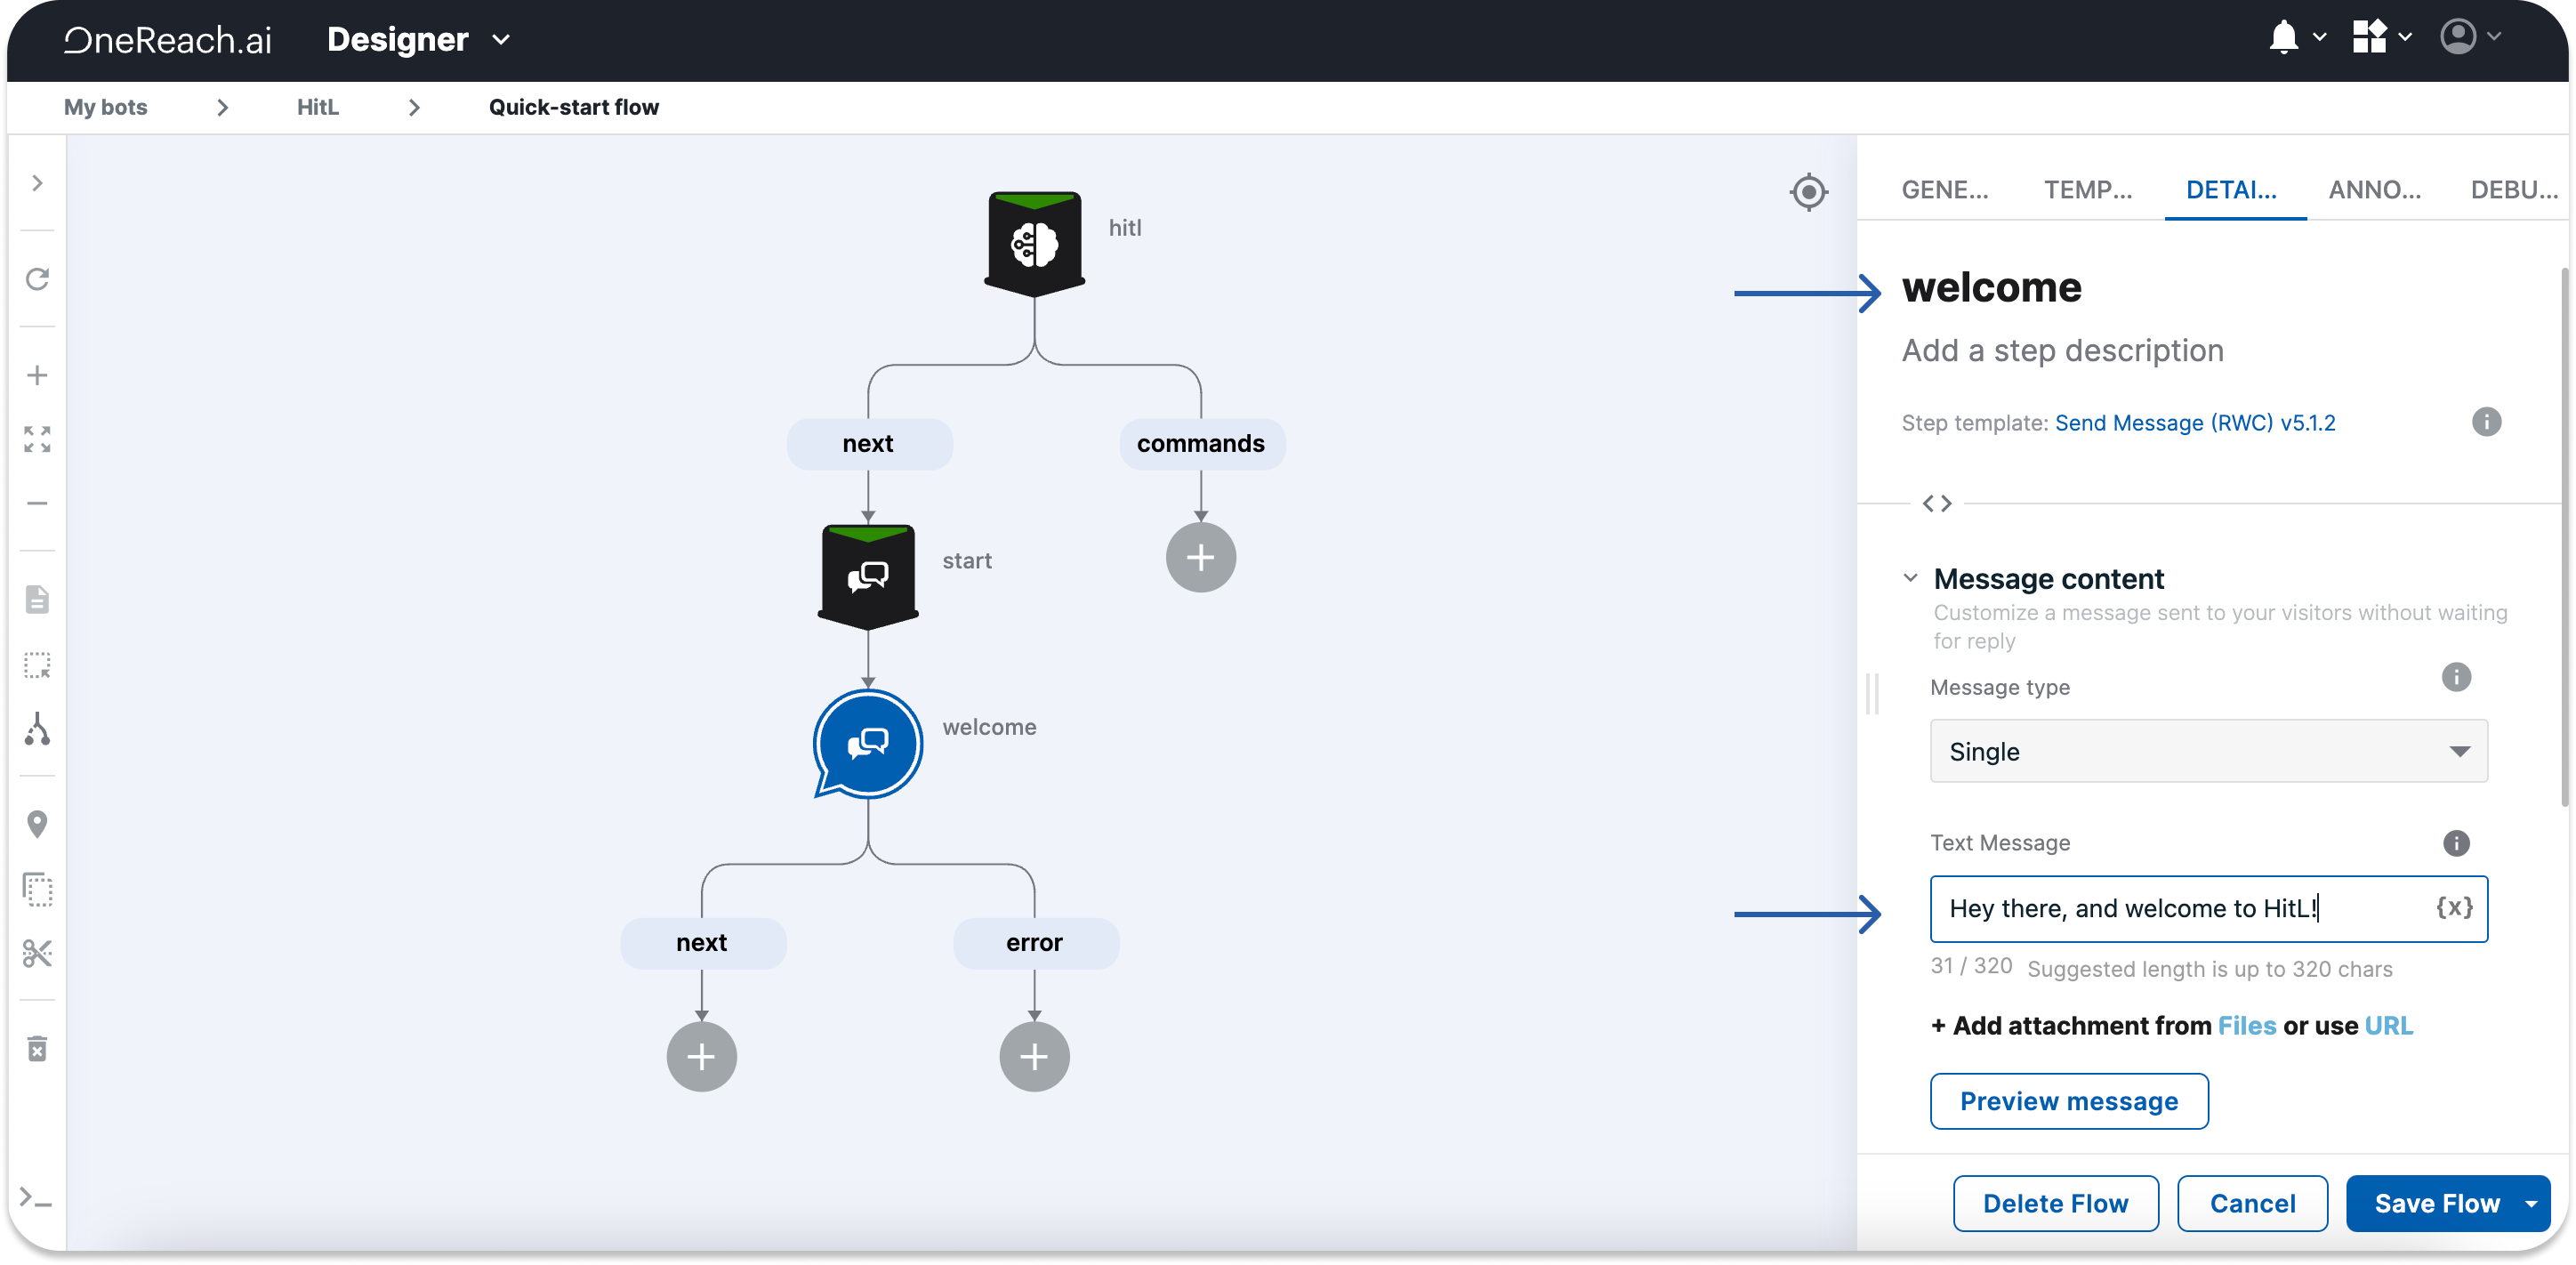
- To welcome the chat user, configure the Send Message (RWC) Step:
- From the Templates tab, drag the Send Message (RWC) Step onto the Canvas.
- Name the Step welcome.
- In the Text Message field, write a greeting to a chat user.
Save and activate the Flow
It might take a while. 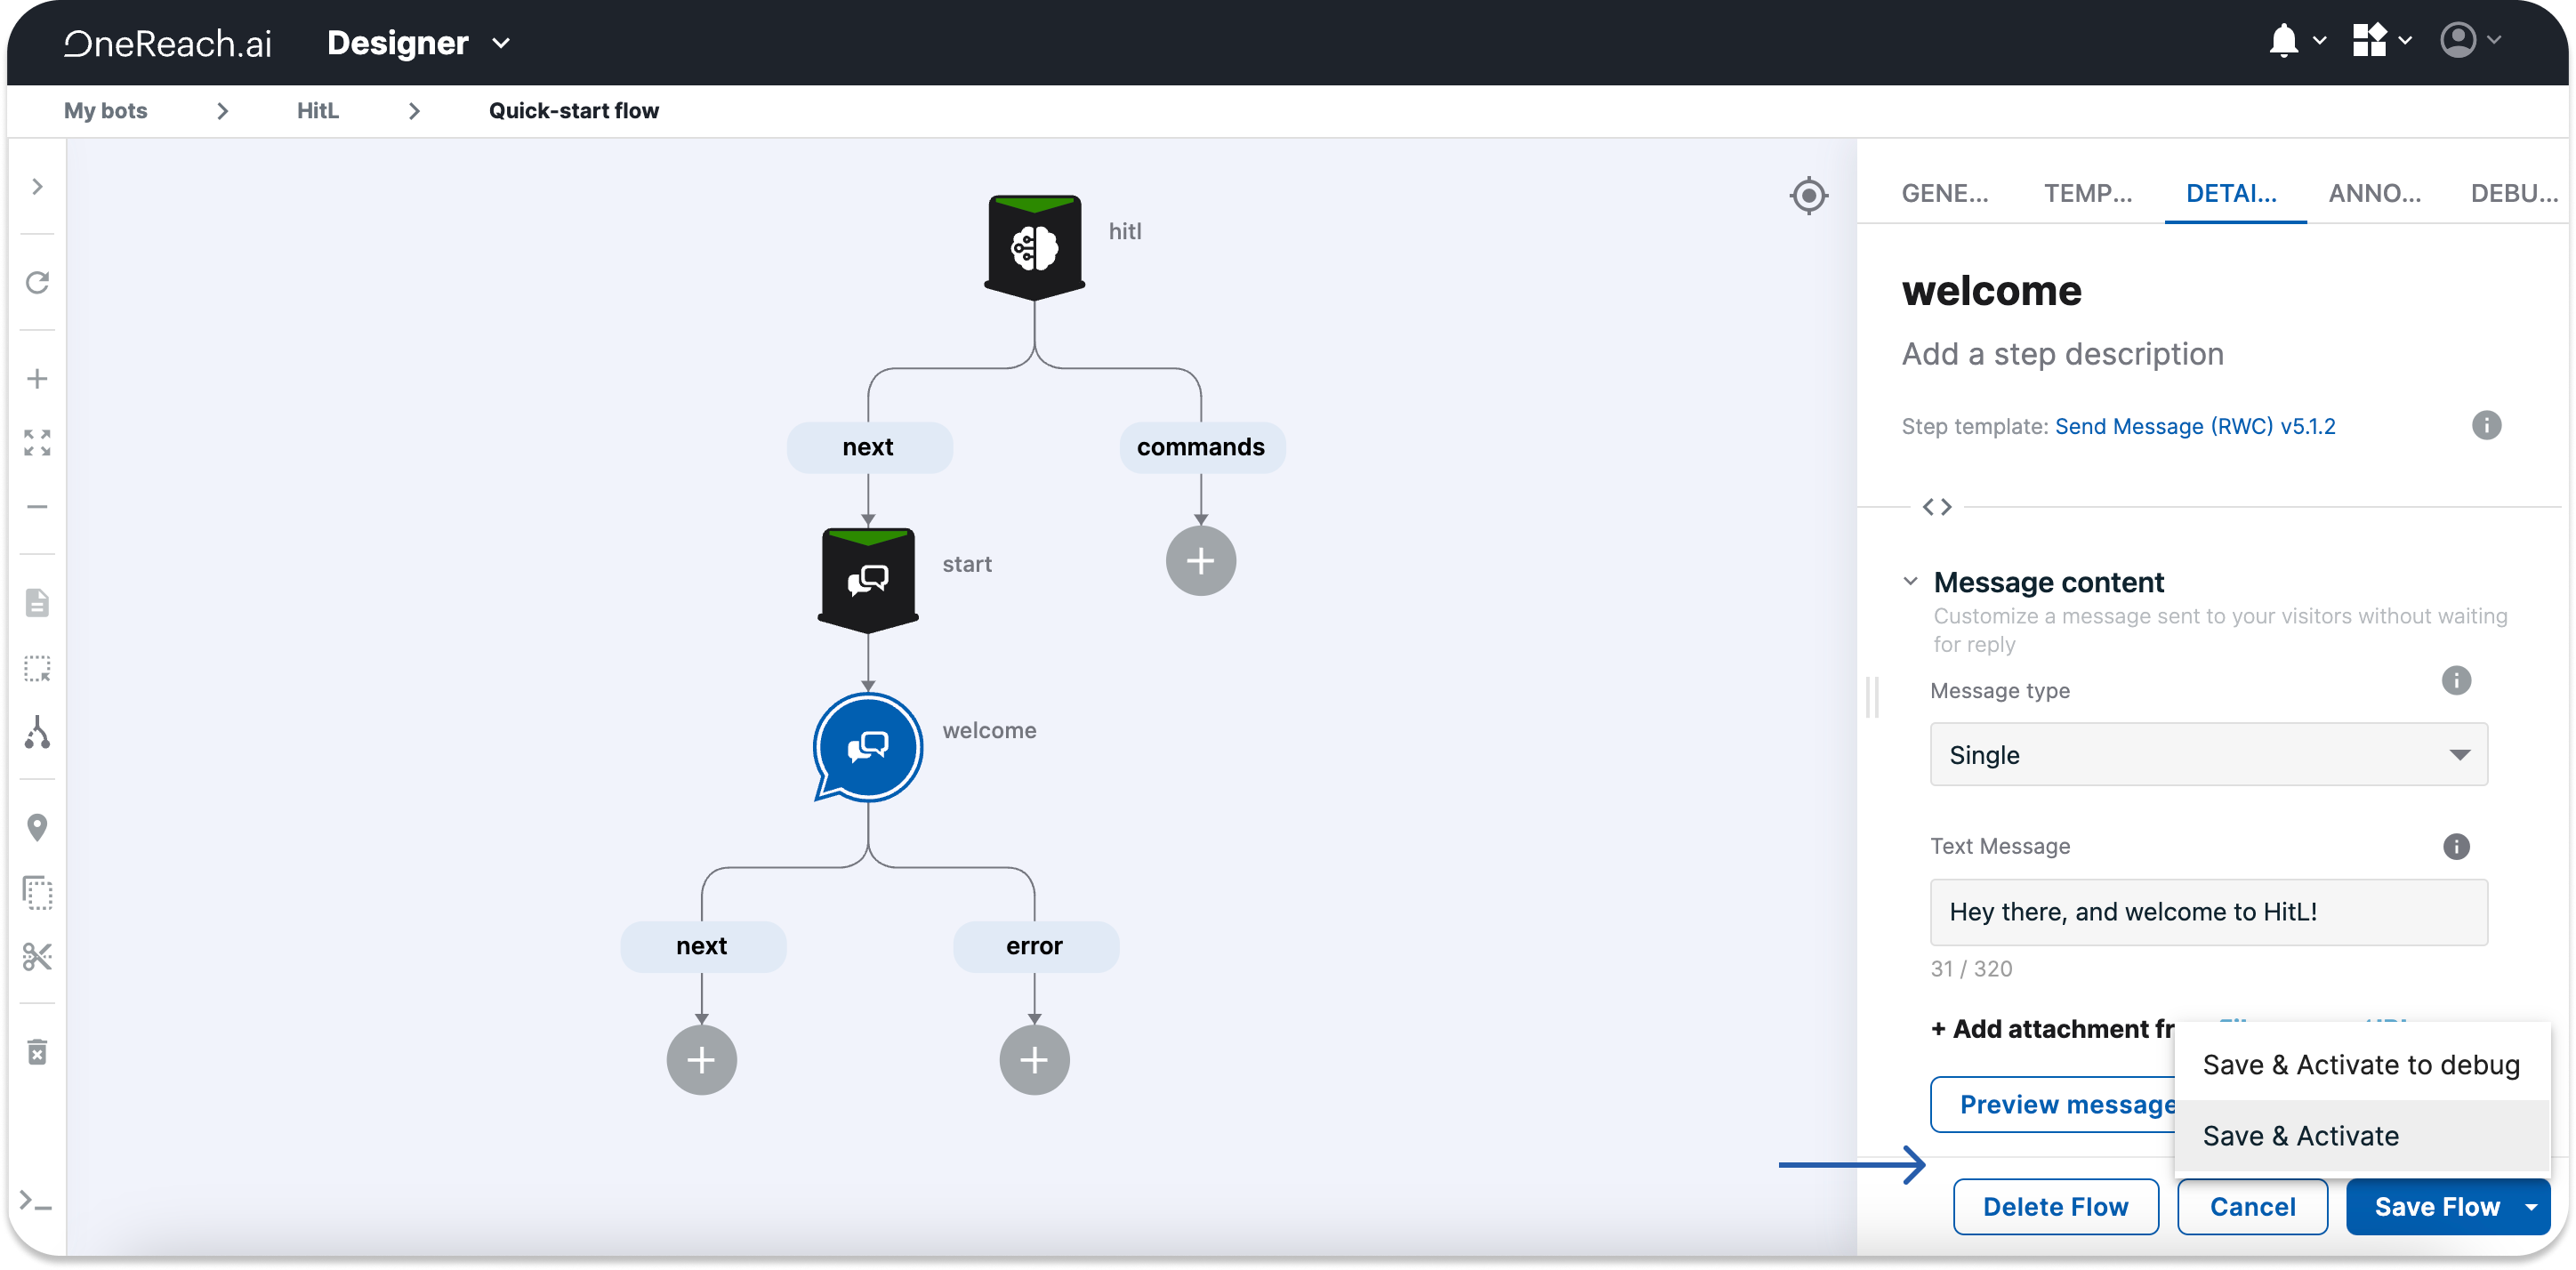
Open the chat
Opening the chat activates your conversation and lets you see it appear in the [HitL] Agent UI View.
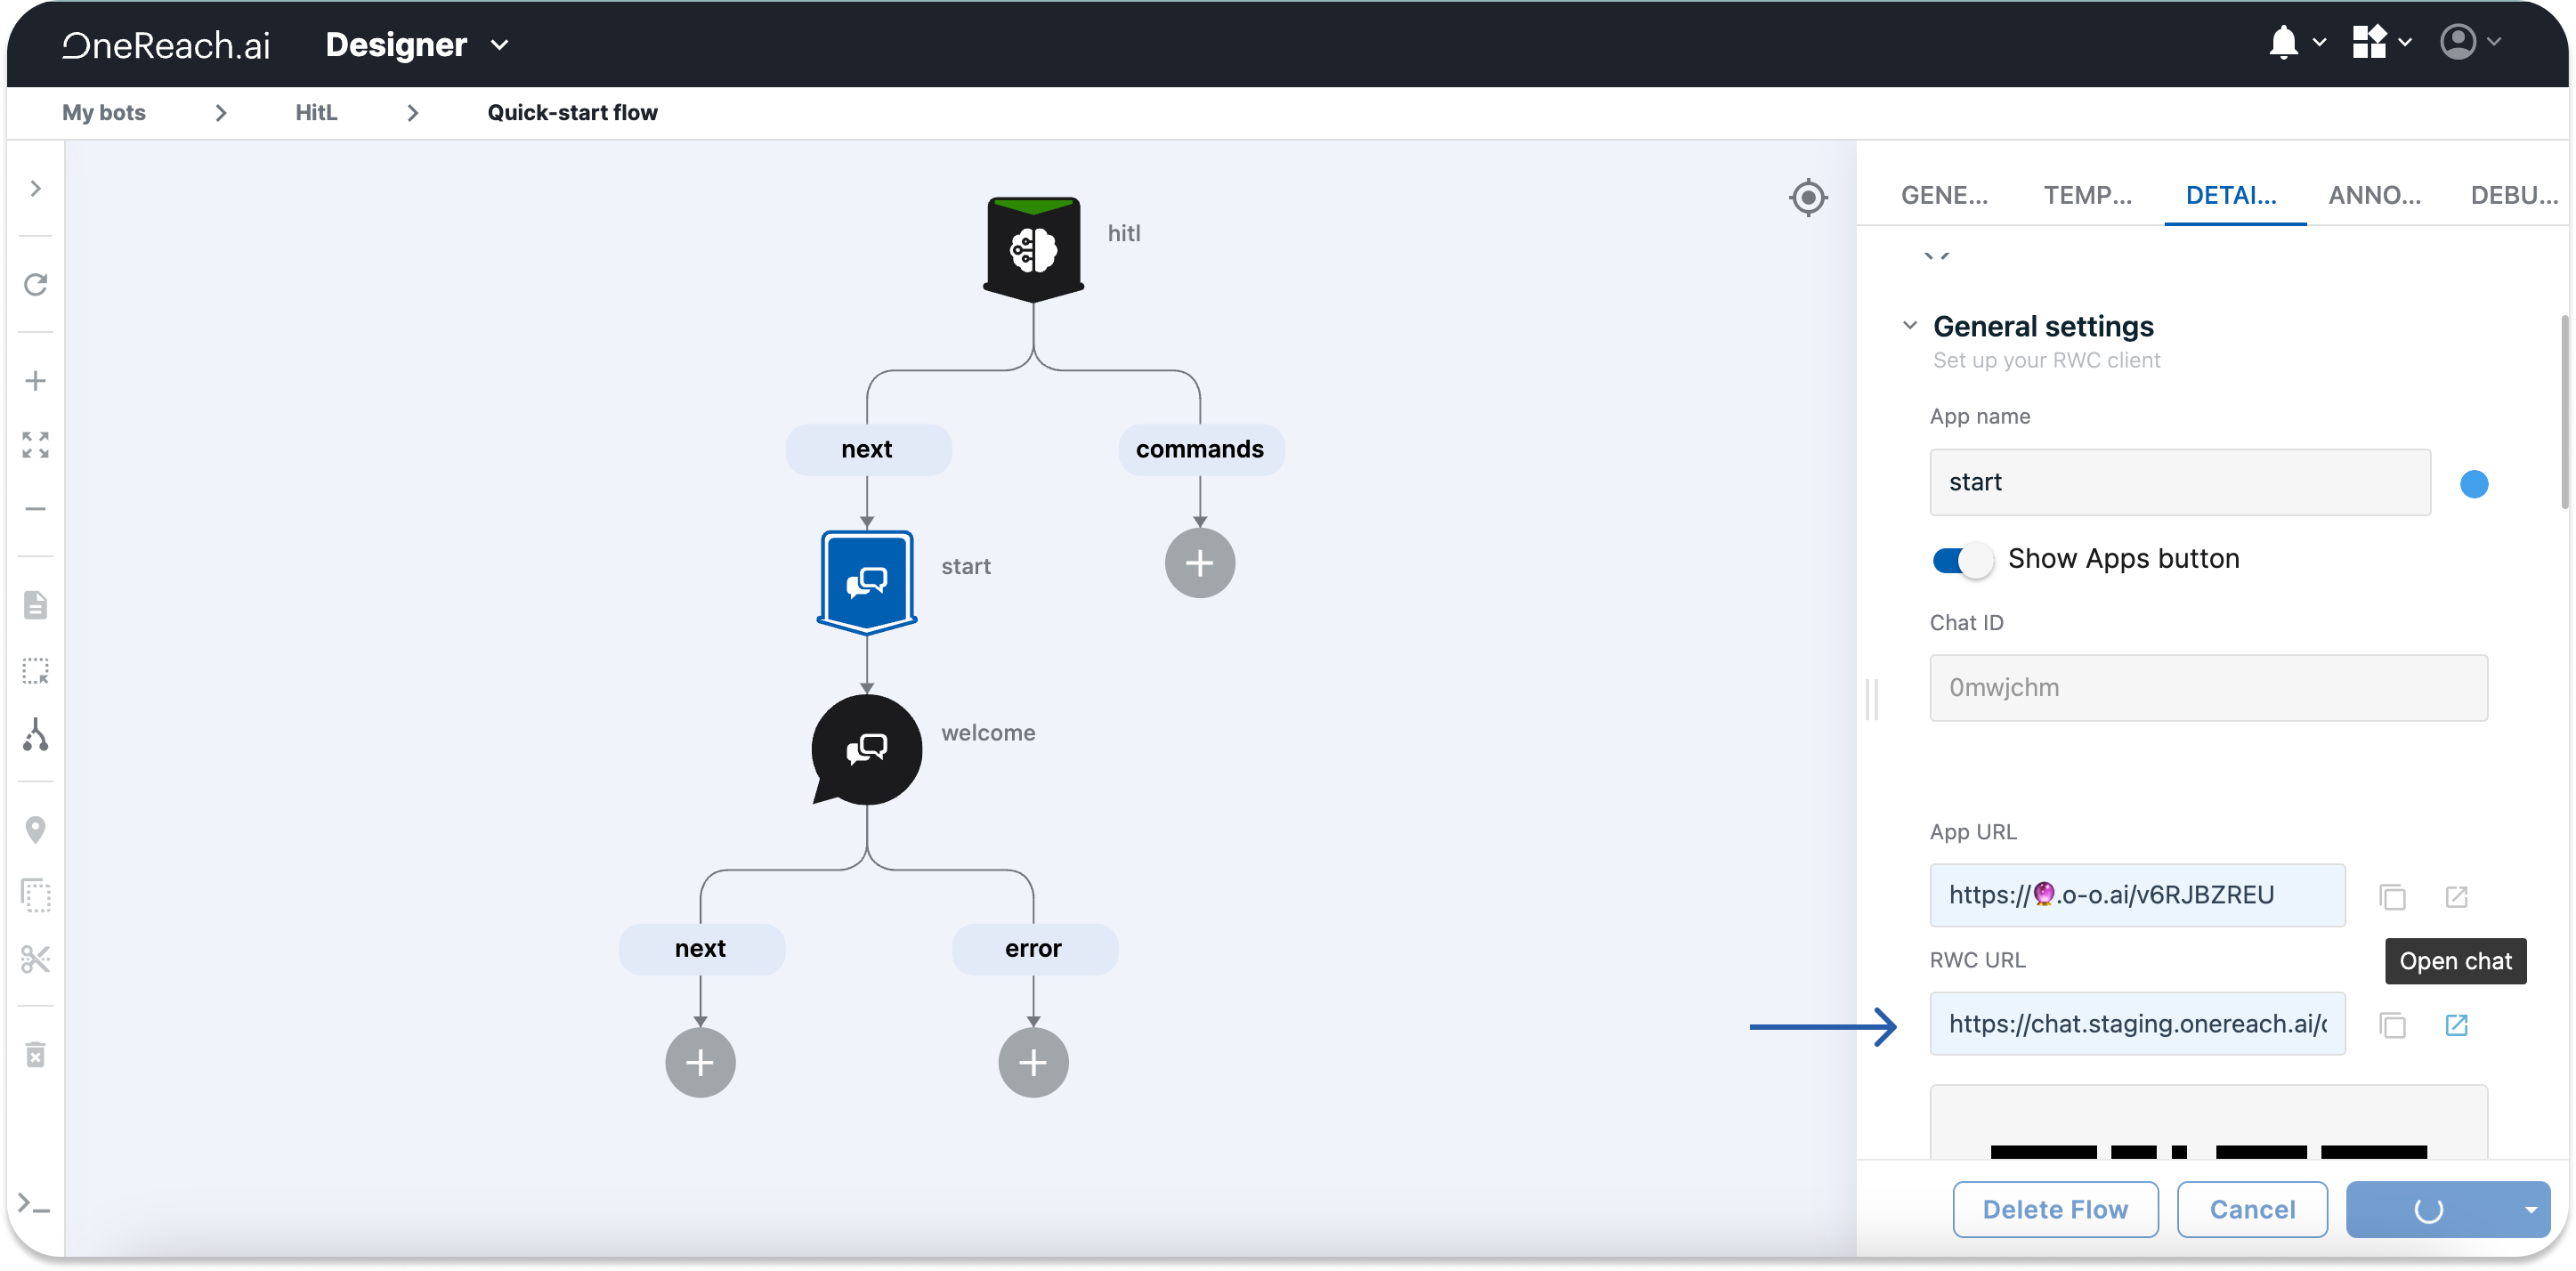
- Click the first Step on your Flow tree, which is Wait for Сhat (RWC).
- Scroll to the Rich Web Chat settings section and find the RWC URL field. It becomes available only after the Flow activation. Next to it, click
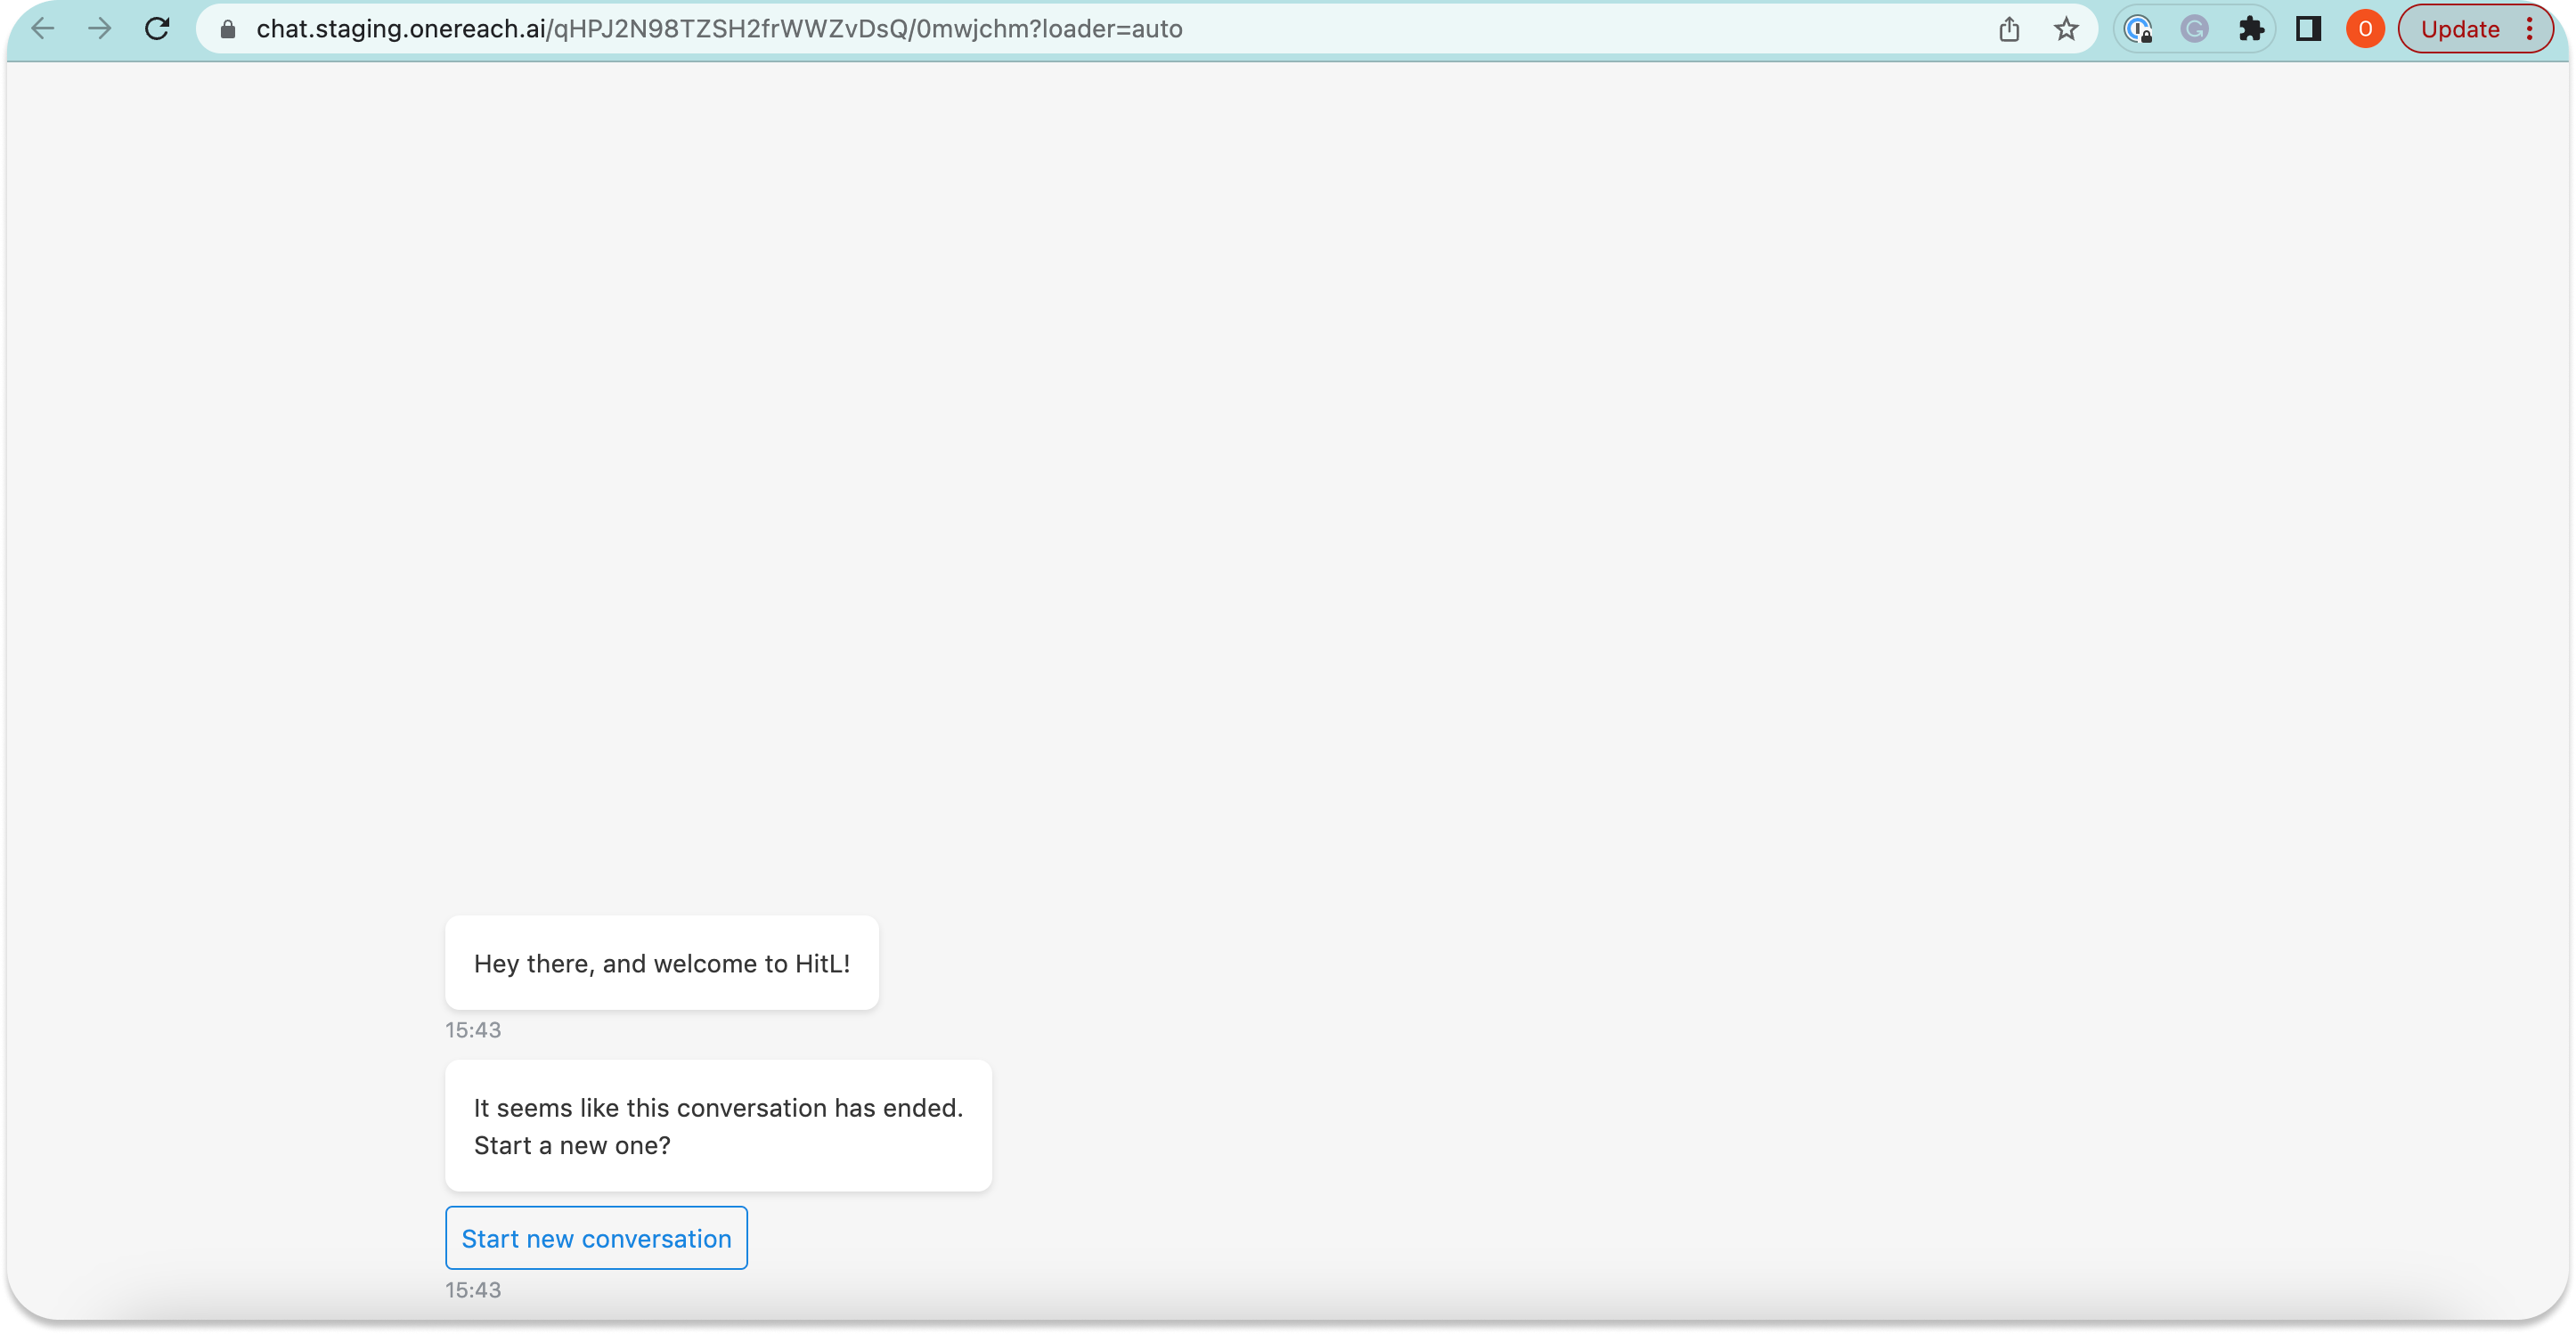
. Your Rich Wed Chat opens on a new web page and displays the messages you have configured. Loading the chat might take some time.
Set up the [HitL] Agent UI View
Download and open the [HitL] Agent UI View in Action Desk, as you did with [HitL] Settings View.
Result
In the [HitL] Agent UI View, observe your conversation appear in the Sessions list.

Note
Make sure the Session view is set to All conversations to see your chat.