Work with [HitL] Agent UI
Follow this link for the [HitL] Agent UI overview.
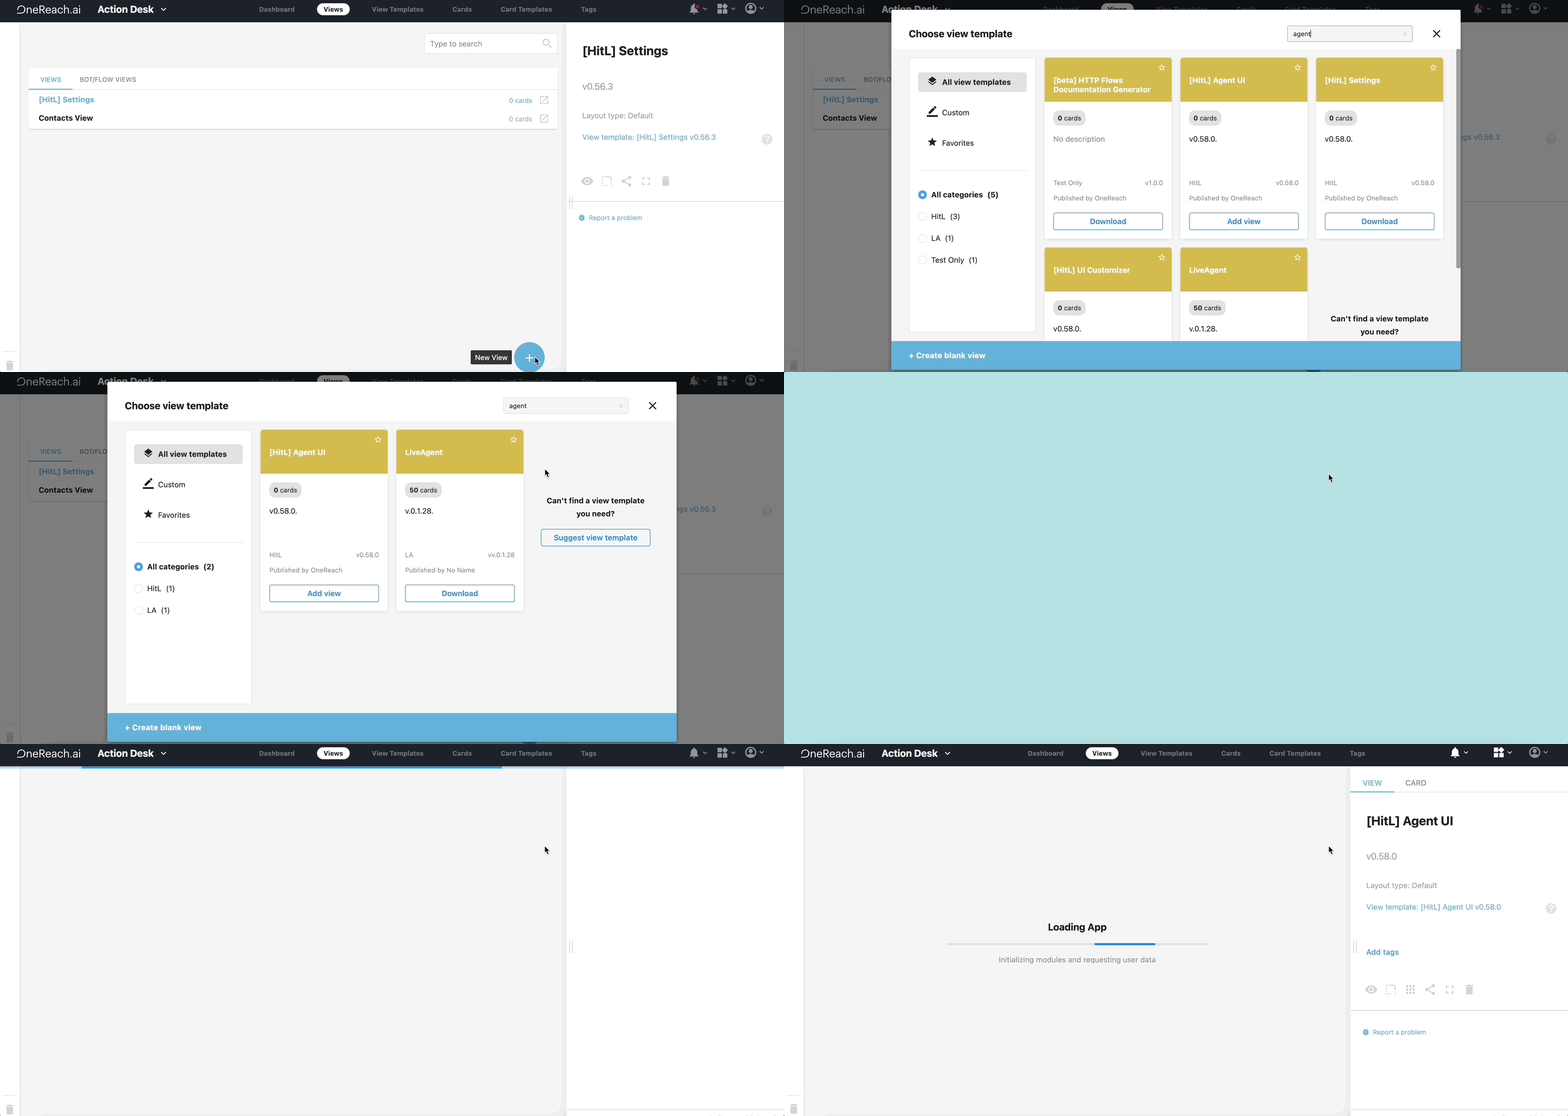
Download and open Agent UI View
To download the Agent UI View:
- Navigate to Views in Action Desk.
- Click the blue Plus button and select Choose from Library.
- In the Library iFrame, type 'Agent UI' in the search box.
- Once you have found the View, click Add view.
- Click
to open the View.
Set up session views
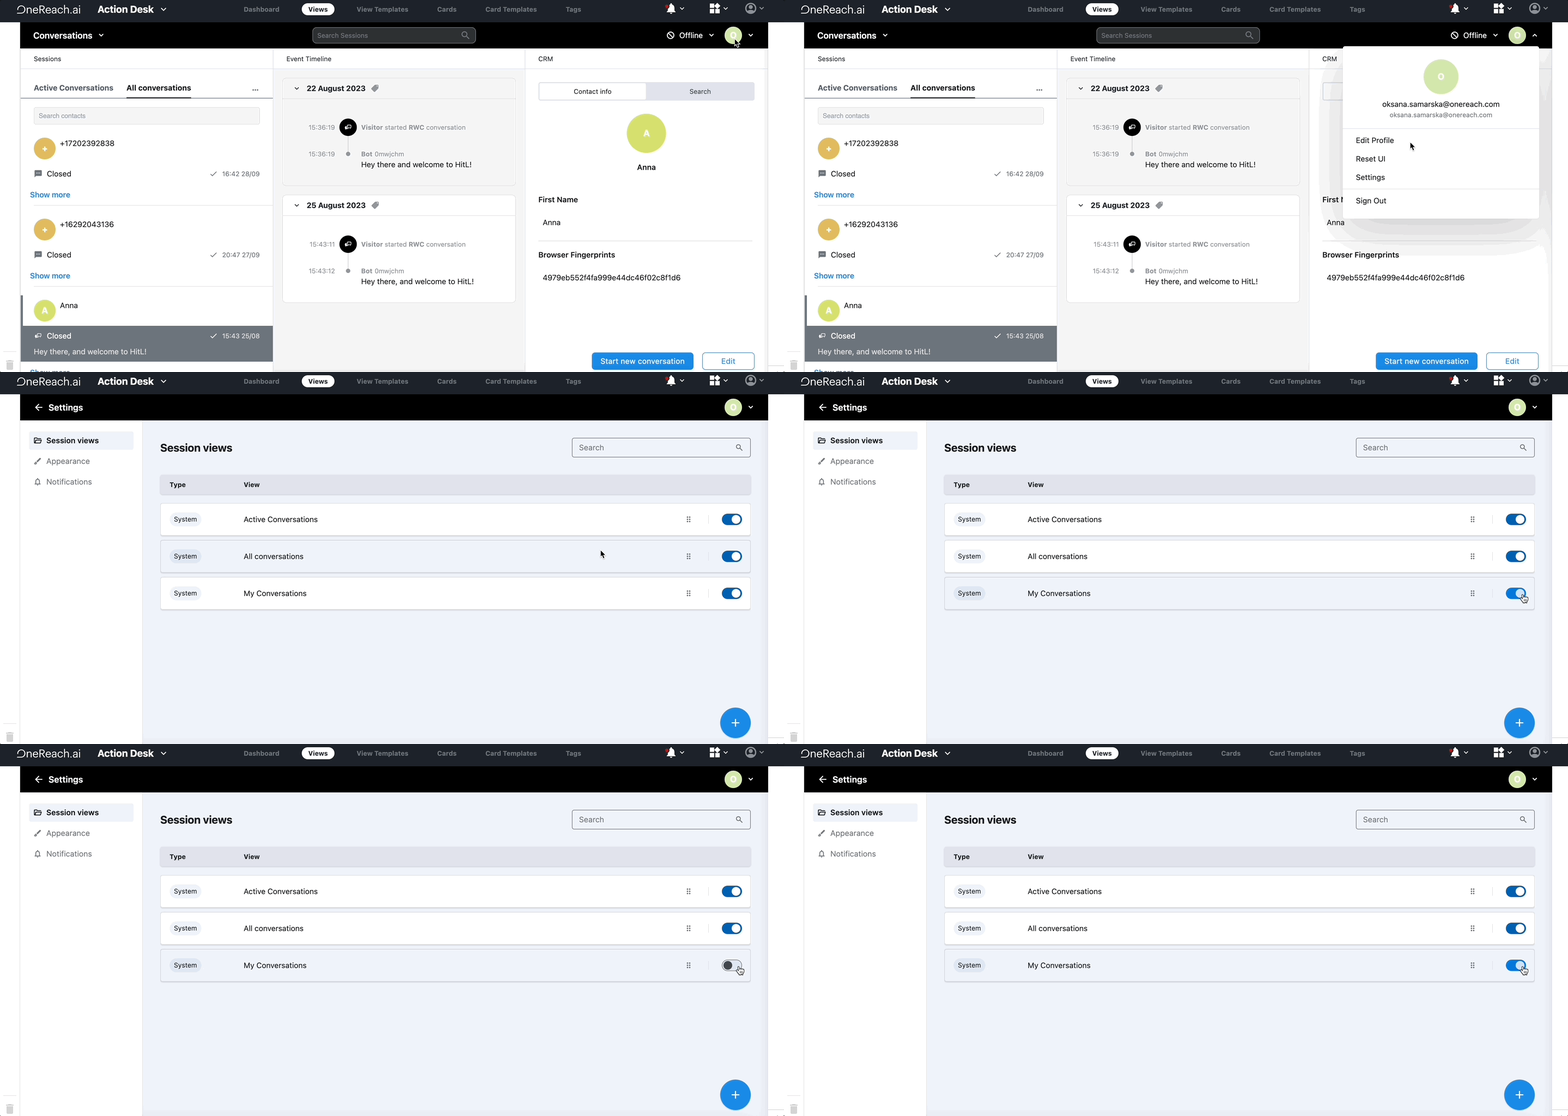
To set up session views:
- Navigate to Agent information and click Settings. You will land on the Session views page.
- From here, either enable/disable the respective toggles for system Session views or create a new one by clicking the Plus button.
Set up custom session views
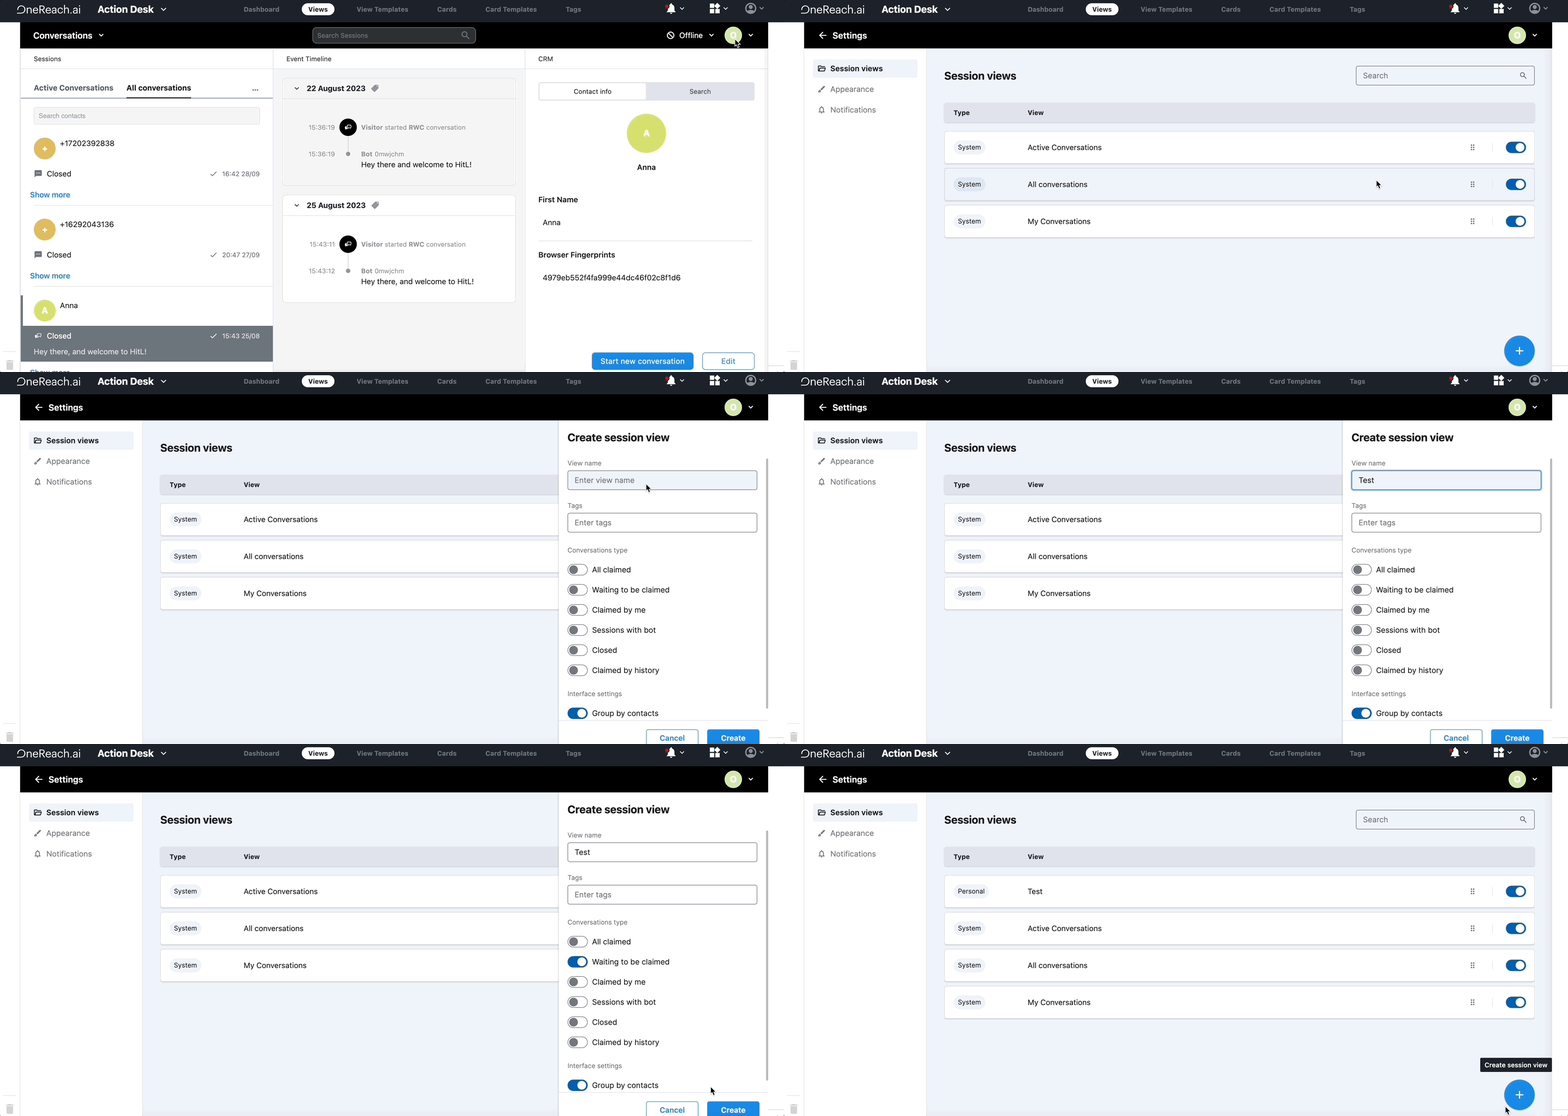
To create a custom session view:
- Navigate to Agent information and click Settings. You will land on the Session views page.
- Click the Plus button.
- Provide the session view name.
- Provide tags, if necessary.
- Enable toggles for the conversation type(s) to display for this session view.
- Click Create.
Set your agent status
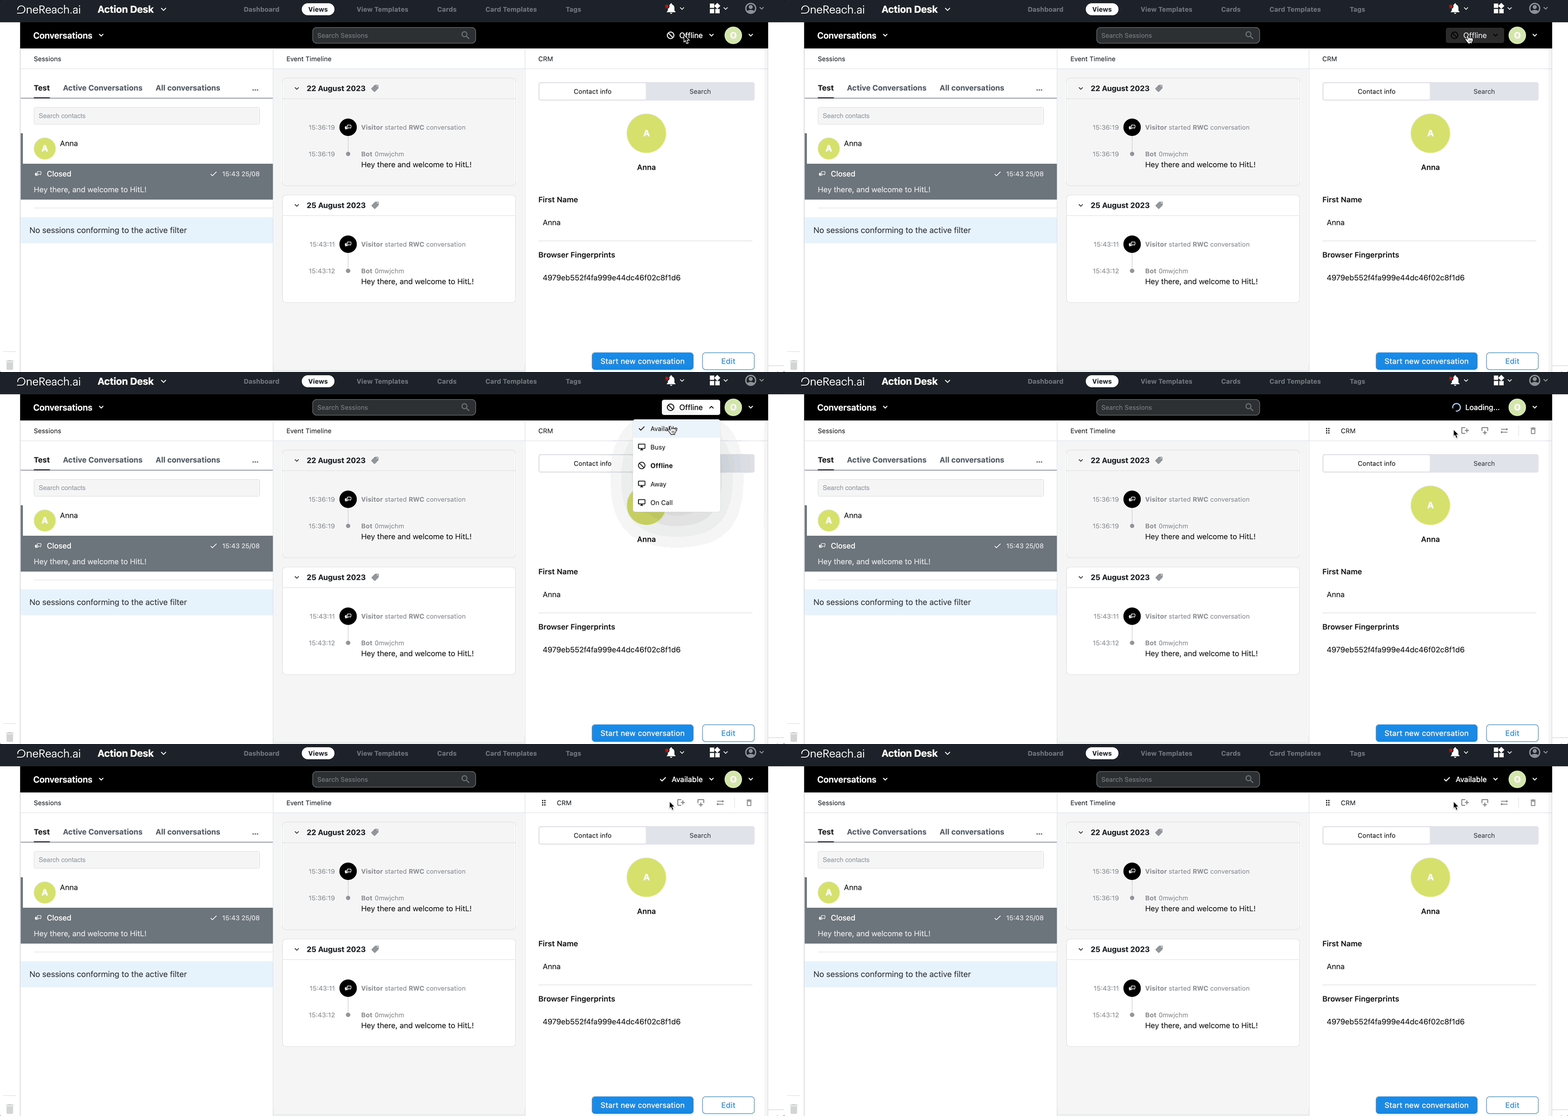
To set your agent status, click the Status button. Note that the button's appearance differs depending on the set status. You can choose from the following default statuses:
- Available
- Busy
- Away
- On Call
- Offline
You are free to customize "Busy" status. See how to do that here.
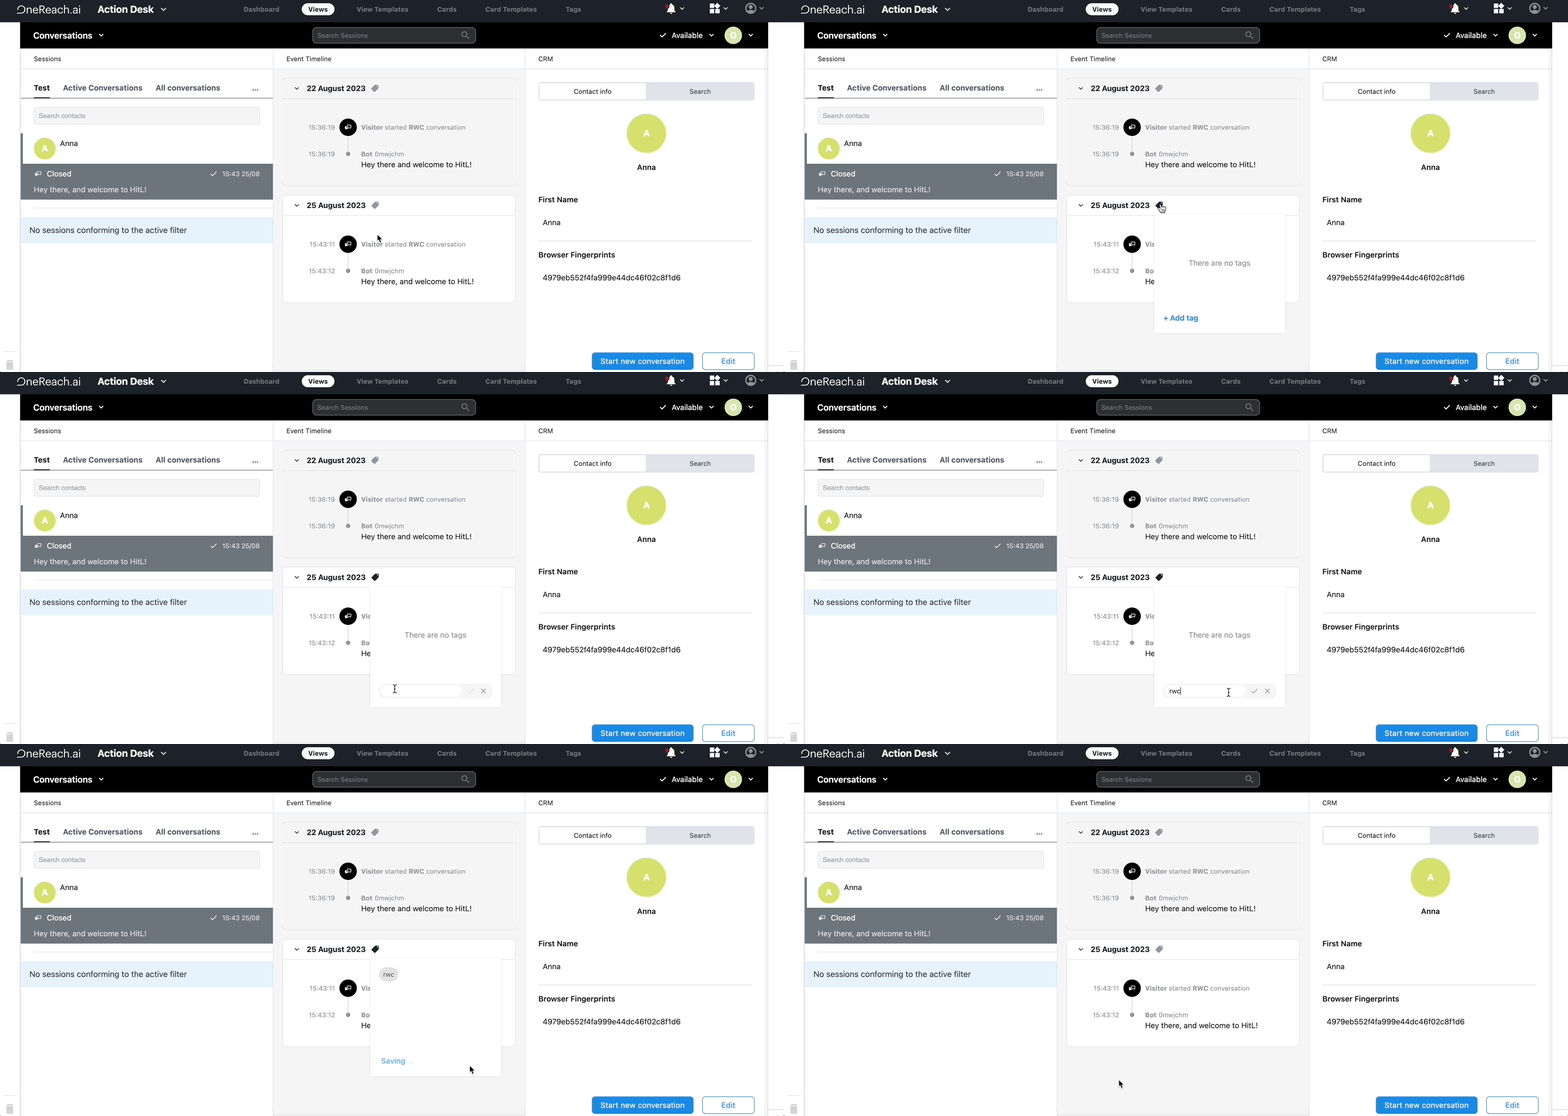
Add session tag
To add a session tag:
- Navigate to the Event timeline.
- Click
and then +Add tag .
- Provide the tag name, based on which you can filter conversations. For example, "rwc".
- Click
.
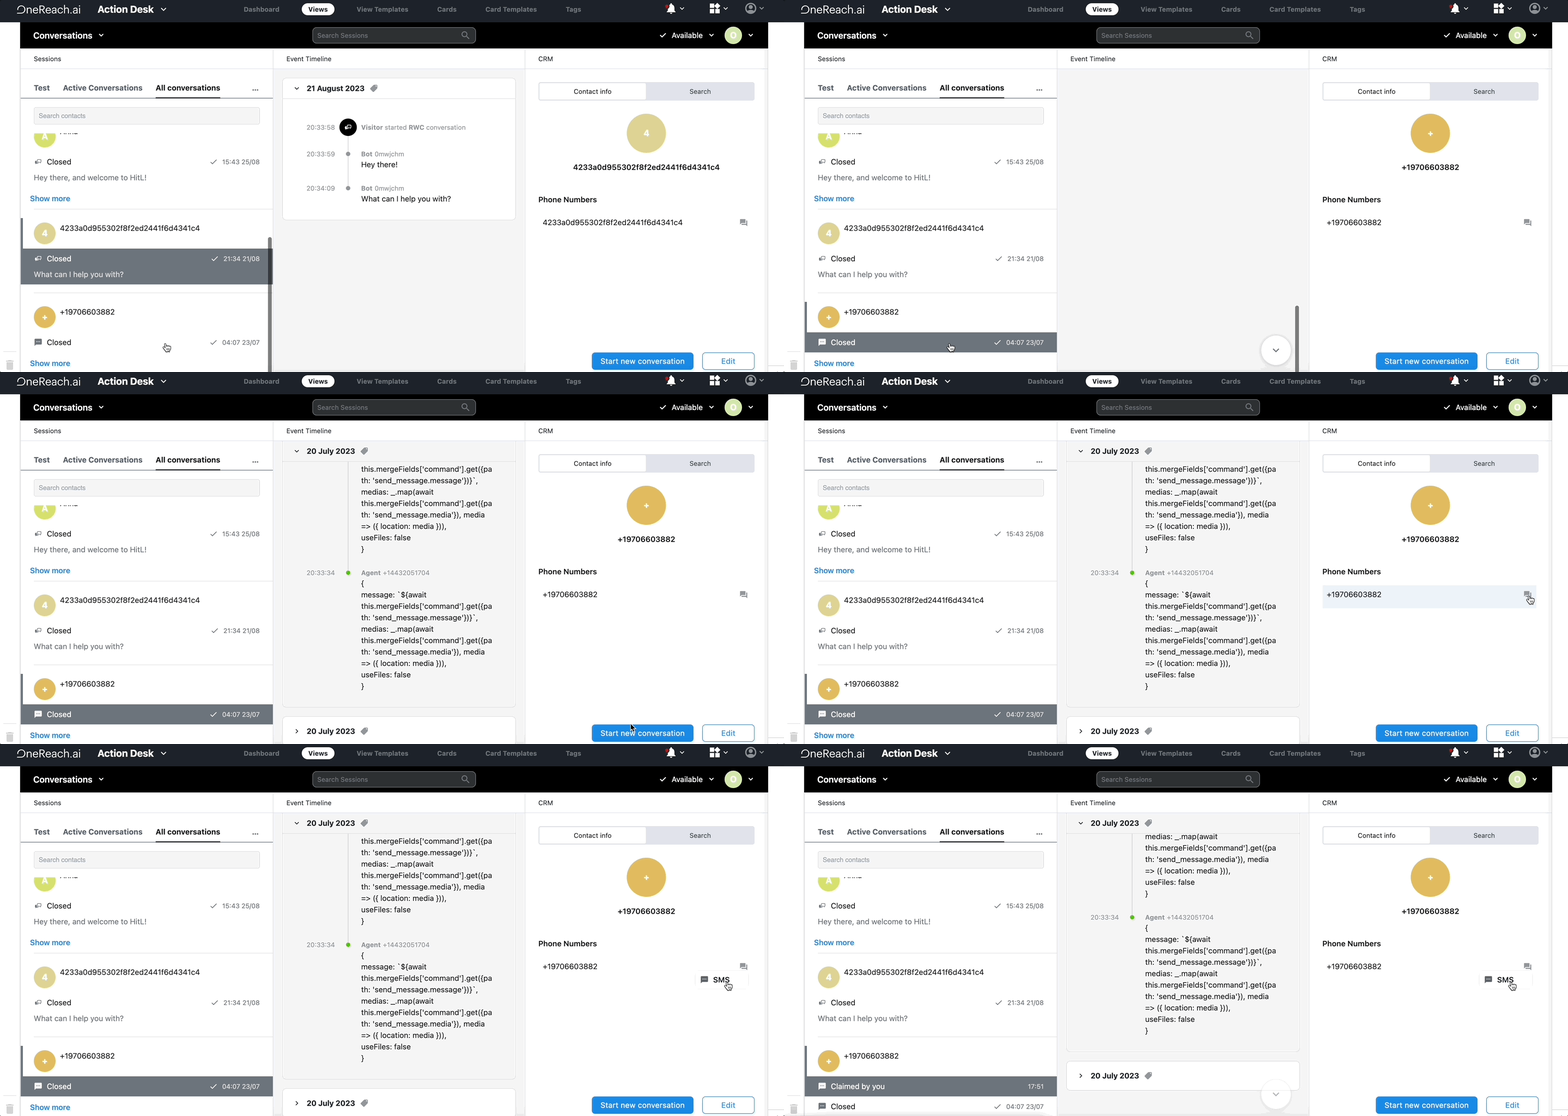
Start conversation
There are two ways you can start a conversation. For both of them:
- Select the conversation from the Session list on the left. The Contact record management card (CRM) opens to the right.
- From there, a) either click Start new conversation or b) click the icon that defines the conversation channel (a message icon in this case).
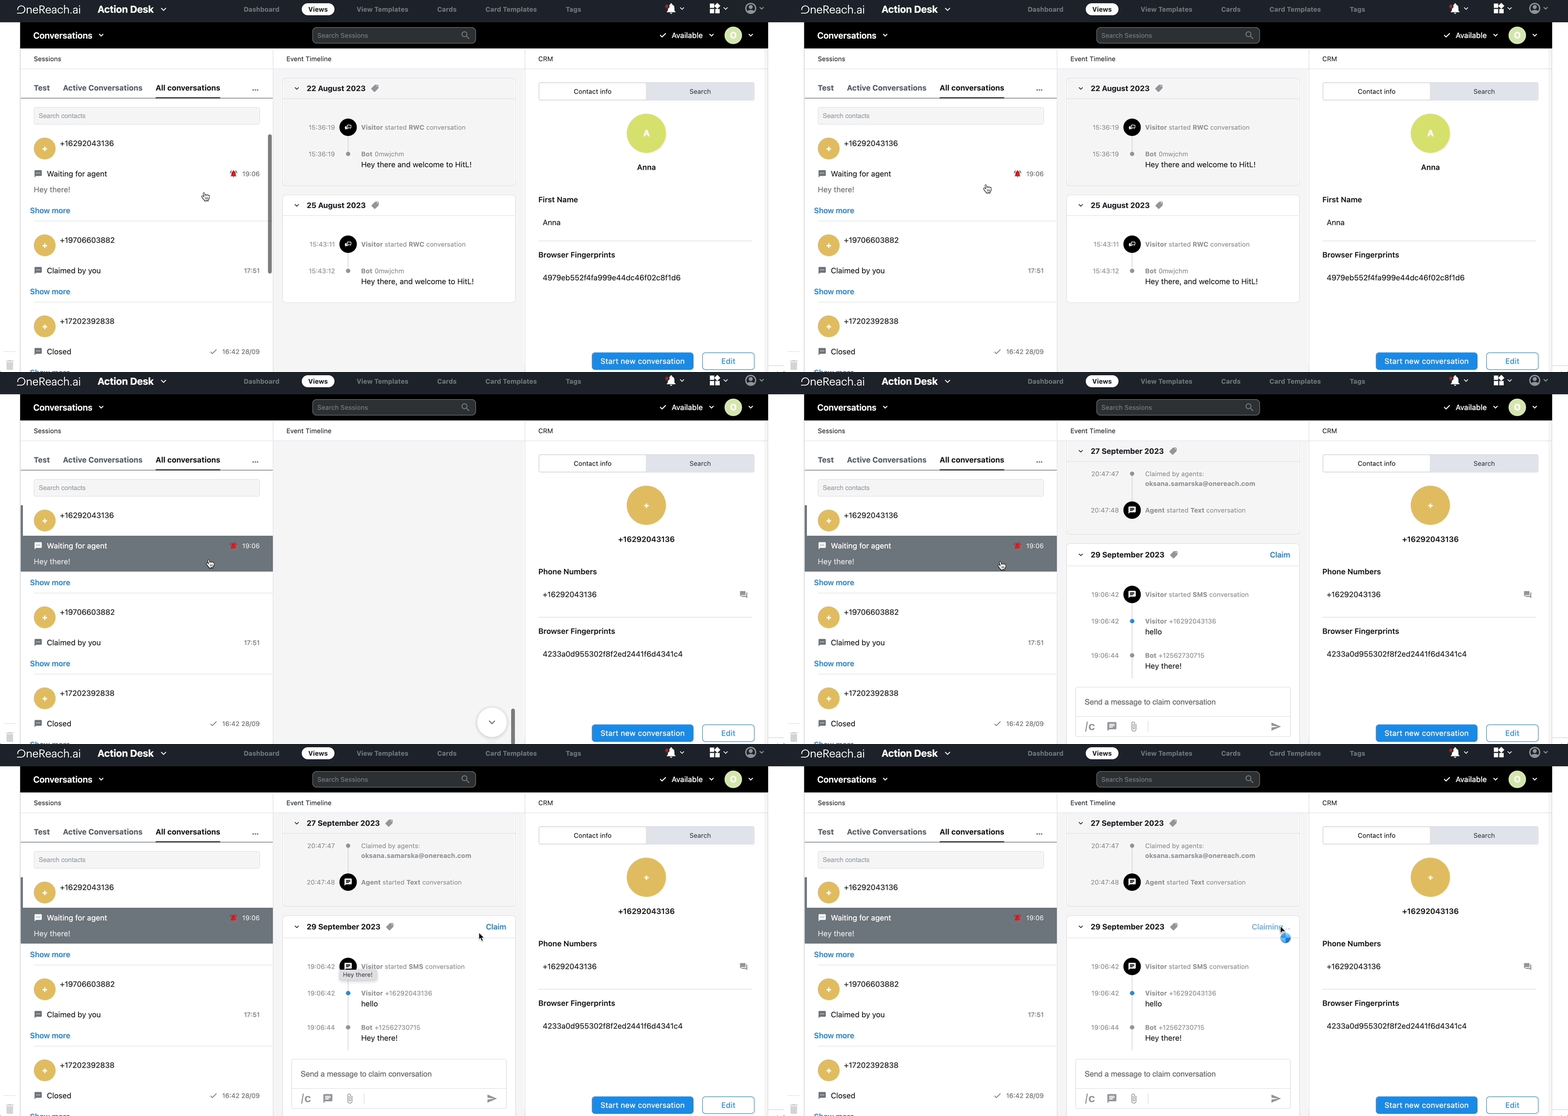
Claim conversation
A new conversation marked with in the Session list indicates it requires agent assistance. To claim it:
- Select the conversation. The conversation opens.
- Click Claim.
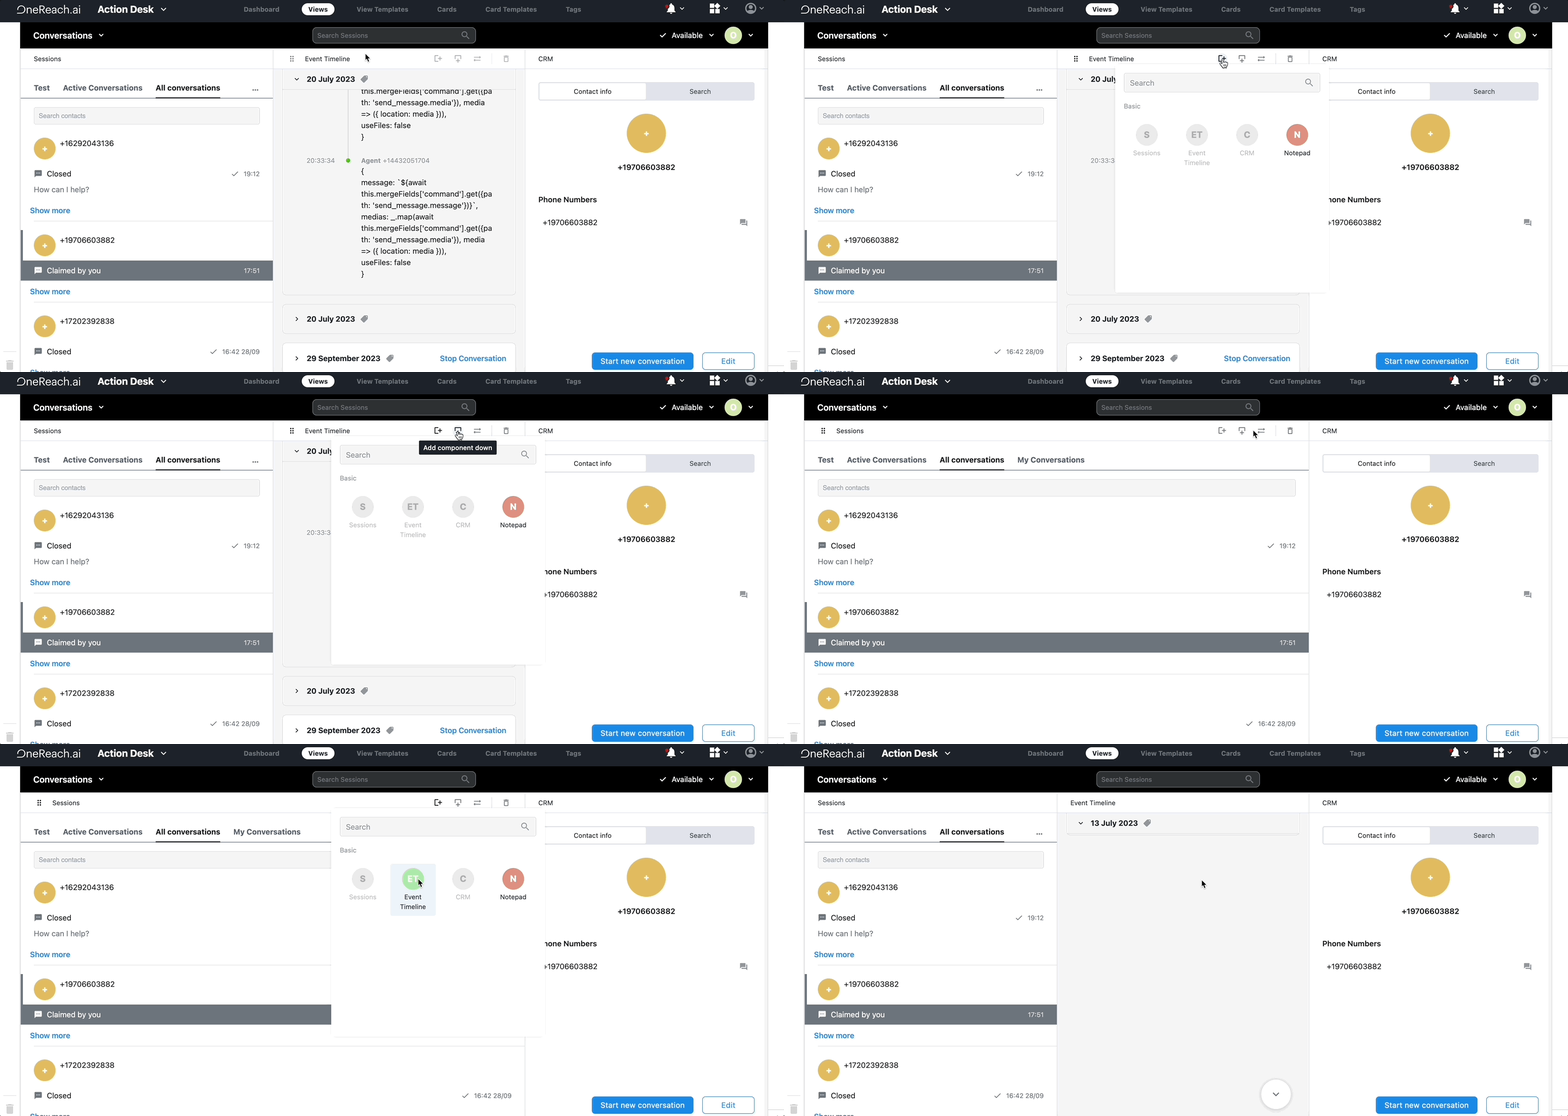
Rearrange components on screen
When you hover over a component, the following options become available:
drag the component on the screen
add new component to the right
add new component below
change component
remove component
Clicking options 2, 3, and 4 opens a popup to choose what component to add/replace with. If you have deleted a component but need to restore it, click either or
and then select what component to restore from the popup.
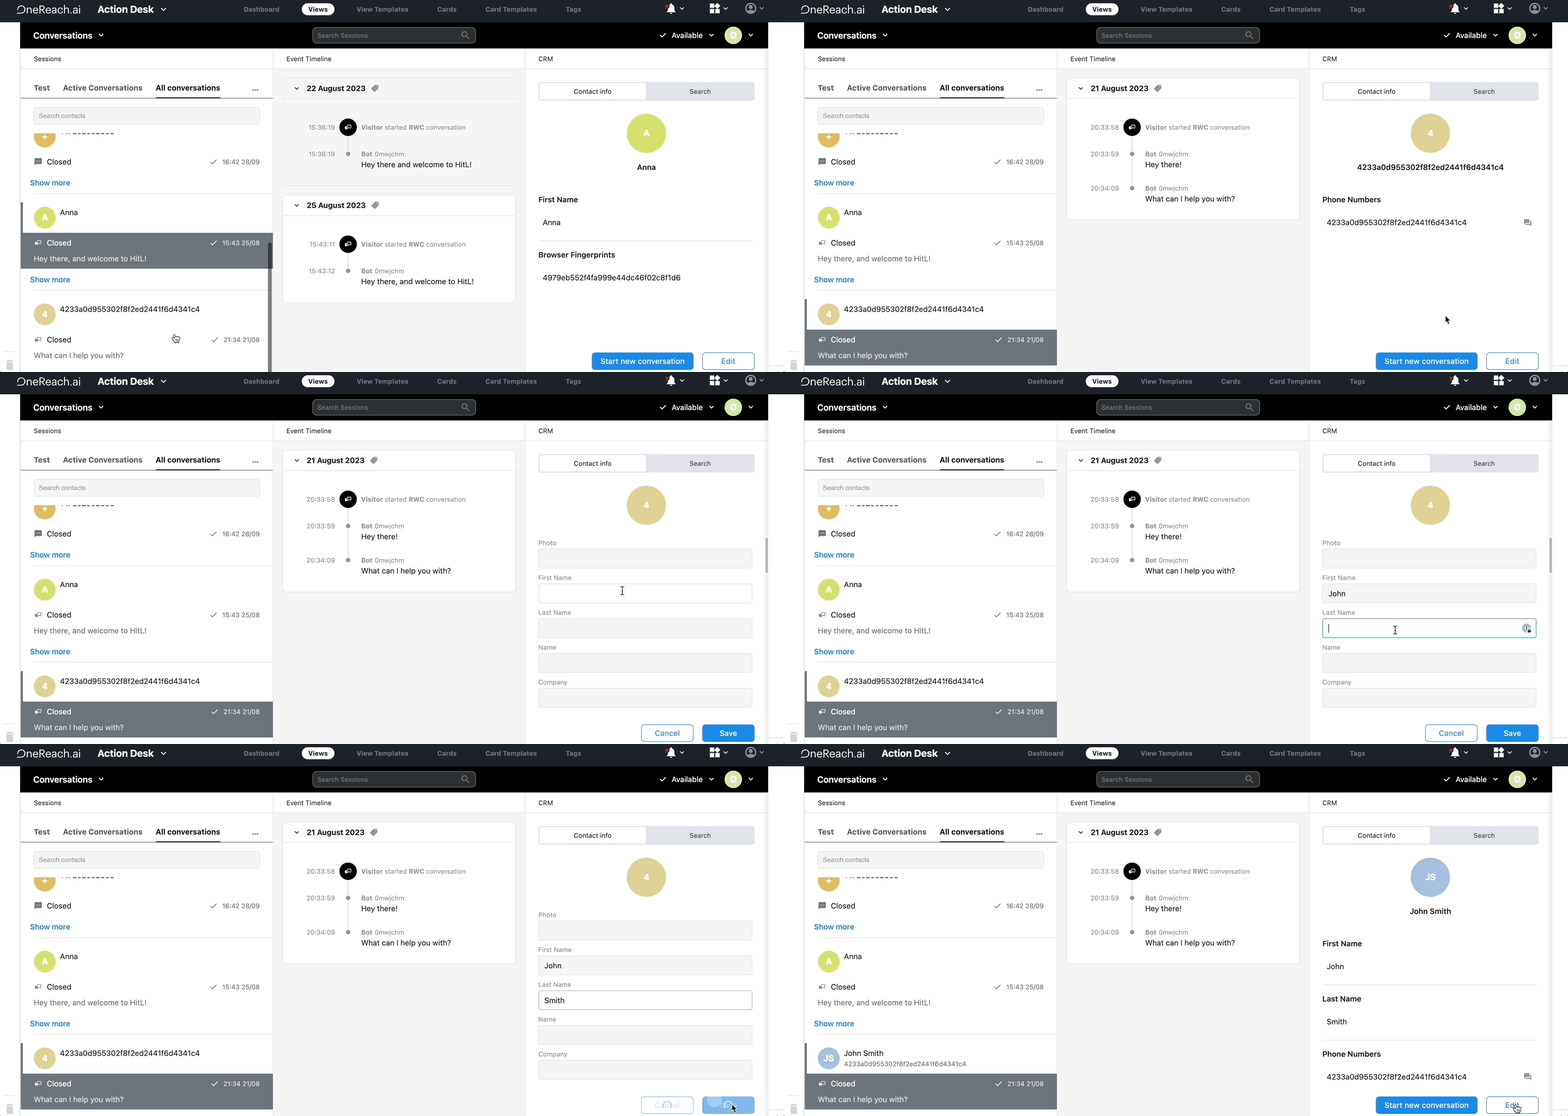
Edit contact record
To edit the contact record:
- Select the conversation from the Session list on the left. The Contact record management card opens to the right.
- Click Edit.
- Fill out/edit relevant information.
Delete contact record
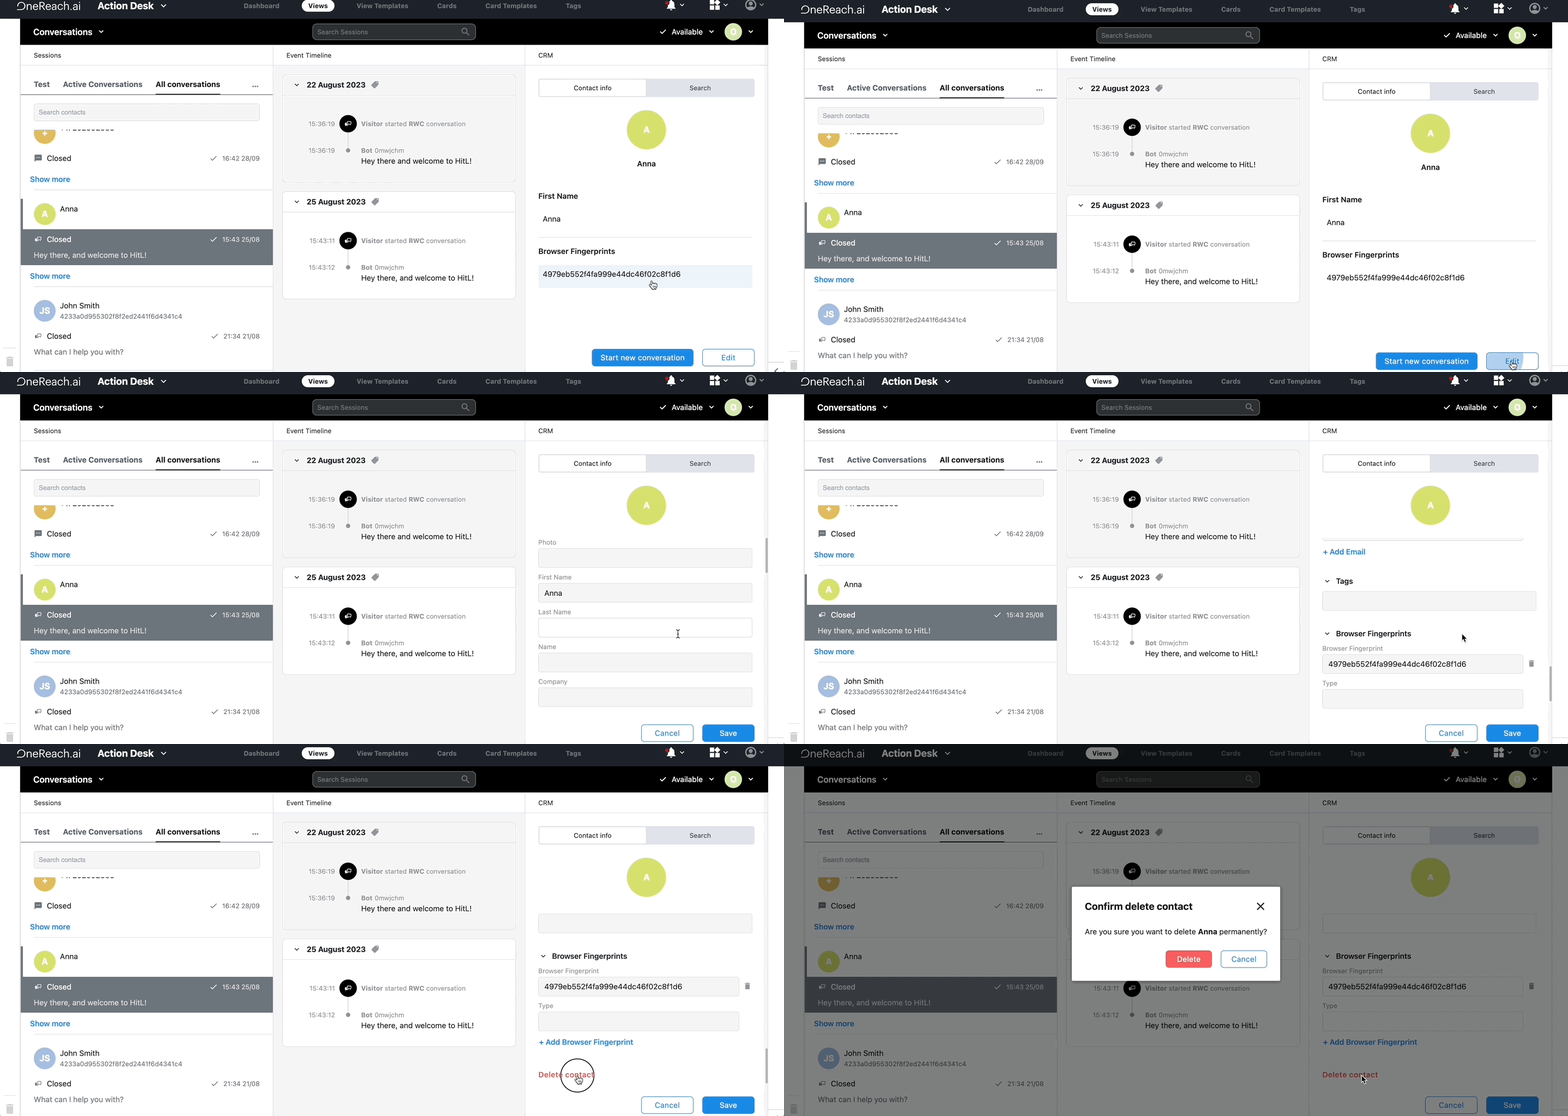
To delete the contact record:
- Select the conversation from the Session list on the left. The Contact record management card opens to the right.
- Click Edit.
- Scroll down till the very end.
- Click Delete contact.
- Confirm the action.
Merge & swap contacts
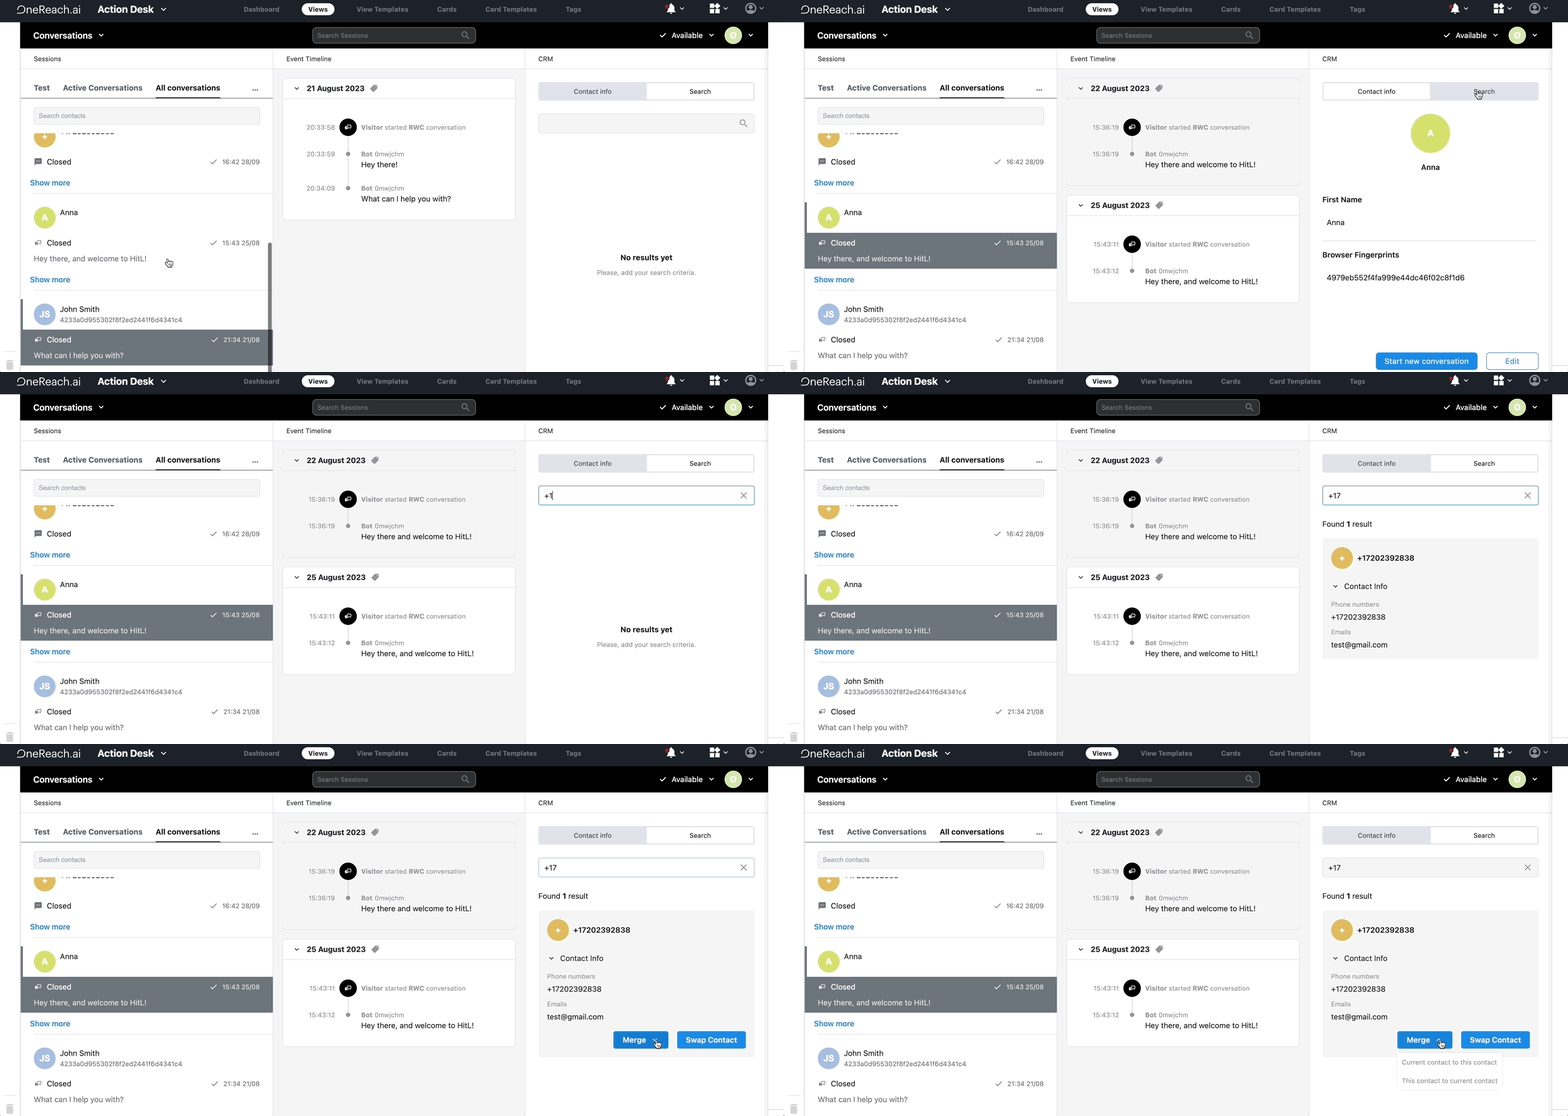
To merge contacts:
- Select a conversation from the Session list on the left that you would like to merge. The Contact record management card opens to the right.
- In the Search box, search for the second contact you want to merge. You can search by name, phone number, or email.
- Select the merge type: either merge the data from the current contact (on the left) to the contact on the right (this contact) or vice versa.
To swap contacts:
Perform the above steps 1 and 2. Then click Swap.
Set up notifications
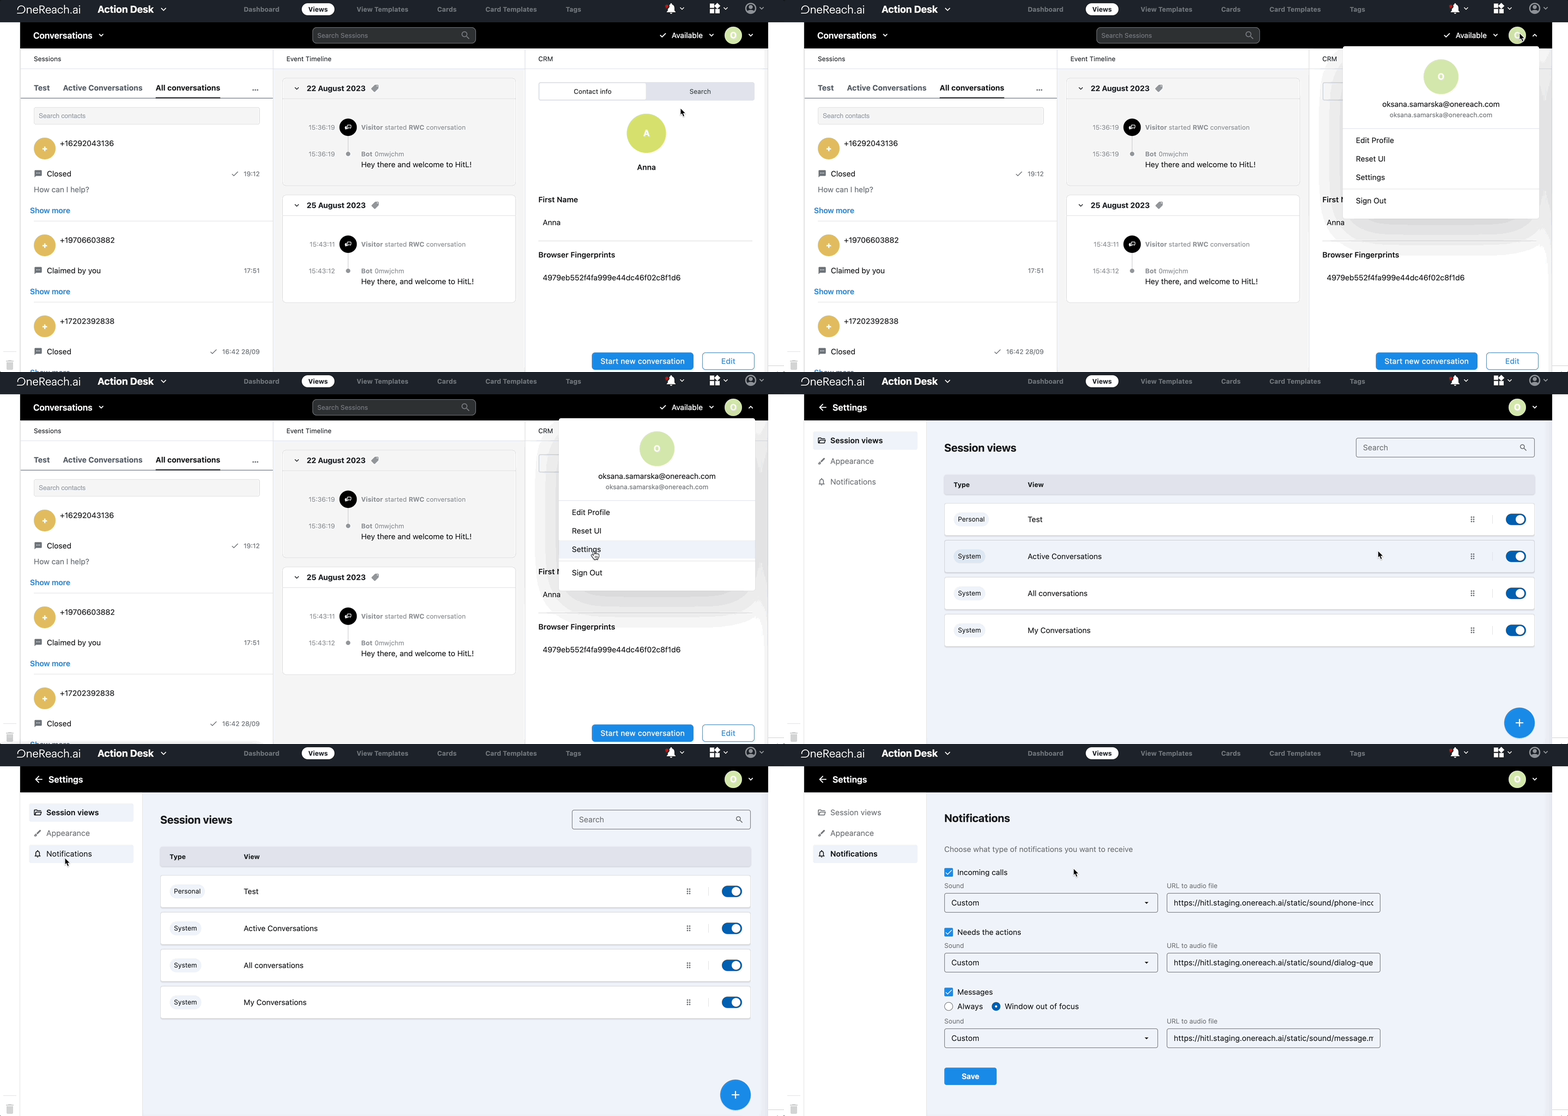
To set up notifications:
- Navigate to Agent information and click Settings. You will land on the Session views page.
- Open Notifications.
- Select the type of notifications to receive and the preferred sound effect
These are system notifications, but agents can customize them individually.
 .
.
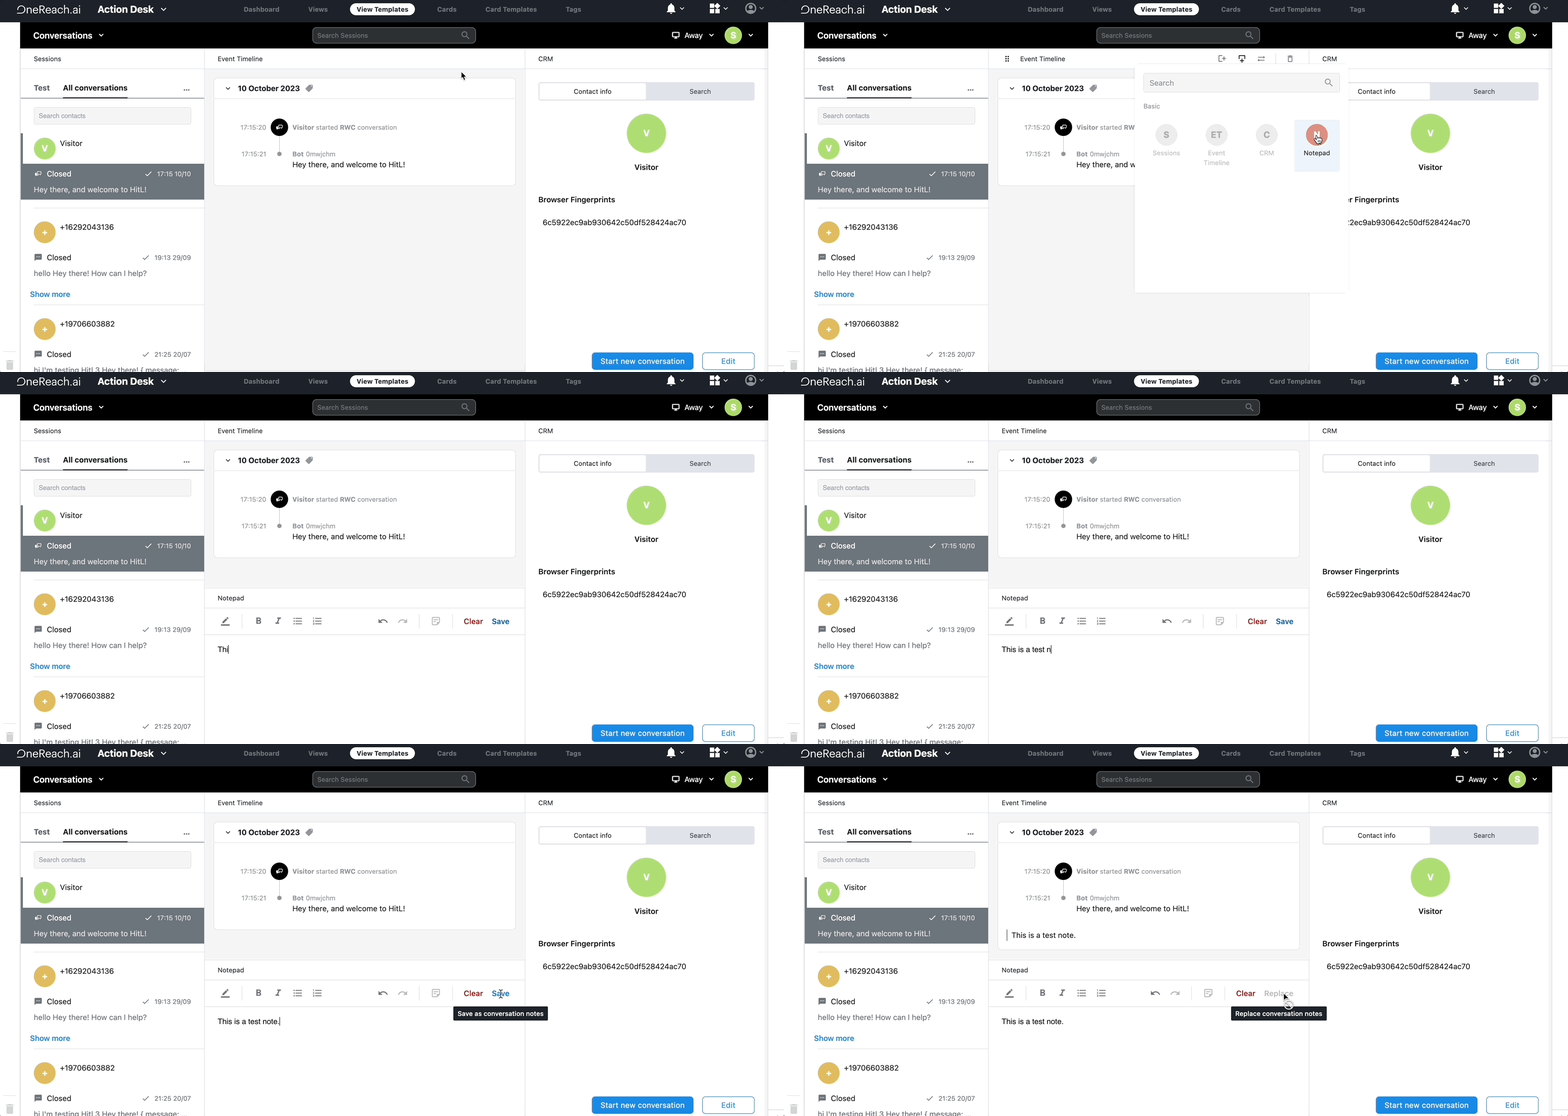
Add notes to conversations
To add notes:
- Select the conversation to add a note to.
- Add the Notepad component by clicking either of the two buttons:
or
.
- Add your note.
- Click Save.
Switch between layouts
To switch between layouts in the Agent UI:
- Navigate to the workspace the Layouts are part of.
- Hover over the layout.
- Click
.
- Click Select.