[HitL] Agent UI overview
The [HitL] Agent UI is the main View of the HitL UI. Through this View, agents can engage in conversations with customers, interact with any agent-level instruments set up via the UI customizer, and change a small subset of the overall HitL settings applicable to them individually.
Follow this link for some practical tips on how to work with the [HitL] Agent UI.
The [HitL] Agent UI View consists of four components:
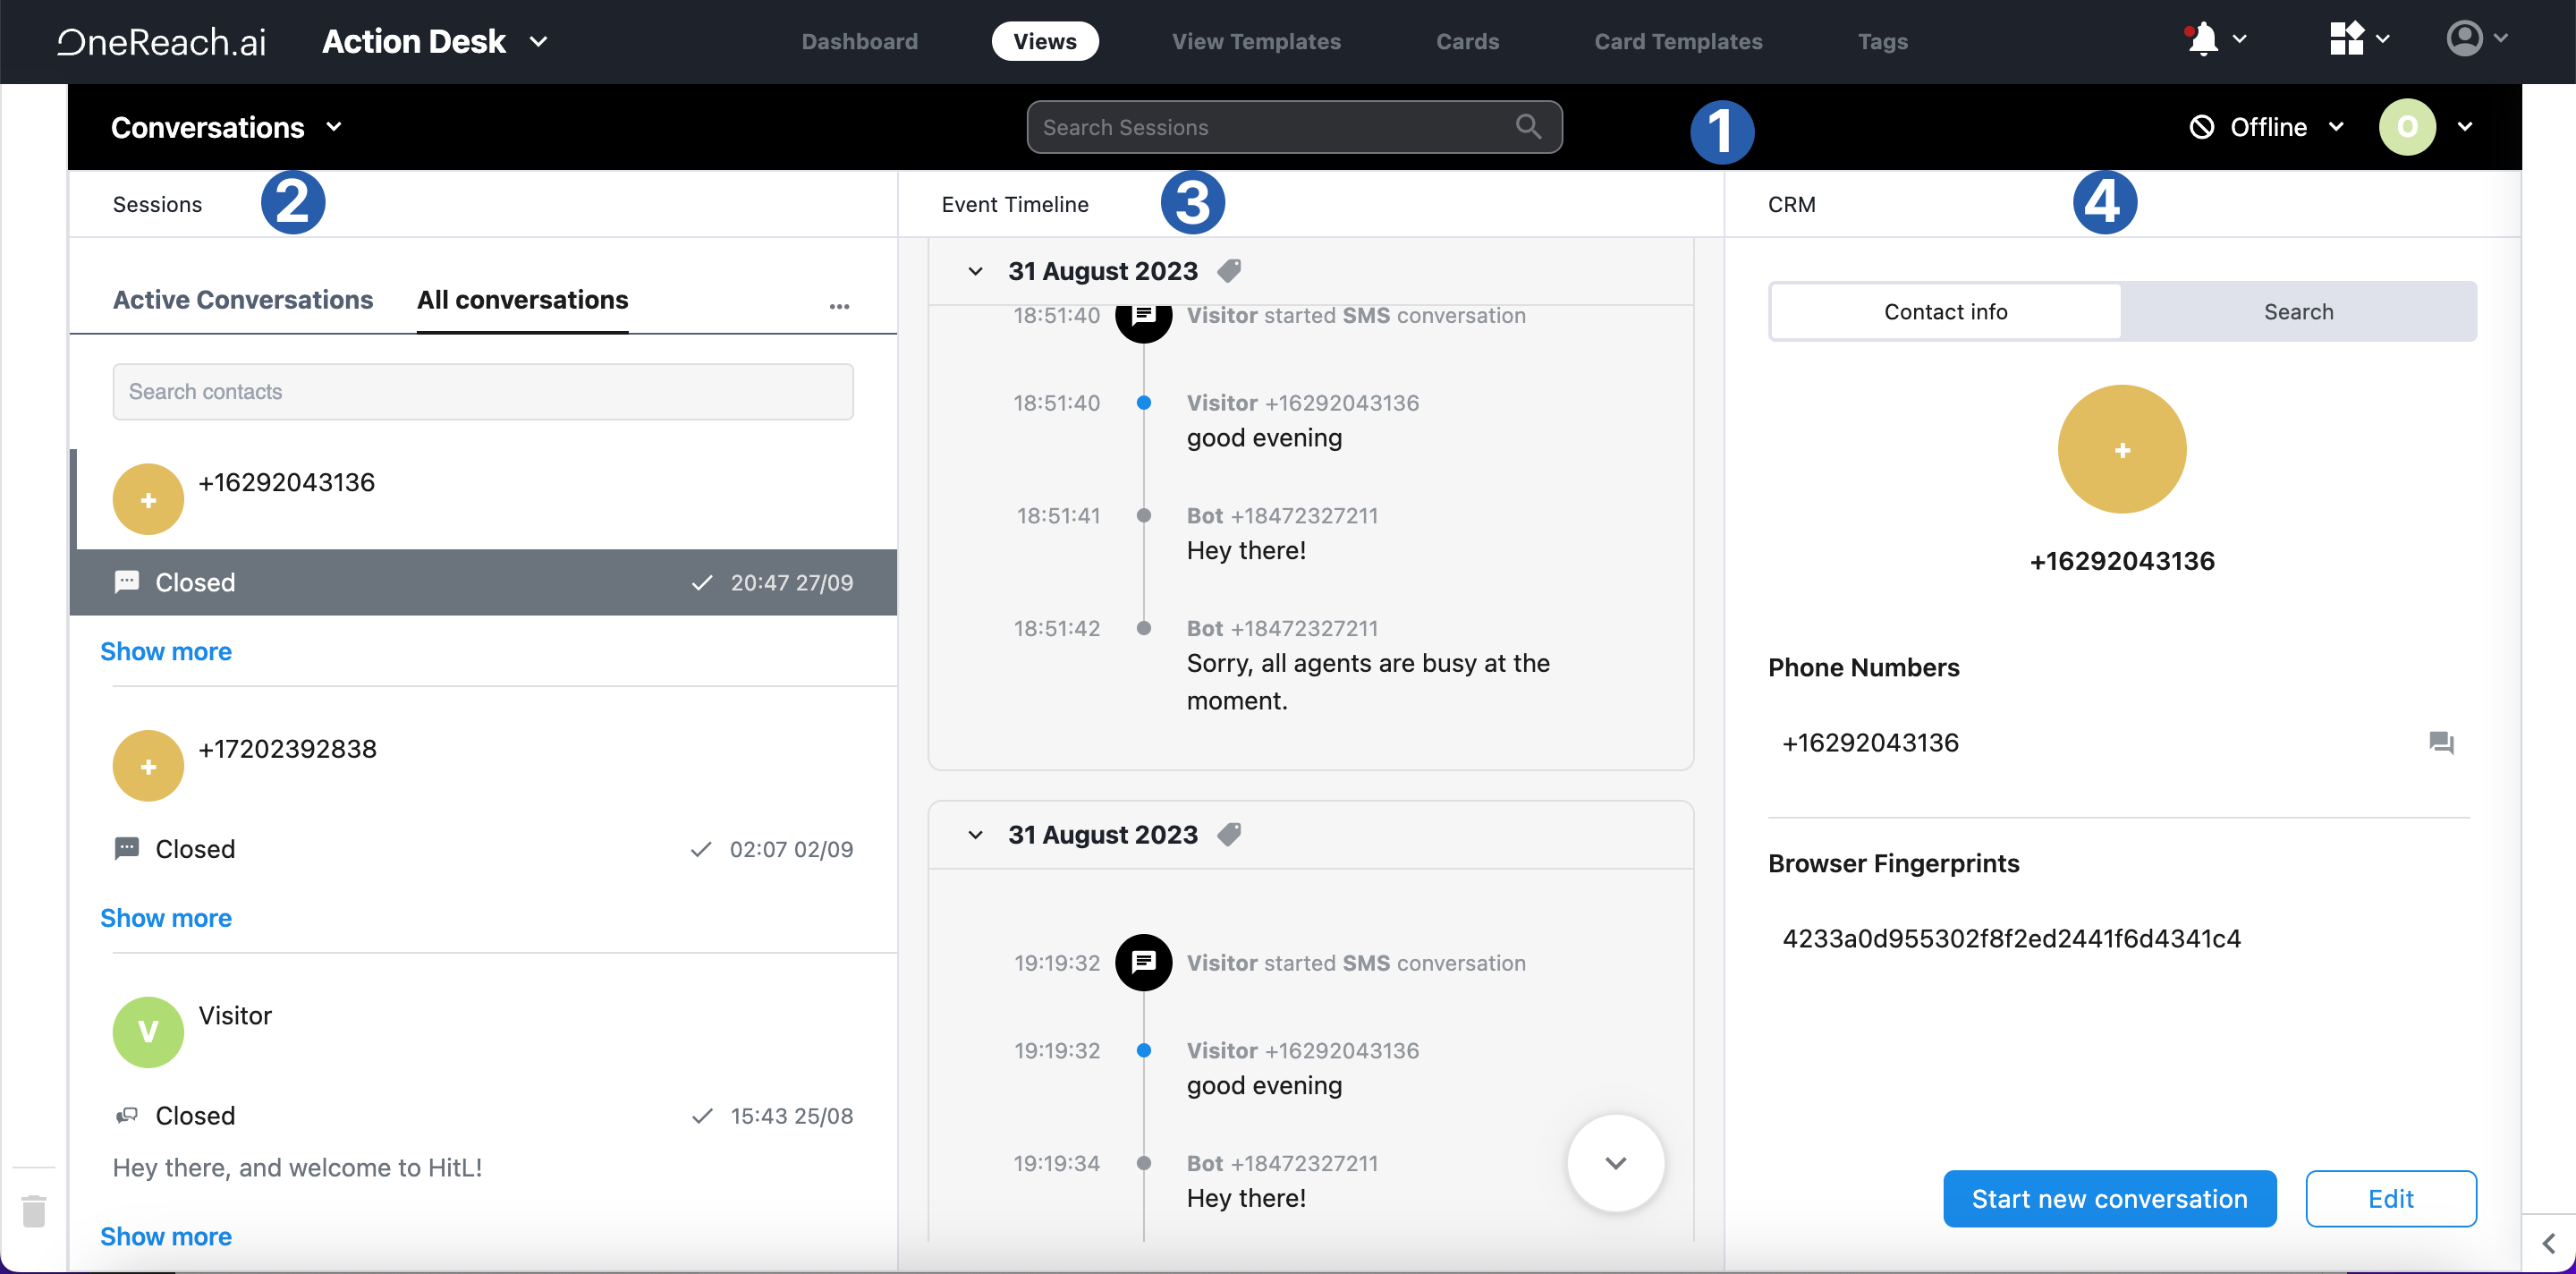
Header
The Header panel is the topmost section of the interface. It serves you to do the following:
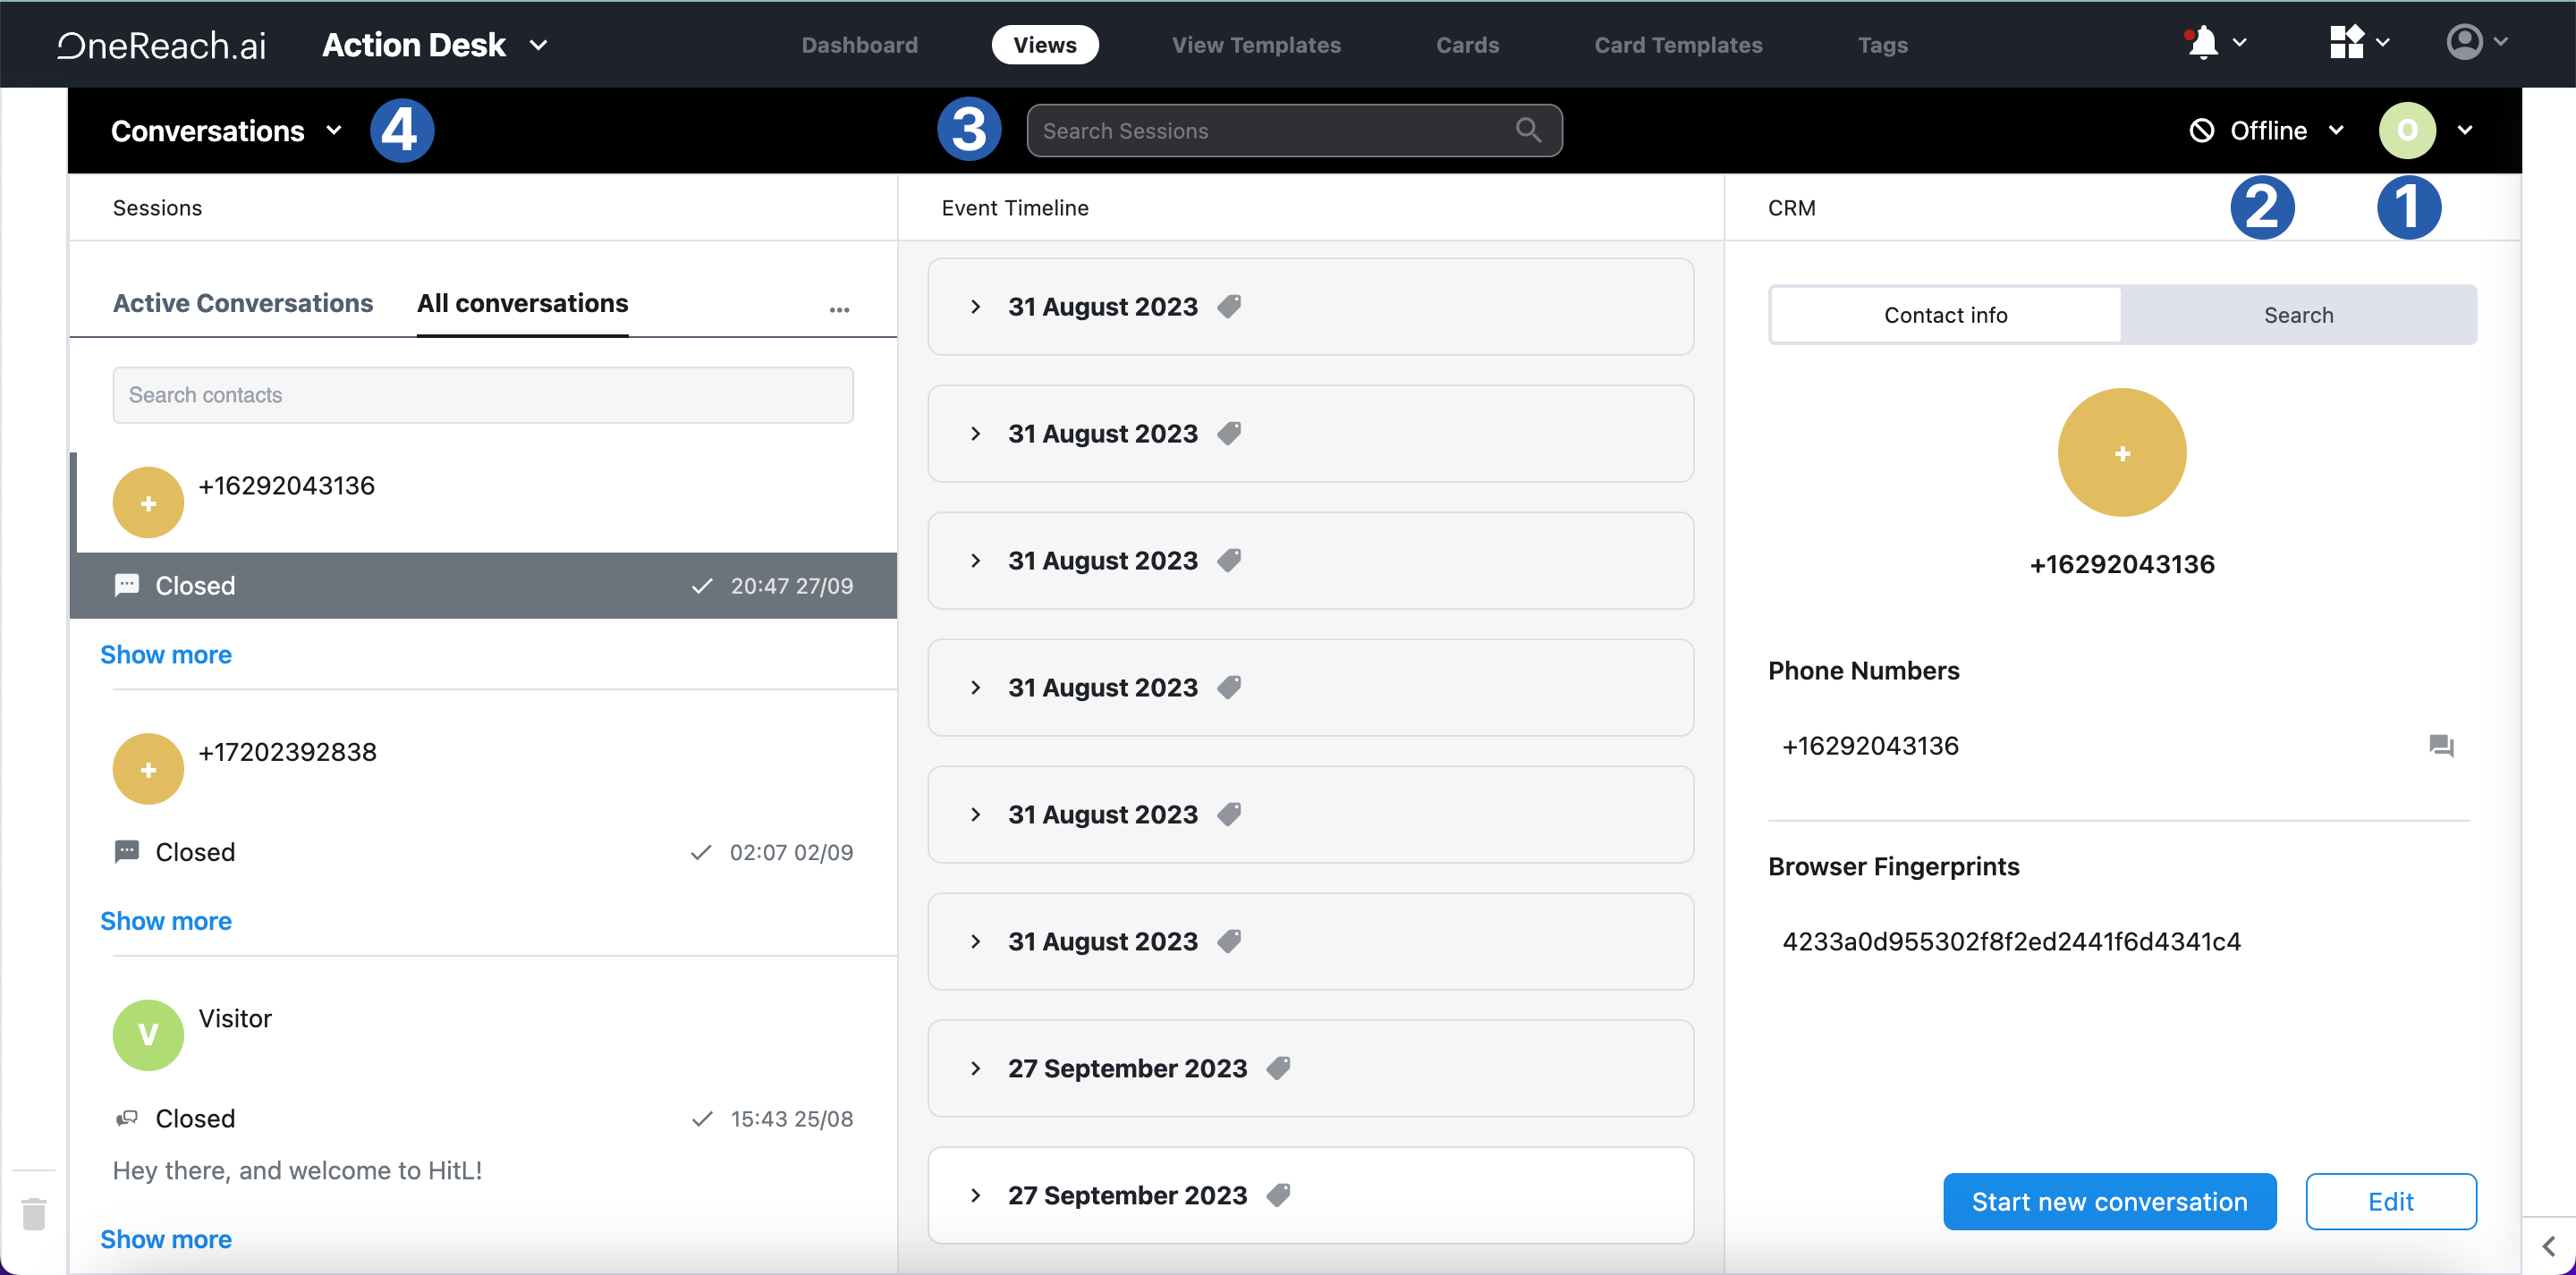
- (1) Agent information: edit your profile, reset the user interface (UI), access settings, and sign out
- (2) Status change: change the current agent status
- (3) Search box: search through sessions by text, date range, contacts, or tags
- (4) Workspace selector: define personal layouts and control which workspace and/or predefined component layout within that workspace you want to work with right now.
Session list
The Session list provides information on sessions and their associated contacts. If you enable the Auto-create Session option, the display will include both session and contact information. If this option is disabled, the list will only show sessions, with the most recent ones appearing at the top.
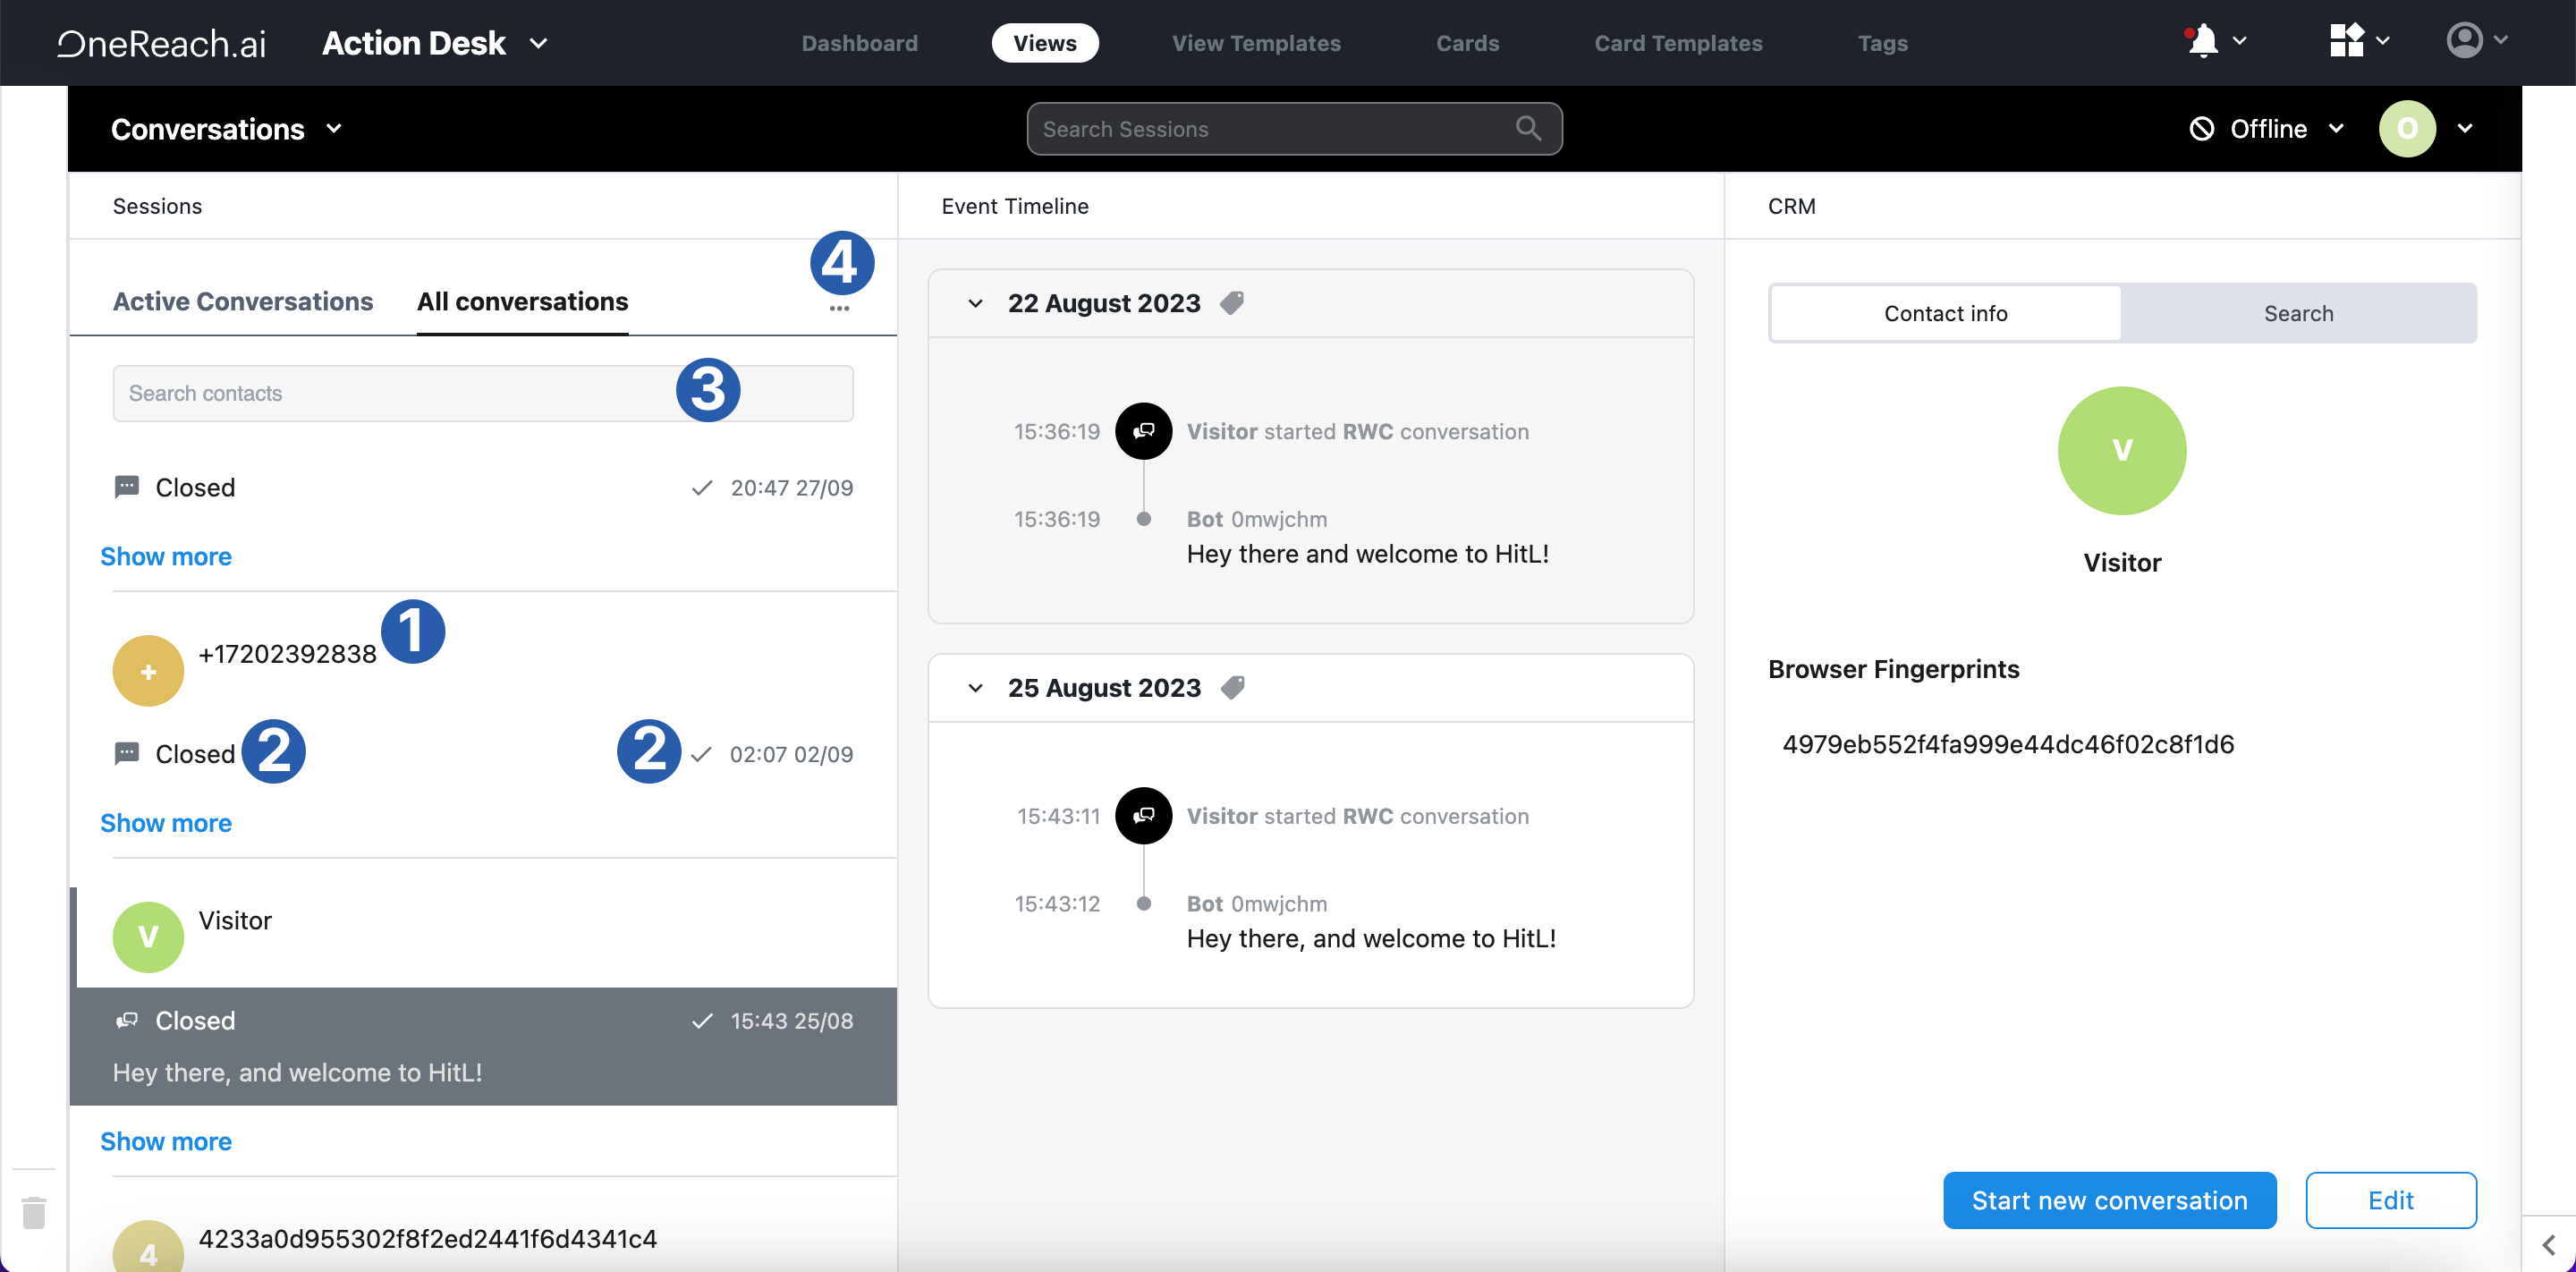
- (1) Contact record cards: a list of all contact records and conversations associated with that contact. You can find the following information on the Contact record card:
- Contact name: if the name is recorded in the Contacts database, if not - either phone number or "visitor" is displayed
- The (2) session information includes:
- Session status: shows whether sessions are open/closed/claimed/awaiting to be claimed (
- you have unread messages within that conversation,
- session is awaiting to be claimed,
- session is closed)
- Session type icon: shows which type the session belongs to - phone, SMS, RWC, email, HTTP, Slack, Skype, Viber, Telegram or WhatsApp
- Show more option: see the history of conversations associated with that contact record. The Show more option might not be available if you have the All active conversations filter on.
- Last message in this conversation.
- Session status: shows whether sessions are open/closed/claimed/awaiting to be claimed (
- (3) Search box: search for specific contact records by name, phone number, or email. This quick filter returns results based on the currently enabled filter. For instance, if you have activated the All active conversations filter, the search will only return information within that range of conversations.
- (4) Session view: configure how to view sessions. There are three system options to choose from:
- All active: see all active conversations
- All conversations: see all conversations, be it active or closed
- My conversations: see all conversations you were part of (ex., claimed by the agent or transferred to that agent)
Learn how to customize the Session list and define which sessions to view here.
Event timeline
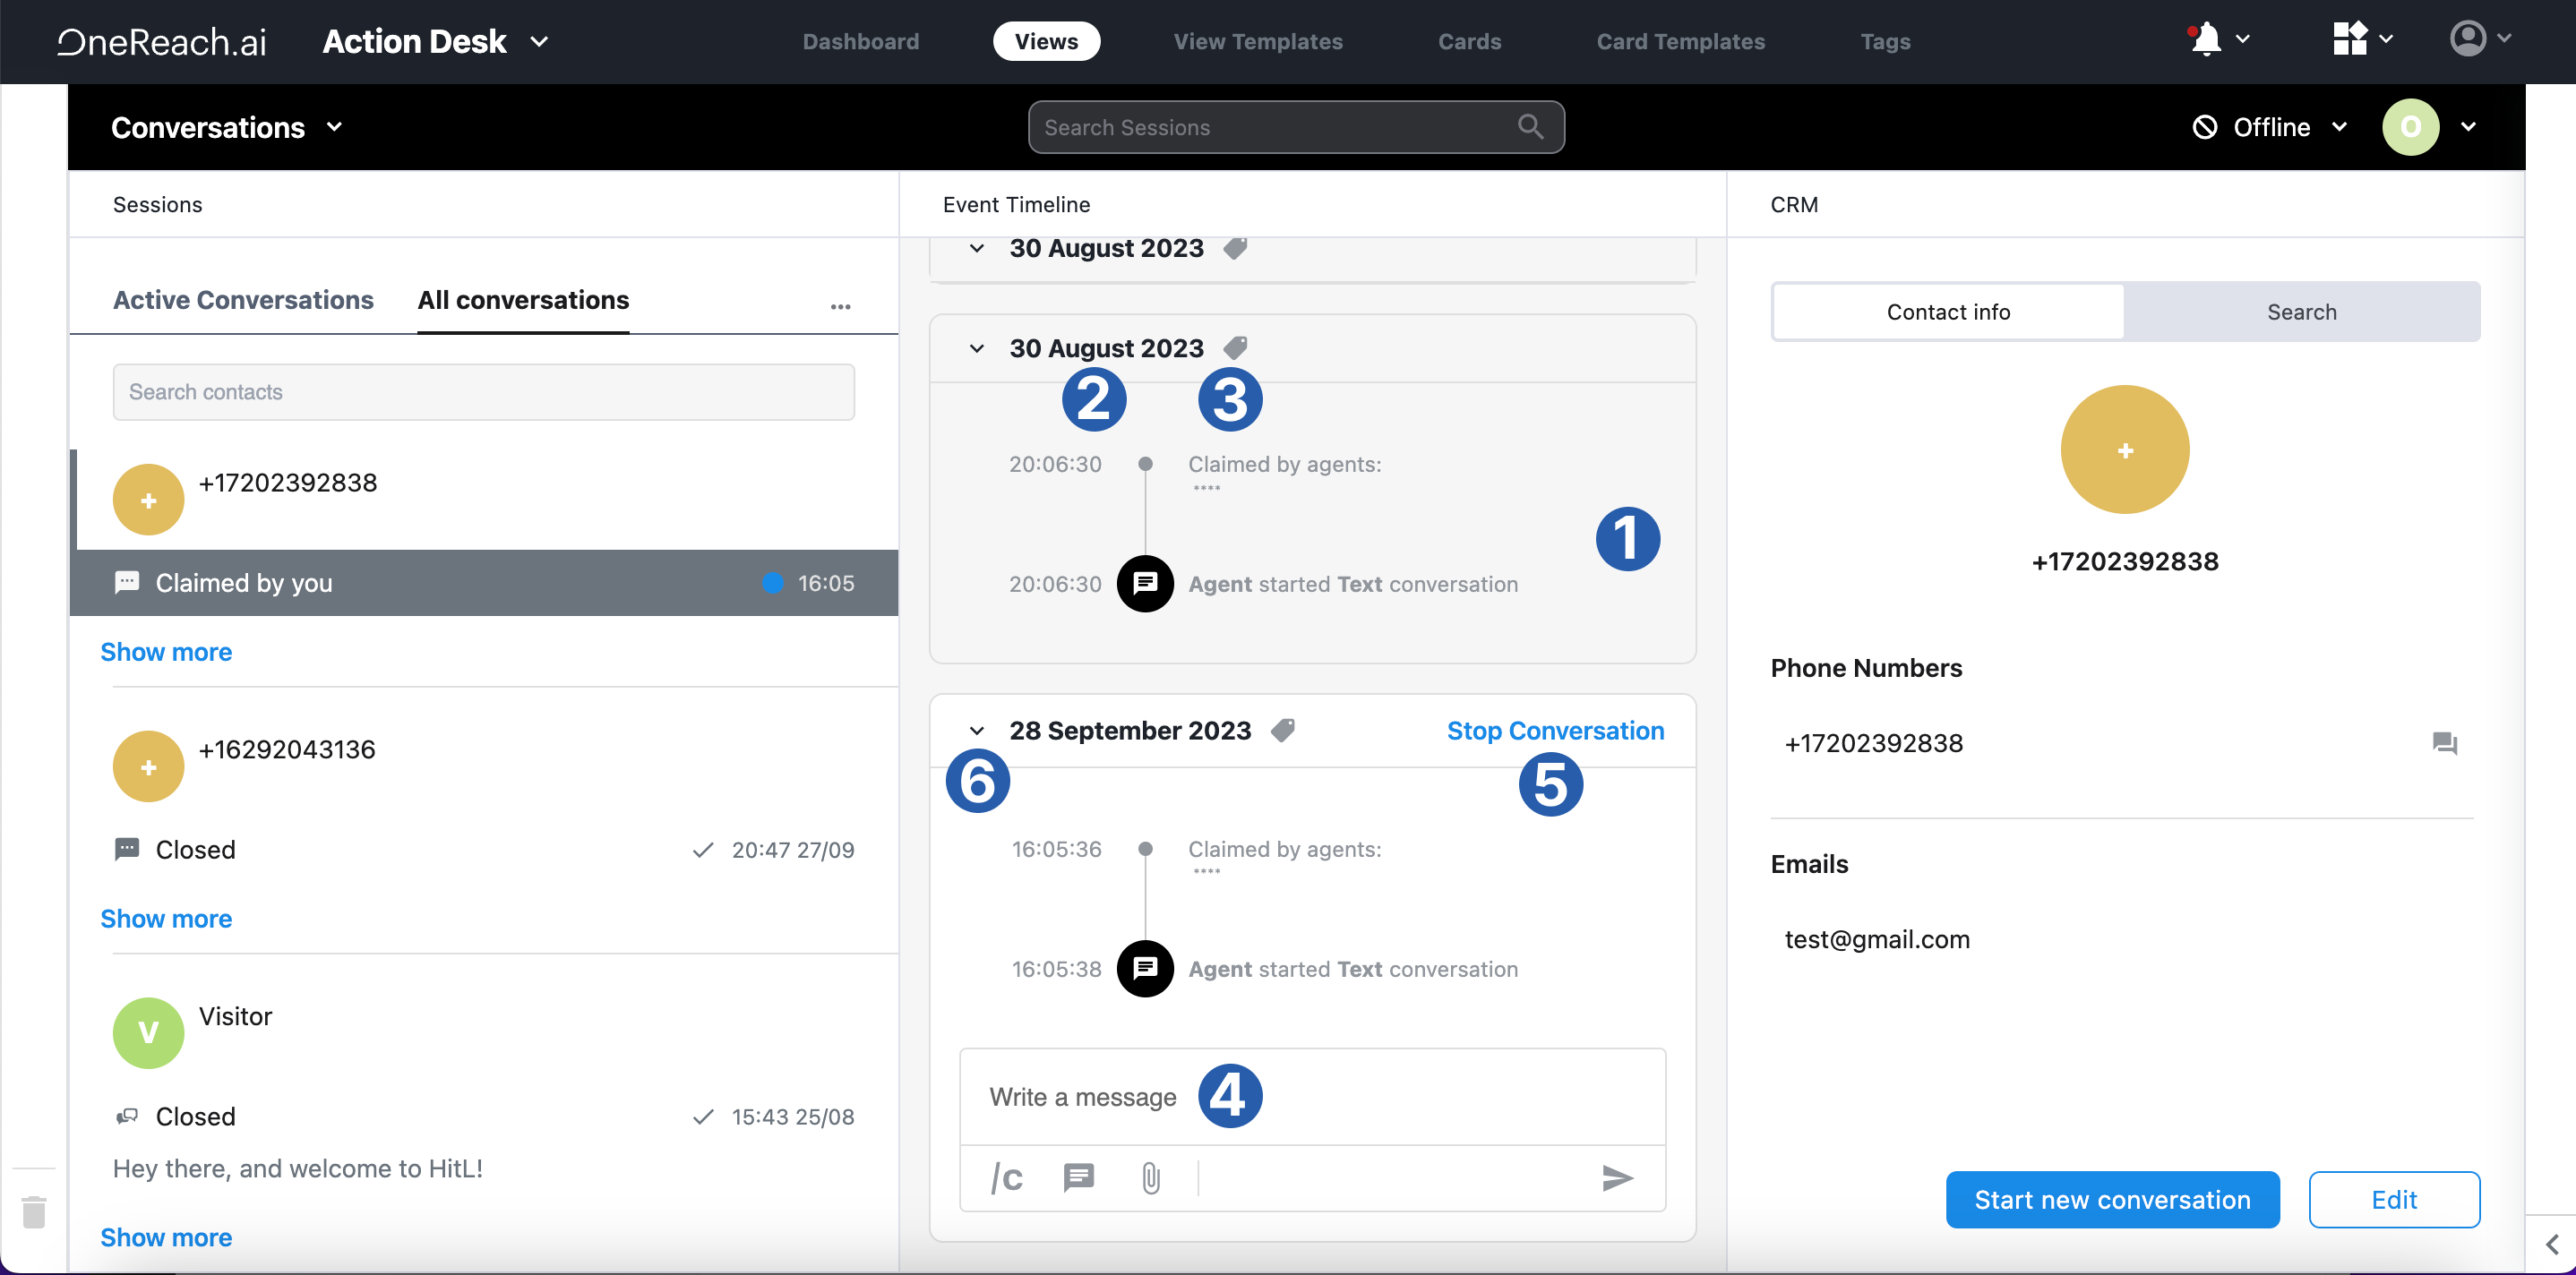
The Event timeline displays the history of interactions with a selected contact record. Each conversation is shown as a sequence of chronological events within its (1)Conversation card. Within the Conversation card you can:
- (2) Conversation start date: see when the conversation began
- (3) Tag button: add a session tag to a specific conversation. To learn how to add conversation tags, follow this guide.
- (4) Chat box: send messages if the conversation is still active (if not - only a list of
/commandsis available depending on the Flow logic) - (5) Stop conversation button: stop the conversation and transfer it back to the Bot. You can change the button name in the Pause Execution (HitL) Step in the Flow.
- Claim conversation button: appears when there is a new conversation for the agent to claim.
- (6)
: collapse the Conversation card
: go back to the selected Conversation card. This button appears when you start scrolling. If you select a Conversation card and scroll through the Event timeline, clicking this button will take you to the selected Conversation card.
The Event timeline's contents can vary depending on the Event templates and the Rule groups to which the agents belong. You will see a short summary of each session if the Flow uses the Manage Session Properties (HitL) Step. In this case, the summary appears at the bottom of the Conversation card.
Contact record management card
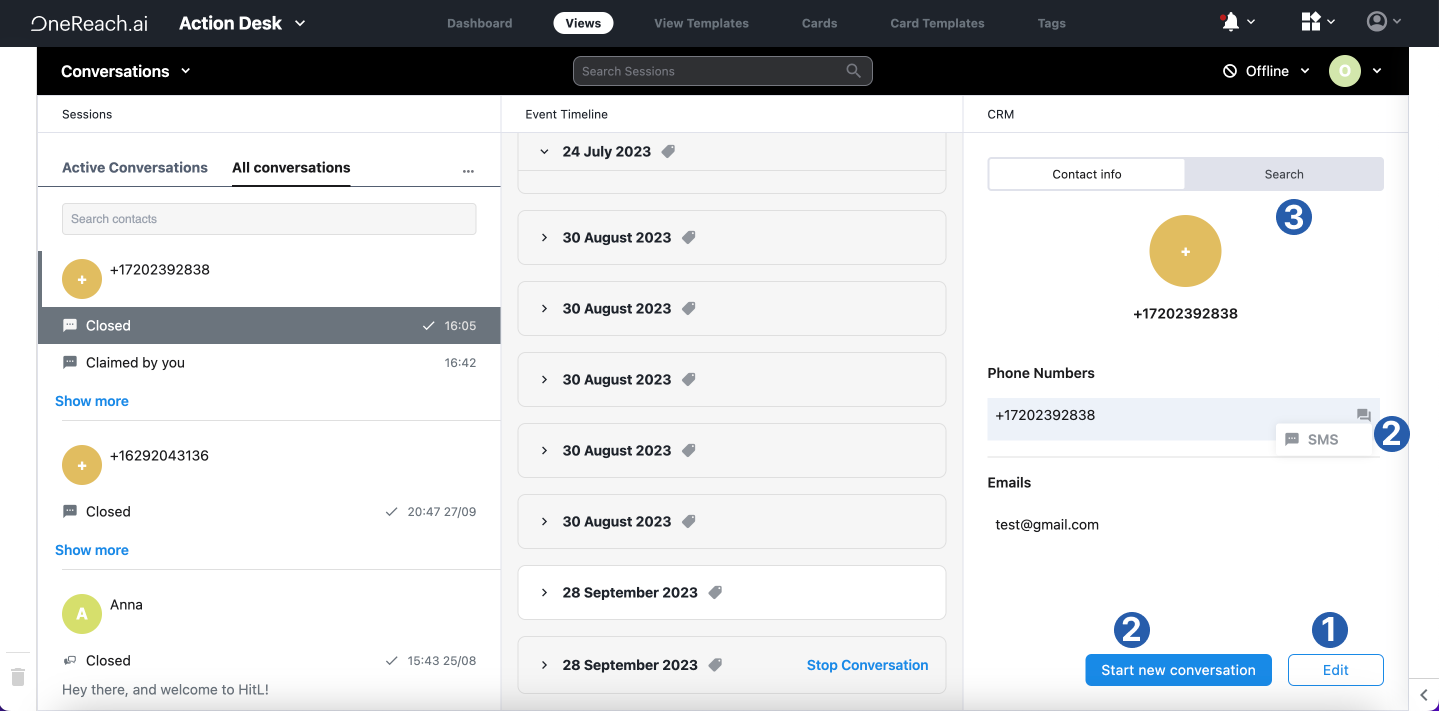 The Contact record management card allows managing and organizing contacts. For example:
- (1) See and edit the contact data (you can also edit data by clicking on it)
- Delete contact record (the Delete button appears after you enter the contact edit mode by clicking Edit)
- (2) Start a new conversation with that record
- (3) Search all contacts by name, email, and phone number
- Merge or swap contacts. For example, to associate multiple phone numbers with one contact. Learn how to do both here
Call control popup
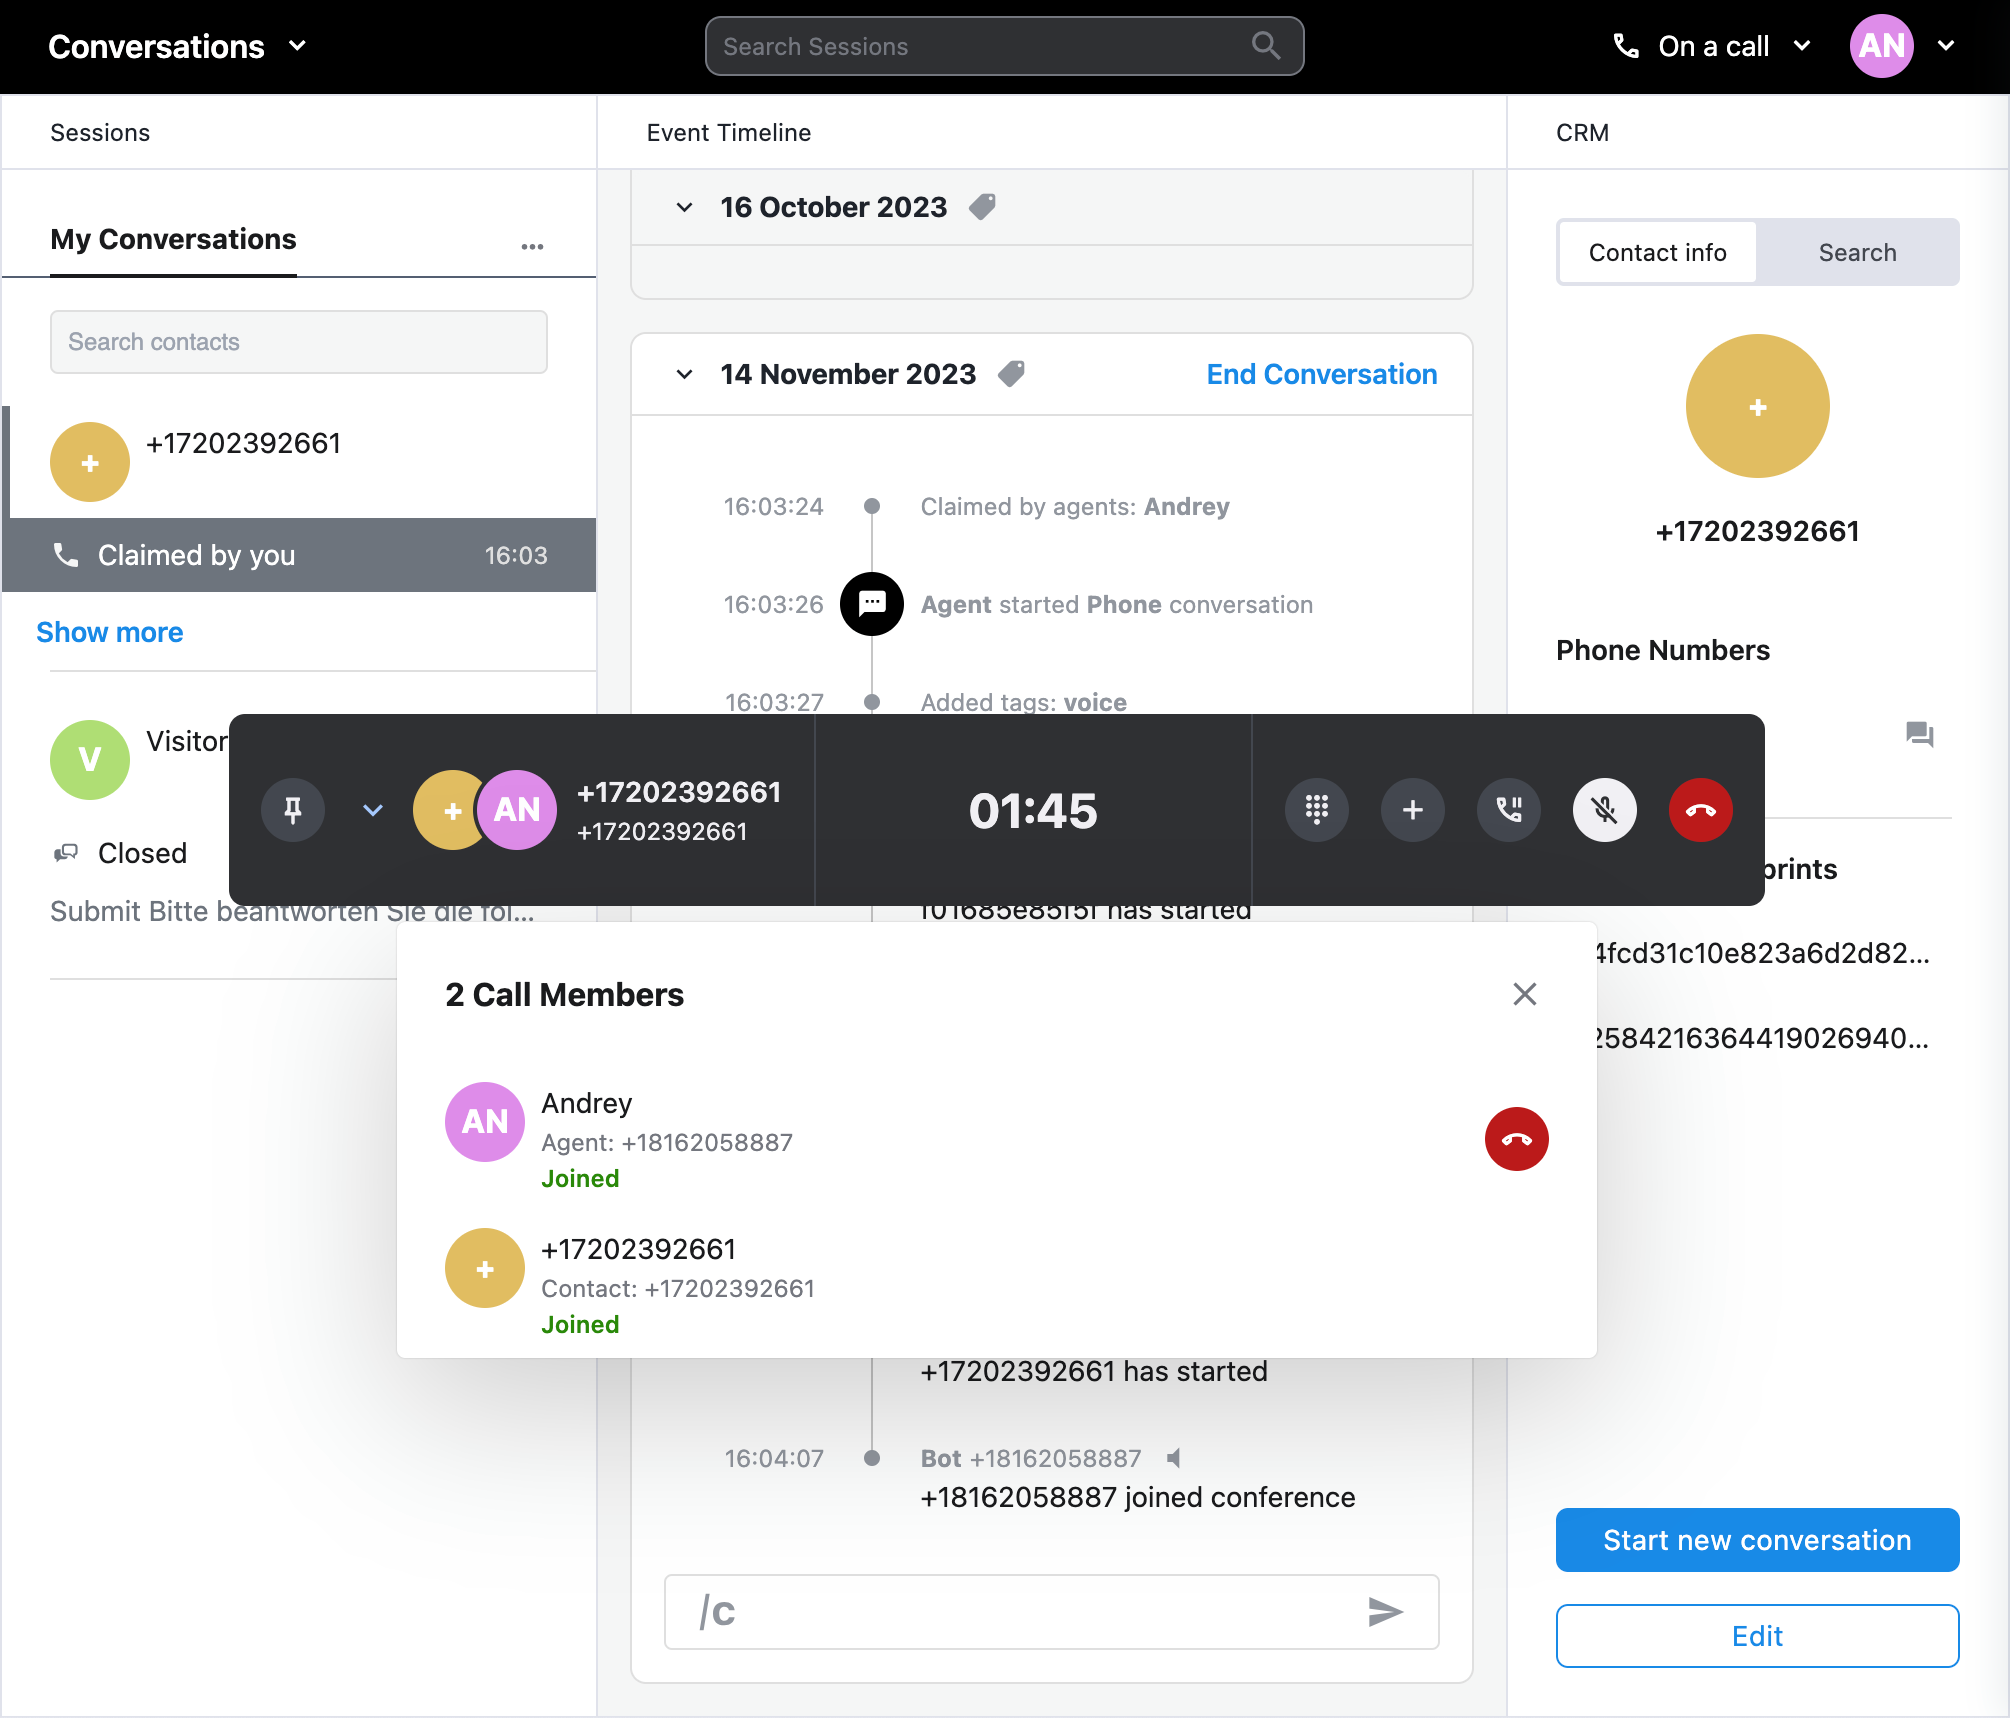
The Call Control popup appears on the screen to manage ongoing calls. It provides basic controls for voice conversations, such as ending the call, muting it, putting it on hold, adding other agents to the ongoing call, and accessing the dial panel.
When you add other agents to the call, another popup appears with a list of agents to select from, or you can enter a phone number.
The popup also displays the avatar of the contact you're on the call with, the call's start time, its duration, and a dropdown list of all members with their statuses. If multiple agents are on the call, you can mute them and end the call on their behalf.
