On this page
Request Response (RWC)
Read the overview on what to use the Step for in the Convert communication scenarios into messages article.
Use the Step to send a message to a chat user in a specified RWC conversation. The Step works together with the Wait for Chat (RWC) Step template. When Request Response (RWC) is reached during Flow execution, it sends the message to the chosen conversation, receives the user’s reply, and proceeds down the next leg.
Message content
To create the outgoing message, choose an input component and fill in the necessary information. Each component’s settings and limits are described in the input component field under the Info icon.
Text input component
A text message has no limit on the number of characters and will not be truncated. However, for user-friendly purposes, the suggested limit is 320 characters.
Fill in the Text field manually and/or with Merge fields by clicking {x} icon. Note, that using the Merge field values makes the length of a message unknown.
You can format the text by inserting HTML into the message, for example: Look it up on <a href='https://onereach.ai/'> OneReach.ai</a>!. It will create a link to the OneReach.ai.
To customize text or add images, use HTML tags and inline CSS styles.
To insert an active URL in the text, use http:// or https://.
Add and render attachments as media or files
You can attach the file to the content of your message and choose how to display it in the chat: as media or as a file.

If the media option is selected, attachments, that can be parsed as media (images, videos and audio files) will be joined and transformed. Images in the RWC UI will be wrapped into the gallery component with zoom and save options. Video and audio files will be presented as a media player. If it's not possible to parse the file as a media, it will be presented as a default file.
If the files option is selected, every file is shown as an attached file, including images and videos.
Allow manual user response
You can allow the user manually to type their reply instead of choosing a predefined input component. Enable the toggle and the Step will get a new Manual response leg. Whenever the chat user chooses to reply by typing their answer instead of choosing a predefined reply, the Flow will proceed down the Manual response leg.
Note that for the Text and Files input components, the user is expected to manually type their reply. In this case, this option is on by default, and the Flow will proceed down the next leg.
Suggested options creation method
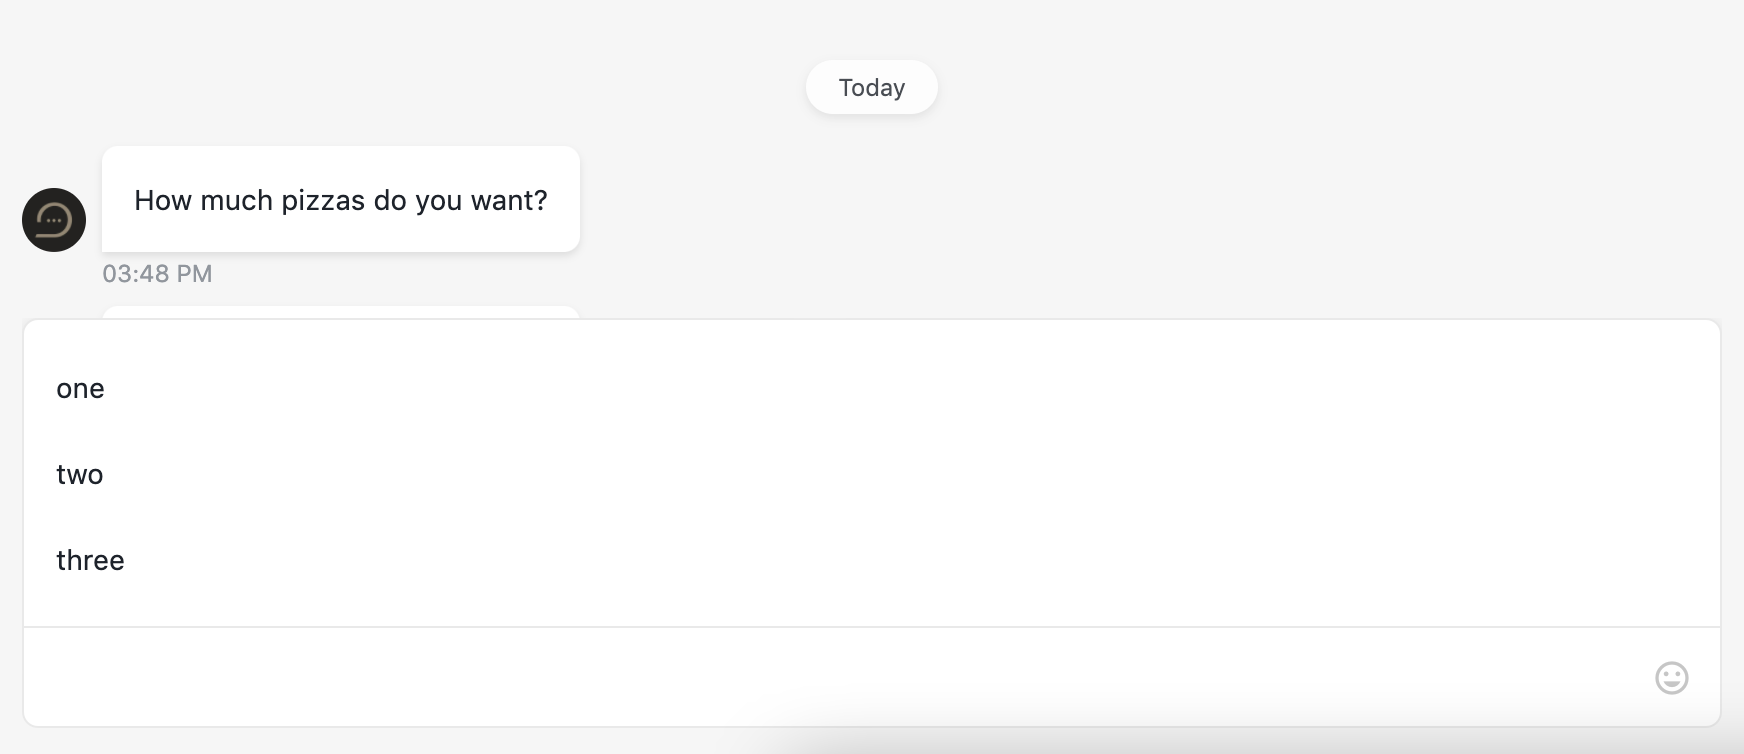
Manual user response can contain prewritten answers to provide the chat user with auto-suggestions for their manual reply. You can set auto-suggestions in two ways:
- Prewrite them in the Step. Switch the Suggested options creation method to Create list.
- Set them dynamically via Merge fields. Switch the Suggested options creation method to Set values dynamically.
Once the user focuses on the Text input field of the chat, auto-suggestions will appear.
Input type of the Text component
Text input component supports several input types:
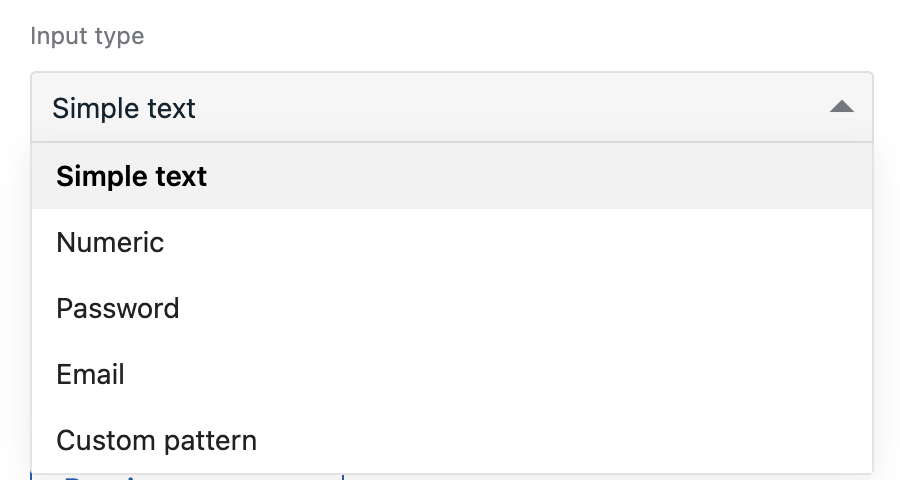
- Numeric allows user to enter only numbers
- Password hides user reply will with
* - Email suggestes to autofill if the user has any saved emails in the browser
- Custom pattern allows only to add formatting for requested data and doesn't provide validation for it. To specify pattern symbol use next chars:
js
# - only digits (0-9)
X - [0-9a-zA-Z]
S - [a-zA-Z]
A - [a-zA-Z] will transform to UPPER CASE
a - [a-zA-Z] will transform to lower case
! - escape char pattern and use as a regular symbol
# - only digits (0-9)
X - [0-9a-zA-Z]
S - [a-zA-Z]
A - [a-zA-Z] will transform to UPPER CASE
a - [a-zA-Z] will transform to lower case
! - escape char pattern and use as a regular symbolFor static suggestions in the Dynamic and Code mode, the Merge field structure is the following:
js
[
  { text: `one` },
  { text: `two` }
]
[
{ text: `one` },
{ text: `two` }
]Validation
When the Text input component is chosen or Allow manual user response toggle is on, you can add validation for the user response by turning on the Add validation toggle.

DANGER
The validation is running on the client side. That is why the server side can not completely trust those checks. So it is still necessary to double-check sensitive and critical things in the Flow. It is also unsafe to pass sensitive data, for example, passwords, in 'validation' functions or custom validation variables.
Only one help text and numerous rules are available for validation in one Request Response (RWC) Step.
In the chat, validation becomes active once the chat user submits the input element. Error state disappears after any input.
There are two types of validation rules for now: Character limits and Custom. the rest of the types are based on Custom. They are available to use as examples of functionality. 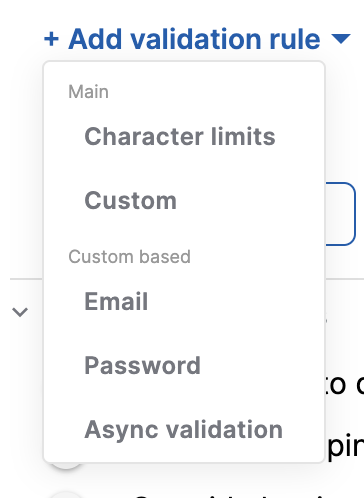
Once the first not-valid condition is met, validation stops. The error message for this condition is shown above the input.
TIP
There could be conflicts between these functionalities:
- validation
- input type
- predefined text
- suggestions
Be careful about exclusionary conditions in these options.
Character limits validation

This type of validation allows to validate number of characters in the user reply as minimum, maximum, both, or exact number. At least one field is required. For the exact number of characters fill both fields with the same number. There could be just one Character limits rule for a Step. The error messages here are predefined and can't be changed. The client-side in error condition of this looks like this:

Custom validations
It is possible to write your custom validation functions with a custom error message for each. There is no limited number of custom validation. There are a few predefined examples of custom validation ("Email", "Password", "Async validation"). You can use them directly or base your own validation on them by changing predefined values (but templates wouldn't change for future use).
What is possible:
- using basic js syntax, write additional functions inside the main one
- using async/await
- using built-in basic js asynchronous functions like
fetchorsetTimeout - using external API with
fetchsyntax (the example of using it is inAsync validationitem in the menu for adding the new validation rule) - use variables that we pass in "Variables for custom validation" block (it's appearing when you choose at least one custom validation)
- change a predefined custom function
- using multiline syntax for the error message
What is not possible:
- importing anything, using external npm modules
- using merge fields in the validation function directly (but you can pass them in "Variables for custom validation" and use those variables in a function)
If you use async validation rules they are running synchronously (one after one) without creating the race condition. You can use character limits validation along with customs.


Custom validation variables
Since we have some restrictions in the validation function, passing variables here could be helpful. Merge fields are available here. Value has to be a valid js-expression. If you have a few custom validations these variables are available in each of them. 
Examples:
To request 4 last credit card digits, use the pattern: !#!#!#!# !#!#!#!# !#!#!#!# !#!#!#!# ####
When the chat user adds digits (e.g. 4444), text input and submitted data will contain: #### #### #### 4444
To request a phone number for a specific country code, use the pattern: +1 (500) ###-##-##
When the chat adds digits (e.g. 1234567), text input and submitted data will contain +1 (500) 123-45-67
Preview the message right in the Step
The Preview message button allows you to see how the user will see the message in the chat.
Advanced settings
Allow message reaction (Like/Dislike)
Turn on the toggle to let the chat user leave Like or Dislike reactions to this message as well as additional feedback in case of Dislike.
When the feature is enabled it creates the like and dislike legs for the Step. If the like or dislike leg has any RWC Steps, this leg must end with the Return to Main Thread (RWC) Step. If the like or dislike leg does not have any Steps or has non-RWC Steps, no need to add extra Steps to reroute a chat user to the main Thread because no RWC message exchange takes place in this like or dislike leg.
Find details at Turn on Like and Dislike user reactions to the message article.
Allow to override reaction
When Allow message reaction (Like/Dislike) is enabled, the Allow to override reaction toggle becomes available:
- If Allow to override reaction is off, the chat user can react to the Step message only once.
- If it is on, they can react to the Step message every time the Step is executed in the Flow. For example, due to iteration or redirection with the Go to Step or Anchor Step. So you can handle every reaction separately every time.
Find details at Overriding reaction for multiple executions of the Step.
Show copy button for the message
The toggle is off by default. Turn it on to add  buttons to the bot's message and the submitted user reply message. The button only shows and works for the messages that have the
 string data type in the bot's message and/or the submitted user reply message. By clicking the button, the chat user can copy the text content of the message.
Find the eligible messages for the feature and other details in The Copy button in the message article.
Send message in view mode
Some components have a view mode. In this mode, the Step doesn't wait for and can't receive any reply from the user. It is similar to sending a message with the Send message Step but using the components of the Request Response Step.
You can send only the following components in a view mode:
- Cards
- Checkboxes
- Radio buttons
- Range or single points
- Date
- Geolocation
- Audio playback
- Video playback
- Reorderable list
WARNING
If you enable the view mode, validation and field requirements remain active in the Step.
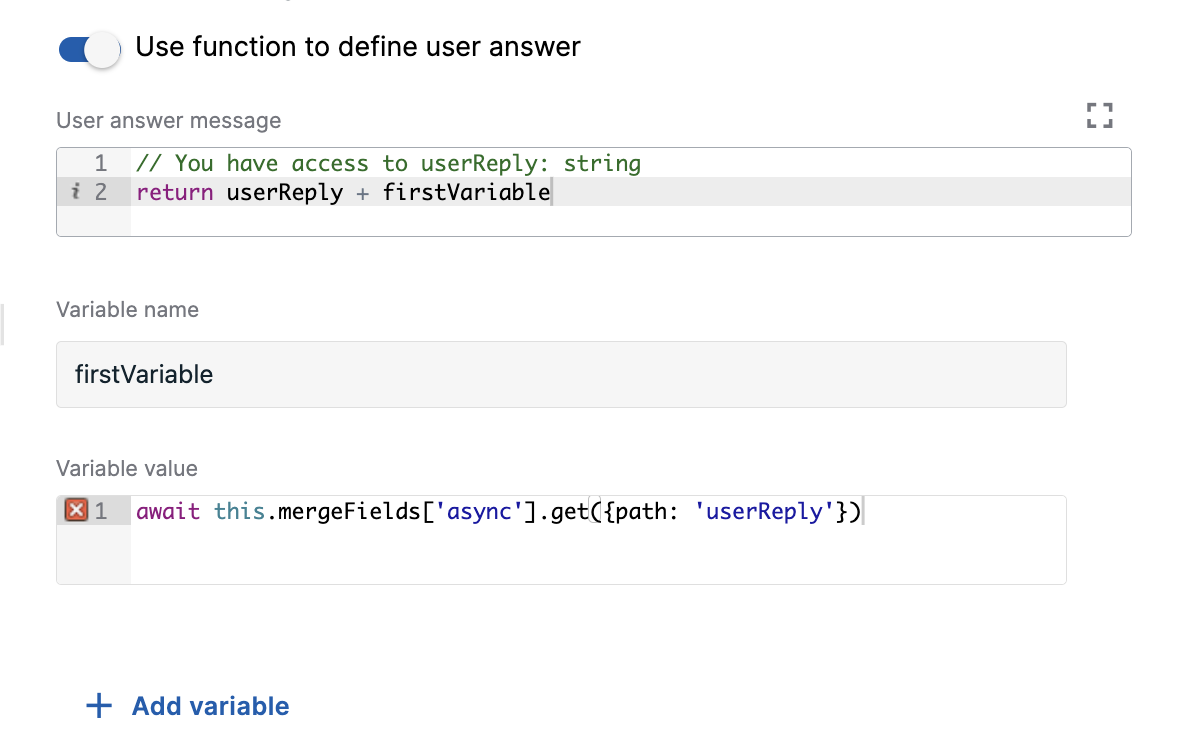
Use function to define user answer
It serves to override default user answer by custom message.
TIP
It affects only the appearance of the user reply message in the chat, but does not affect Merge field data.
If the chat user replies with text input, this setting does not change the message content.
TIP
Does not have access to Merge fields, but you can add variables in the fields below the toggle. There you can pass the Merge field value and use it later in the function.
Examples
- Hide user reply using custom user answer function
- Replace user reply by component using custom user answer function
Set custom typing indicator duration
Use this option to override the global Bot typing indicator duration set in the Wait for Chat (RWC) Step. When the toggle is on, you can set the custom typing indicator duration and it will be applied only for this message. Duration should be in the timestring format, e.g. 10s, 3000ms.
Find details in the Typing indicator article.
The Set custom typing indicator duration and Show text message in typing mode toggles are mutually exclusive.
Show text message in typing mode
Enable the toggle to make the bot type the text of the message symbol by symbol as if the bot generates it on the go in the chat.
Find details in the Show text message in typing mode article.
Override bot icon
Use this option to change the bot icon that has been set globally in the Wait for Chat (RWC) Step. When the toggle is on, you can set the custom bot icon, which will be applied only for this message.
Find details in the Override bot icon for the message article.
Merge field settings
Find details in the Set up Merge fields article.
Conversation
Find details in the Conversation settings in the RWC Step article.
Error handling
Find details in the Error and timeout handling article.
Reporting
Find details in the Reporting events article.